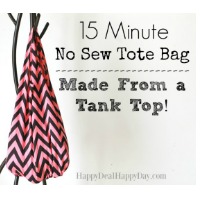
15 Minute DIY Tote Bag No Sew For Beginners
5.0
(2)
Your folders
Your folders
Author : Maura
Ingredients
Export 2 ingredients for grocery delivery
Instructions
Step 1
First thing is to turn your tank top inside out (with the outer fabric piece on the inside) and lay the fabric flat with the long side on the right and left. Measure 2″ from the bottom corners and mark across the bottom of the shirt using straight lines.
Step 2
Connect your dots until you get a line that is 2″ above the bottom of the bag – all the way across.
Step 3
Before you begin cutting, if you want to sew on a pocket piece, whether on the exterior or add an interior pocket for safer storage, you can at this step of the tutorial! Otherwise, you can move on to the next step.
Step 4
Now you need to get your pair of scissors and start making cuts at the bottom corner, and create strips of cloth that you will tie. Start at very end and make your first cut up the seam until you reach the 2″ line that you drew.
Step 5
Now make cuts every 3/4″ to 1″ along the bottom. Be sure to cut through both the front and back of the fabric as the strips you are creating will be paired up and tied together. You don’t need to cut the right sides or do anything to the side seam (yay, no raw edges!). All the work is done at the bottom of the shirt.
Step 6
When you finish making the cuts all along the bottom, find your first pair of strips and tie it together twice, making a knot. Now do this with each pair of strips the way along the bottom.
Step 7
When you finish tying, you will notice that there are still small holes that remain in between the knots. If you are nervous that smaller items or something you are carrying in your tote will fall through, then you will need to do one more row of knot tying.
Step 8
You will find new pairs to tie together for this second row of knot tying. Take the top strip from one knot, and the bottom strip from the knot next to it – and tie those 2 together. Do this all the way across the bottom so now those holes are tied up. Tiny items may still sneak out, so only use this bag for items you know can’t fit through those small holes!
Step 9
Here is what the bottom looks like when it is completely tied. You should have an even and flat bottom. The bag will curve when you use it because of the stretchy fabric.
Step 10
Turn your tote back now right side out and you’ll see the cute knots at the bottom. That’s it – you are done! The top of the bag is ready to go since the handles were already in place.