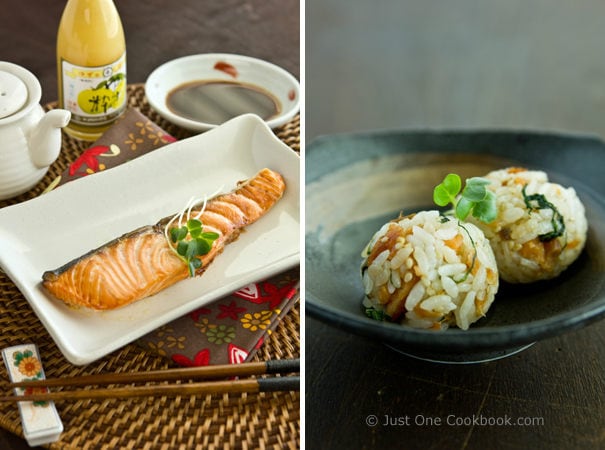
Broiled Salmon and Salmon Onigiri (Rice Ball)
4.9
(11)
Your folders
Your folders
Prep Time: 10 minutes
Cook Time: 10 minutes
Total: 50 minutes
Servings: 2
Ingredients
Export 11 ingredients for grocery delivery
Instructions
Step 1
Preheat the broiler* with a rack placed about 6" (15 cm) away from the top heating element (in the center of the oven) for 5 minutes. When broiling, you don't control the temperature in the oven; instead, you control the distance between the broiler and the surface of the food. It's similar to using hotter and cooler zones on your grill. *Broiler setting: Low (450ºF/232ºC), Medium (500ºF/260ºC), and High (550ºF/288ºC). I usually use medium (6" away) or high (8" away).
Step 2
Line a baking sheet with foil for easy cleaning. Place the salmon on the foil, skin side up (for crispy skin!). Broil the salmon at medium (500ºF) or high (550ºF) for 8-10 minutes. Please remember the cooking time varies depending on the thickness of the fish and the distance between the broiler and the food. Japanese salted salmon is cooked till well done (more dry and flaky). You do not need to flip it.
Step 3
Preheat the oven to 425°F (218ºC) with a rack placed in the center and bake the salmon on parchment paper for 10-12 minutes. Japanese salted salmon is cooked till well done (more dry and flaky).
Step 4
Prepare a small plate/bowl with soy sauce and yuzu extract. I use this brand of yuzu and dip salmon in the sauce to enjoy. Goes very well with white rice. You can keep the leftovers in an airtight container and store in the refrigerator for up to 3 days or in the freezer for a month.
Step 5
Cook steamed rice first. Once cooked, transfer to a large bowl.
Step 6
In a non-stick frying pan, heat 2 tsp oil and add broiled salmon. With a wooden spatula, break up the salmon into smaller pieces.
Step 7
Add the rest of the ingredients (ginger, sake, sugar, soy sauce, sesame seeds, and shiso leaves) to the pan and mix all together.
Step 8
Pour the mixture into the bowl of cooked rice. Mix all together.
Step 9
While the rice is warm, make rice balls with wet hands. See how to make onigiri in this post.
Step 10
Onigiri (or any rice dish) gets hard when you refrigerate. The cold air makes the rice dry and hard (which is perfect for fried rice!). I don't recommend making onigiri ahead of time. But if you really need to, my trick is to wrap the onigiri with thick kitchen towels and store in the fridge. Onigiri will be cool and safe, but should not be cold.