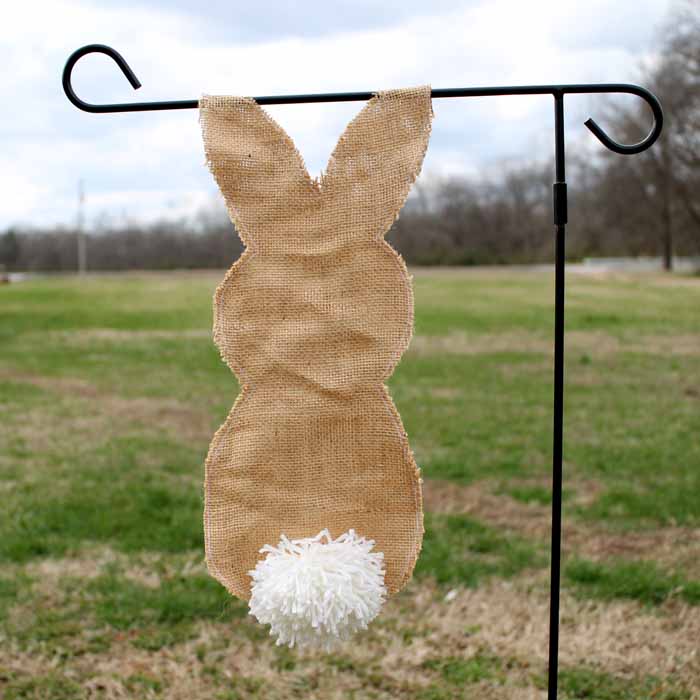
Burlap Bunny Garden FlagBurlap Bunny Garden Flag
Your folders
Your folders
Total: 130
Ingredients
Export 8 ingredients for grocery delivery
Instructions
Step 1
Download and print the bunny pattern on two sheets of paper and cut out. The pattern pieces should go together as shown below.
Step 2
Fold the burlap sheet in half. (We will be tracing and cutting the pattern on a fold so each side stays together.)
Step 3
Place the ears portion of the pattern near the fold and trace around the entire pattern with a marker. Use scissors to cut out through the two thicknesses of burlap.
Step 4
You will be left with two bunnies that are connected by the ears. Open them up and first sew around the ears with a zig-zag stitch, leaving about a 3-inch portion around the ears unsewn. (This part will hang on the flag holder.)
Step 5
Fold together both burlap sides, and sew around the entire bunny, except the area for hanging.
Step 6
Make the bunny tail by creating a large yarn pom-pom. See the link below for how to make these with yarn. Make the largest one possible and use a lot of yarn to make it as full as possible.
Step 7
Use a needle and thread to sew the tail onto the front of your burlap bunny flag. You can sew one onto the back as well if desired.
Step 8
Download and print the bunny pattern on two sheets of paper and cut out. The pattern pieces should go together as shown below.
Step 9
Fold the burlap sheet in half. (We will be tracing and cutting the pattern on a fold so each side stays together.)
Step 10
Place the ears portion of the pattern near the fold and trace around the entire pattern with a marker. Use scissors to cut out through the two thicknesses of burlap.
Step 11
You will be left with two bunnies that are connected by the ears. Open them up and first sew around the ears with a zig-zag stitch, leaving about a 3-inch portion around the ears unsewn. (This part will hang on the flag holder.)
Step 12
Fold together both burlap sides, and sew around the entire bunny, except the area for hanging.
Step 13
Make the bunny tail by creating a large yarn pom-pom. See the link below for how to make these with yarn. Make the largest one possible and use a lot of yarn to make it as full as possible.
Step 14
Use a needle and thread to sew the tail onto the front of your burlap bunny flag. You can sew one onto the back as well if desired.