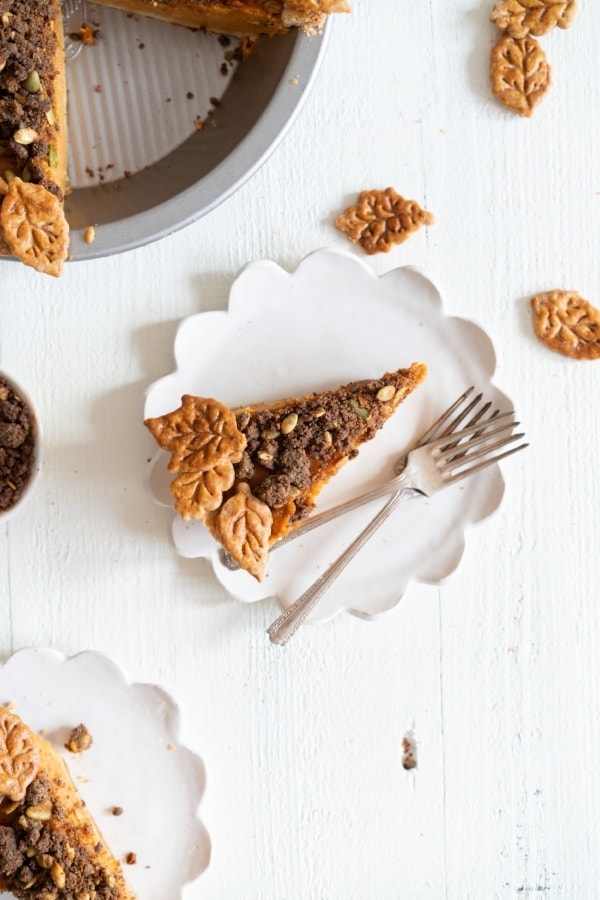
Buttermilk Pumpkin Streusel Pie
4.9
(13)
Your folders
Your folders
Prep Time: 15 minutes
Cook Time: 60 minutes
Total: 75 minutes
Servings: 8
Author : Cloudy Kitchen
Ingredients
Export 14 ingredients for grocery delivery
Instructions
Step 1
PIE DOUGH In a large stainless steel bowl, combine the flour, sugar, and salt and stir to mix well. Place the sticks of butter in the bowl and coat on all sides with the flour mixture. Using a bench scraper, cut the butter into 1⁄2-inch cubes. Work quickly to separate the cubes with your hands until they are all lightly coated in flour. Grab that bench scraper once again and cut each cube in half. I always tell my pie dough students that it’s unnecessary to actually cut each cube perfectly in half, but it’s a good idea to break up the butter enough so that you can be super-efficient when it’s pastry blender time. It’s pastry blender time! Switch to the pastry blender and begin to cut in the butter with one hand while turning the bowl with the other. It’s important not to aim for the same spot at the bottom of the bowl with each stroke of the pastry blender, but to actually slice through butter every time to maximize efficiency. When the pastry blender clogs up, carefully clean it out with your fingers (watch out, it bites!) or a butter knife and use your hands to toss the ingredients a bit. Continue to blend and turn until the largest pieces are the size and shape of peas and the rest of the mixture feels and looks freakishly similar to canned Parmesan cheese.
Step 2
At this point, add the water-vinegar mixture all at once, and switch back to the bench scraper. Scrape as much of the mixture as you can from one side of the bowl to the other, until you can’t see visible pools of liquid anymore. Now it’s hand time. Scoop up as much of the mixture as you can, and use the tips of your fingers (and a whole lot of pressure) to press it back down onto the rest of the ingredients. Rotate the bowl a quarter-turn and repeat. Scoop, press, and turn. With each fold, your intention is to be quickly forming the mixture into one cohesive mass. Remember to incorporate any dry, floury bits that have congregated at the bottom of the bowl, and once those are completely gone and the dough is formed, it’s time to stop.
Step 3
Remove the dough from the bowl, place it on a lightly floured counter, and use your bench scraper to divide it into two equal pieces. Gently pat each into a 2-inch-thick disc, working quickly to seal any broken edges before wrapping them tightly in a double layer of plastic wrap. If you’re portioning for a lattice-topped pie, shape one half into a 2-inch-thick disc and the other half into a 6 by 3-inch rectangle. Refrigerate the dough for at least 2 hours or, ideally, overnight. When you go to roll out the crust, you want the discs to feel as hard and cold as the butter did when you removed it from the fridge to make the dough. This will make the roll-out way easier. You can keep the pie dough in the fridge for a few days or in the freezer for up to 1 year. If frozen, remove the dough and place it in the refrigerator to thaw one full day before you intend to use it. If you’re planning to make only one single-crust pie, wrap the discs separately and place one in the freezer.
Step 4
Lightly flour your work surface and place the unwrapped pie dough in the center. Using a french rolling pin, begin by banding the dough from the left to the right, striking the dough about four times. Rotate the dough 180 degrees and bang across the dough from left to right once more. Use one tapered end of the rolling pin to press and roll along the edge of the round one single time, enlarging the circle. After each press of the edge, rotate the disc 45 degrees clockwise. If you sense that the dough is sticking to the surface, lift it up and lightly flour the surface below it. To begin the final step, place the rolling pin in the very center of the dough. Apply pressure to the rolling pin while rolling away from yourself (stand on your tiptoes to get maximum leverage if necessary), being careful to stop rolling about 1 inch away from the edge (to avoid re-rolling the areas you’ve already rolled). Rotate the disc 45 degrees and roll again. If it becomes difficult to rotate the dough, lift it up and lightly flour the surface beneath it. If the top surface of the dough starts to feel sticky, flip it over onto the floured counter and roll on the other side. Continue this roll and rotation process until you have a circlet 12 to 13 inches in diameter. Gently run your rolling pin over the entirety of the dough to make sure the final size is an even thickness.
Step 5
Invert your pie tin or dish onto the circle. Using a pastry cutter or a knife, and the pie tin as a guide, cut a circle around the tin that is 2 1/2 to 3 inches larger than the edge of the tin. Gather up the dough scraps, wrap in plastic wrap, and store in the fridge to be added to other scraps and rerolled for another use. Remove the pie tin and turn it right side up on the work surface. Fold the dough circle in half. Place the folded dough in the pie tin so that it covers one-half of the pan. Unfold the other half, and gently press the dough to fit it snugly into the tin, making sure it is completely centered and pressed all the way into the bottom of the tin. Roll the dough overhang toward the center of the pie, creating a ring of dough, as though you were rolling a poster tightly. Use the thumb and index finger of one hand to form a C, and position that hand in the very center of the pie pan. Position your opposite thumb on the outside of the pan. Use the C fingers to push and press the rim of the dough up and away from the pan, simultaneously pressing the thumb of your other hand into the “C” to make a crimp. Continue until the entire ring of dough is crimped. Transfer to the freezer for at least 15 minutes. If you don’t plan to use the crust that same day, wrap it tightly in plastic wrap and store in the freezer for up to one year.
Step 6
BLIND BAKING You will need aluminium foil, 1 1/2 lbs dried beans, and your frozen crust Preheat your oven to 450°F with the rack on the lowest level. Remove the pie crust from the freezer, tear off a square of aluminum foil that is slightly larger than the pie shell, and gently fit it into the frozen crust. Fill the crust with the dried beans (they should come all the way up to the crimps) and place the pie pan on a baking sheet. Transfer the baking sheet to the oven and bake for 25 to 27 minutes. Check for doneness by peeling up a piece of foil—the crimps should be light golden brown. Remove the baking sheet from the oven and transfer to a cooling rack. After 6 minutes, carefully remove the foil and beans. You did it! You are now ready to fill the pie.
Step 7
PUMPKIN PIE Preheat your oven to 325°F. Line two baking sheets with parchment paper. Make the streusel topping: In a mixing bowl, combine the all-purpose and buckwheat flours, pepitas, cinnamon, brown sugar, and salt. Place the butter in the bowl and coat on all sides with the flour mixture. Take a bench scraper and cut the butter into 1⁄2-inch cubes directly into the flour mixture in the bowl. Work to break up the cubes with your hands until they are lightly coated with the flour mixture. Continue to use the bench scraper to cut the cubes into smaller pieces—the idea is that you are cutting each cube in half. Switch to a pastry blender and begin to cut in the butter with one hand while turning the bowl with the other. It’s important not to aim for the same spot at the bottom of the bowl with each movement, but to actually slice through butter every time. You’ll need to clean out the pastry blender every few turns of the bowl. Once most of the butter is incorporated, use your fingers to fully break down the butter until it is no longer visible. Be careful not to overwork the mixture at this point. Scatter the streusel over one of the parchment-lined baking sheets, distributing it evenly, and transfer the baking sheet to the oven. Bake for approximately 25 minutes, gently tossing the mixture with a spatula about halfway through. When the streusel is evenly browned and does not appear wet anymore, remove the baking sheet from the oven. Cool completely on a wire rack.
Step 8
Make the filling: In a mixing bowl, combine the pumpkin, buttermilk, eggs, syrup, melted butter, cornmeal, brown sugar, salt, cinnamon, and ginger and whisk until well blended. Place the blind-baked shell on the other parchment-lined baking sheet. Brush the crimped edge with the beaten egg. Pour the buttermilk-pumpkin filling into the pie shell until it reaches the bottom of the crimps. Transfer the baking sheet with the pie on it to the oven and bake for 50 to 60 minutes, until the edges are puffed and the center jiggles only slightly when shaken. Remove the baking sheet from the oven and transfer the pie to a wire rack. Let cool for 15 minutes, then cover the pie with the streusel topping. Allow the pie to fully cool and set for another 4 to 6 hours. When the pie is at room temperature, slice it into 6 to 8 pieces and serve. Store leftover pie, well wrapped in plastic wrap, in the refrigerator for up to 2 days.