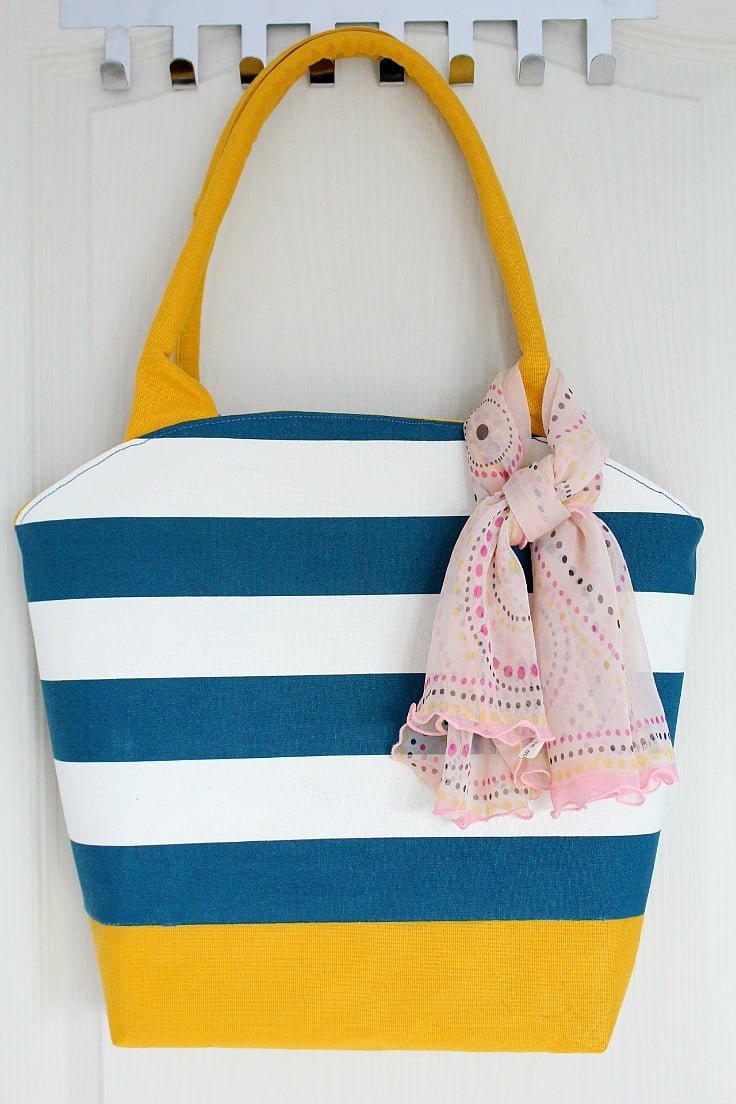
Canvas tote bag patternCanvas tote bag pattern
Your folders
Your folders
Total: 240
Servings: 11
Ingredients
Export 6 ingredients for grocery delivery
Instructions
Step 1
Wash, dry and iron your fabric.
Step 2
Print your pattern pieces from here.
Step 3
Assemble the pattern for the top piece and the bottom piece.
Step 4
Place both top and bottom pattern pieces on the striped fabric and cut around the patterns. Do the same for the mustard fabric.
Step 5
Then mix and match. Match the bottom pieces of the mustard to the top pieces of the striped fabric and the bottom pieces of the striped fabric to the top pieces of the mustard. I used the mustard top/ striped bottom panel as lining but you can choose which ever one you like.
Step 6
Place the pattern pieces on the interfacing and cut accordingly. You will only need 2 pieces for the bottom and 2 for the top as you'll only use interfacing for the outer fabric panels.
Step 7
Fuse interfacing to the outer fabric as instructed on the package.
Step 8
Take the outer panels and match them at the straight line, facing together then sew with 1/4" seam allowance. Do the same for the other outer panels and the lining panels.
Step 9
Now you'll have 2 big outer fabric pieces and 2 big lining pieces.
Step 10
Take the 2 outer fabric pieces, pin at the sides and the bottom then sew a 1/4" seam.
Step 11
Do the same for the 2 lining pieces.
Step 12
Box the lining fabric. In the corner, measure 2" away from the side and the bottom and mark with a fabric marker.
Step 13
Now pinch the top fabric and match the side seam to the bottom seam, lining them up to make a nice triangle. Stick a pin if you need to.
Step 14
Sew a straight line perpendicular to the corner and do a backstitch at the beginning and at the end.
Step 15
When boxing the outer bag you may find it difficult to pinch and match the seams so draw the 2" mark and cut the fabric out then match the seams as above and sew with 1/8" allowance, backstitching at the beginning and the end.
Step 16
Make the corded handles as indicated in this tutorial.
Step 17
Take your handles and place them on the outer bag as indicated in the image below, 4" away from each side and 1/8" outside the rounded top. Pin in place and sew to the bag with 1/8" allowance.
Step 18
Take your lining and outer bag and place the outer bag into the lining bag, facing right sides together. (I added some simple pockets to my lining before so that's what shows in the image below)
Step 19
Match up the top side seams and edges, pin, and sew leaving a 1/2" seam allowance around the top of the bag.
Step 20
Don't sew all around the bag. Leave an opening in between the handles on one side of the bag, to leave room to turn the bag right side out.
Step 21
Turn the bag right side out through the gap. If you use really stiff interfacing this will prove a bit tricky. Spray some water on your outer bag to make the interfacing moist then turn the bag right side out. This will also help with ironing which is the next step, once the bag is right side out.
Step 22
Place the lining down into the bag, iron your top edges, and top stitch as close to the edge as possible.
Step 23
Use an ironing board or the back of a chair to smooth out the wrinkles easier. If you didn't spray any water on the previous step, you may want to do it now or use a damp cloth.
Step 24
Wash, dry and iron your fabric.
Step 25
Print your pattern pieces from here.
Step 26
Assemble the pattern for the top piece and the bottom piece.
Step 27
Place both top and bottom pattern pieces on the striped fabric and cut around the patterns. Do the same for the mustard fabric.
Step 28
Then mix and match. Match the bottom pieces of the mustard to the top pieces of the striped fabric and the bottom pieces of the striped fabric to the top pieces of the mustard. I used the mustard top/ striped bottom panel as lining but you can choose which ever one you like.
Step 29
Place the pattern pieces on the interfacing and cut accordingly. You will only need 2 pieces for the bottom and 2 for the top as you'll only use interfacing for the outer fabric panels.
Step 30
Fuse interfacing to the outer fabric as instructed on the package.
Step 31
Take the outer panels and match them at the straight line, facing together then sew with 1/4" seam allowance. Do the same for the other outer panels and the lining panels.
Step 32
Now you'll have 2 big outer fabric pieces and 2 big lining pieces.
Step 33
Take the 2 outer fabric pieces, pin at the sides and the bottom then sew a 1/4" seam.
Step 34
Do the same for the 2 lining pieces.
Step 35
Box the lining fabric. In the corner, measure 2" away from the side and the bottom and mark with a fabric marker.
Step 36
Now pinch the top fabric and match the side seam to the bottom seam, lining them up to make a nice triangle. Stick a pin if you need to.
Step 37
Sew a straight line perpendicular to the corner and do a backstitch at the beginning and at the end.
Step 38
When boxing the outer bag you may find it difficult to pinch and match the seams so draw the 2" mark and cut the fabric out then match the seams as above and sew with 1/8" allowance, backstitching at the beginning and the end.
Step 39
Make the corded handles as indicated in this tutorial.
Step 40
Take your handles and place them on the outer bag as indicated in the image below, 4" away from each side and 1/8" outside the rounded top. Pin in place and sew to the bag with 1/8" allowance.
Step 41
Take your lining and outer bag and place the outer bag into the lining bag, facing right sides together. (I added some simple pockets to my lining before so that's what shows in the image below)
Step 42
Match up the top side seams and edges, pin, and sew leaving a 1/2" seam allowance around the top of the bag.
Step 43
Don't sew all around the bag. Leave an opening in between the handles on one side of the bag, to leave room to turn the bag right side out.
Step 44
Turn the bag right side out through the gap. If you use really stiff interfacing this will prove a bit tricky. Spray some water on your outer bag to make the interfacing moist then turn the bag right side out. This will also help with ironing which is the next step, once the bag is right side out.
Step 45
Place the lining down into the bag, iron your top edges, and top stitch as close to the edge as possible.
Step 46
Use an ironing board or the back of a chair to smooth out the wrinkles easier. If you didn't spray any water on the previous step, you may want to do it now or use a damp cloth.