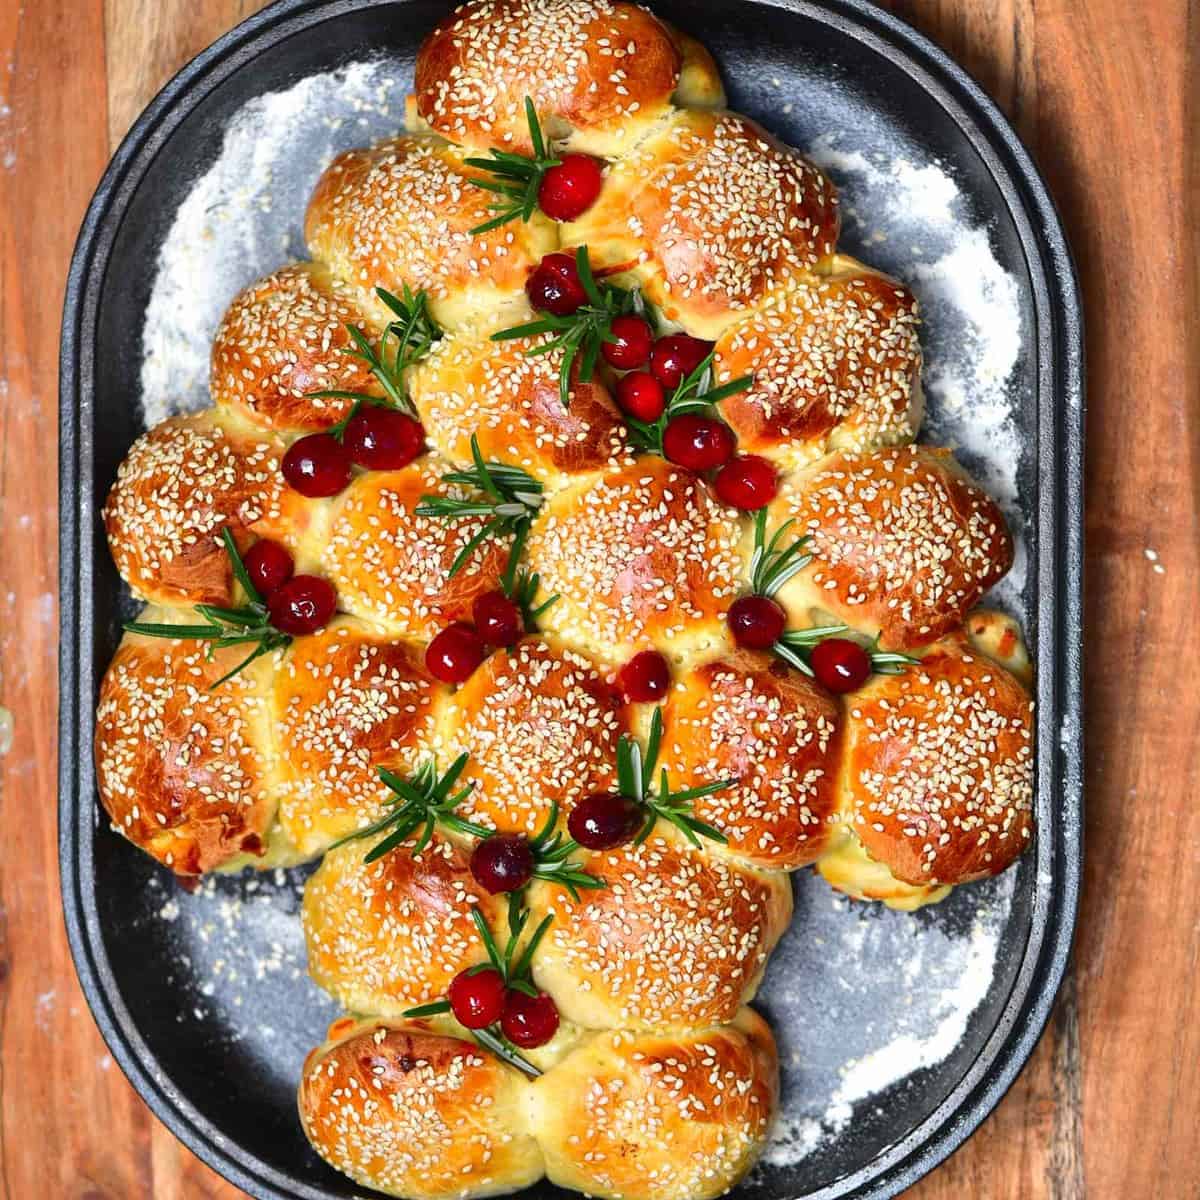
Christmas Tree Pull-Apart Bread (Cheese Buns)
5.0
(8)
Your folders
Your folders
Prep Time: 30 minutes
Cook Time: 18 minutes
Total: 148 minutes
Servings: 19

Ingredients
Export 6 ingredients for grocery delivery
Instructions
Step 1
Mix the flour and salt in a large bowl.
Step 2
In a separate bowl, combine the milk, sugar, and yeast, stirring to dissolve the yeast and sugar. Then add the eggs and whisk well.
Step 3
Transfer the flour to a clean working surface and make a well in the center. If preferred, you can do this in the bowl.Pour the liquid mixture into the well of the dry mix and start to mix the flour into the wet ingredients gradually until you obtain a dough-like mixture.
Step 4
(Move the dough onto a working surface if you haven't yet.)Knead for 7-10 minutes, stretching and folding the dough to work the gluten until you obtain a smooth, elastic dough.It's okay for the dough to be slightly tacky. If it seems a little too wet and won't become smooth, add a little extra flour to the dough, 1 tablespoon at a time until it is only slightly tacky. Don't be tempted to add too much extra flour, or the cheese rolls will be dense and blegh (technical term - of course ;) ), rather than fluffy and light.
Step 5
Shape the dough into a ball and place it back into the bowl, sprinkling it with a little flour on top. Leave it to rest in a warm area for 10 minutes, covered with a kitchen towel.
Step 6
Once ready, place the dough back onto the work surface and start incorporating the butter into the dough little by little, kneading it to incorporate fully. It's easiest to do this as small cubes/spoonfuls.The warmth of your hands will begin to melt the butter slightly, so don't worry, this is normal - try not to get the dough too warm, though.
Step 7
Once the butter is fully incorporated, shape it back into a bowl and leave it to rest for another 10 minutes in the bowl, covered in the kitchen towel.
Step 8
Once the dough is rested, gently deflate it and then use a knife or bench scraper to divide it into 19 even pieces (around 50g/~1.8oz each).
Step 9
Roll each piece into a ball and place on a parchment-lined baking tray, then chill in the refrigerator for 20 minutes so that they firm up.
Step 10
Once chilled, slice each dough ball halfway through horizontally, so it opens like a book - refer to the photos on the blog post. Add your small cheese cube/s or shredded cheese to the center and then close the dough. You can pinch the ends for a better seal; I didn't do this and the buns still turned out great.Roll the balls gently along the surface for a smoother finish.Chef's Note: You can alternatively flatten each dough ball into a cookie shape, add the cheese and then bring in all the edges, pinching them shut and rolling gently on a surface to smooth it.
Step 11
Arrange the dough balls onto a large baking tray into the shape of a Christmas tree. I do this in layers of 1,2,3,4, and 5 dough balls, then one or two rows of 2 balls for the tree 'base' (trunk).Don't place them too tightly to one another as we'll be doing one final prove, allowing the dough to expand further.
Step 12
Brush the dough with egg wash or melted butter and set aside to prove for around an hour in a warm area.
Step 13
Once proved, sprinkle over the sesame seeds and then bake the Christmas tree pull apart bread in the oven at 200ºC/400ºF for 18 minutes until golden brown.Chef's Note: For super cheese lovers, feel free to add a cheese crust/topping. To do this, sprinkle the buns with cheese before baking - this will become golden and turn crisp.Once baked, top with your additional topping of choice (like cranberries and rosemary), and enjoy the cheese buns while they're still warm!
Step 14
To Make Ahead: You can prepare this bread dough after steps 1-a day ahead when chilling it in the fridge. Alternatively, the ready dough can be frozen, wrapped up tightly, for up to three months. Allow it to thaw in the refrigerator overnight before lightly kneading and continue the recipe from step 4.Once Baked: This cheesy pull apart bread is best enjoyed immediately, while the cheese inside is still melted. If you have any leftovers, these can be stored in an airtight container in the fridge for 2-3 days.To Freeze: Freeze the baked cheese buns, wrapped tightly in a layer of plastic wrap and foil for up to three months. Thaw in the fridge overnight before reheating.To Reheat: Simply warm in the microwave (though the buns will be softer) or in the oven at 200ºC/400ºF until warmed through (10-15 minutes)