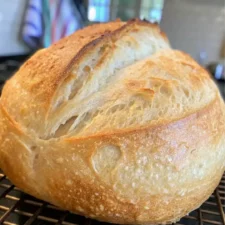
Cold Bake Sourdough with Unfed Starter – A Surprising Success
Your folders
Your folders
Prep Time: 20 hours
Cook Time: 55 minutes
Servings: 1
Author : EMMA
Ingredients
Export 3 ingredients for grocery delivery
Instructions
Step 1
Mix and Autolyse
Step 2
Start by combining the warm water, cold starter, and avocado oil in a mixing bowl. Stir until the mixture is fairly smooth and creamy. Add the bread flour, sprinkle the salt over the top, and mix thoroughly until no dry patches remain.
Step 3
Cover the bowl and let the dough rest for 45 to 60 minutes. This rest period, called the autolyse, allows the flour to absorb the water fully, which helps gluten develop naturally before any kneading or folds begin.
Step 4
Stretch and Fold
Step 5
Once the dough has rested, begin the stretch-and-fold process. This replaces kneading and strengthens the dough gently. Wet your hands, grab one edge of the dough, stretch it up, and fold it over to the opposite side. Repeat from all four corners.
Step 6
Perform 3 full rounds of stretch-and-folds, each about 45 minutes apart. Cover the bowl after each round. You’ll notice the dough becoming smoother and more elastic as it gains strength.
Step 7
Bulk Fermentation
Step 8
Transfer your dough into a straight-sided container like a Cambro or clear glass bowl. Mark the level so you can track the rise. Let it ferment at room temperature (ideally 73–75°F) until it has risen by about 50%. This typically takes a few hours, depending on your environment.
Step 9
Shaping the Dough
Step 10
Once the dough has bulked, turn it gently onto a clean, unfloured surface. If it feels too slack, pre-shape it into a tight round using a bench scraper. Let it rest for 45 minutes, covered with a damp tea towel.
Step 11
To shape: stretch the dough into a rectangle, fold the long edges inward, then roll it up like a jelly roll. Use your scraper to gently rotate and tighten the dough into a taut ball. Let rest again for 30–45 minutes to relax the gluten.
Step 12
Final Proof in a Banneton
Step 13
Generously dust a banneton or proofing basket with rice flour. Place the dough seam-side up, and if needed, stitch the dough to build extra surface tension.
Step 14
Let it sit at room temperature for up to 45 minutes, then loosely cover with plastic wrap or a shower cap. Place in the fridge for a long, cold proof—anywhere from 12 to 14 hours at 36°F or colder.
Step 15
Bake the Next Morning
Step 16
Soak your Romertopf clay baker in water for 15 minutes. If using a Dutch oven instead, no soaking is needed. Place your proofed dough in the freezer for 10–15 minutes to firm up while the oven preheats to 450°F.
Step 17
Flip the dough onto parchment paper, score it with a sharp blade, and mist lightly with water. Place it into your baker or Dutch oven, trimming parchment edges as needed. If using a Dutch oven, place an ice cube underneath the parchment for added steam.
Step 18
Bake for 55 minutes total. Remove the lid around the 36-minute mark when your oven has fully preheated. Check internal temp with a thermometer—it should be around 204°F. Bake uncovered for an extra 2–3 minutes to reach 207°F for a light, golden crust.
Step 19
Cool completely before slicing.