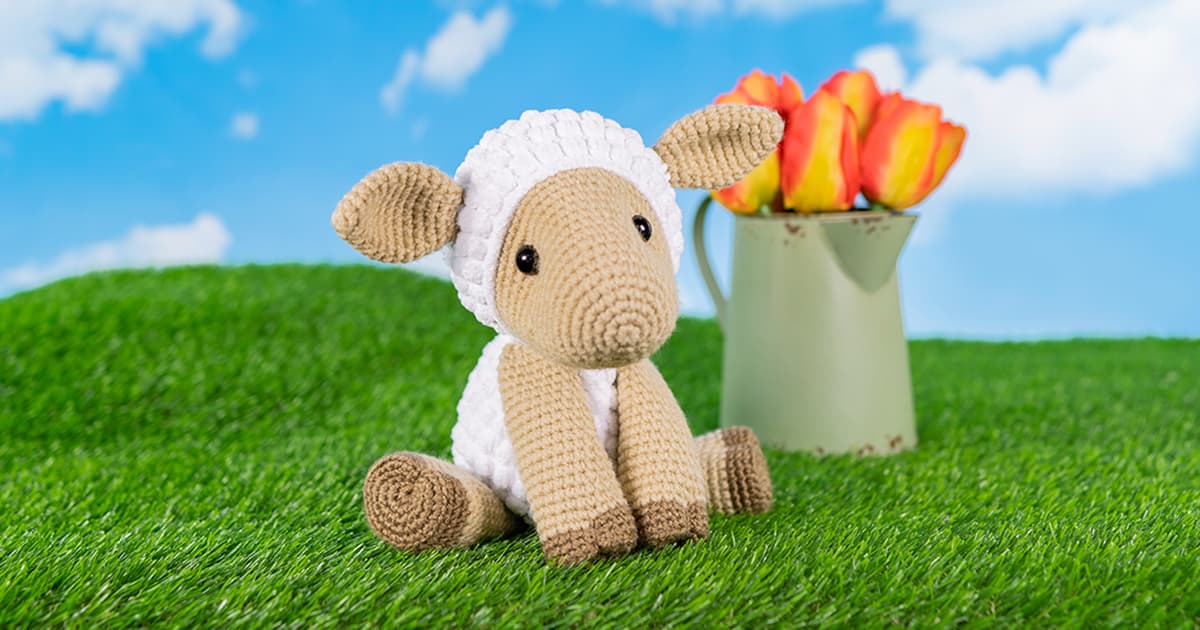
Crochet Ears to Head | Sage the Sheep Tutorial
Your folders
Your folders
Author : Jess Huff
Ingredients
Export 11 ingredients for grocery delivery
Instructions
Step 1
With tan yarn:01. start 6 sc into a magic ring [6]02. *sc, inc* 3 times [9]03. sc, inc, *sc 2, inc* 2 times, sc [12]04. *sc 3, inc* 3 times [15]05. sc 2, inc, *sc 4, inc* 2 times, sc 2 [18]06. *sc 5, inc* 3 times [21]07 – 09. sc in each st around [21]10. *sc 5, dec* 3 times [18]11. sc 2, dec, *sc 4, dec* 2 times, sc 2 [15]12. *sc 3, dec* 3 times [12]13. *sc, dec* 4 times [8]Fasten off and leave a 12" tail. Fold the top opening in half and slip stitch closed, then hide the tail inside the work using a yarn needle.Your ear is now ready to crochet into the head at a later step.
Step 2
With tan yarn:01. start 6 sc into a magic ring [6]02. inc in each st around [12]03. *sc, inc* 6 times [18]04. sc, inc, *sc 2, inc* 5 times, sc [24]05. *sc 3, inc* 6 times [30]06. sc 2, inc, *sc 4, inc* 5 times, sc 2 [36]07 – 08. sc in each st around [36]09. *sc 5, inc* 6 times [42]10 – 11. sc in each st around [42]12. sc 3, inc, *sc 6, inc* 5 times, sc 3 [48]13 – 14. sc in each st around [48]15. *sc 7, inc* 6 times [54]Marking Stitches for the Eyes: Insert two markers 18 stitches apart between rounds 14 & 15. These markers will show you where to place your safety eyes at a later step.For additional details and a photo, see "Head: Round 15 – Marking Stitches for the Eyes" in the Notes section of the pattern.16 – 17. sc in each st around [54]Switch to white yarn & 4.5mm hook:18. slst in each stitch around [54]Switch back to 3.5mm hook:19. BLO: sc in each st around, slst to join [54]20. ch 1, *sc, bobble* 27 times, slst to join [54]21. ch 1, sc 4, inc, *sc 8, inc* 5 times, sc 4, slst to join [60]22. ch 1, *sc, bobble* 30 times, slst to join [60]Marking Stitches for the Ears: You are now going to mark 4 stitches in round 22 (the round you just completed) to show where you should attach the ears in round 23. See "Head: Round 22 – Marking Stitches for the Ears" in the Notes section of the pattern for instructions.Crochet Ears to Head: As you crochet round 23, attach the ears where indicated. I've included a video tutorial under "Head: Round 23 – Crochet Ears to Head" in the Notes section.23. ch 1, sc in each st around, attaching ears where indicated, slst to join [60]24. ch 1, *sc, bobble* 30 times, slst to join [60]25. ch 1, sc in each st around, slst to join [60]26. ch 1, *sc, bobble* 30 times, slst to join [60]27. ch 1, *sc 3, dec* 12 times, slst to join [48]28. ch 1, *sc, bobble* 24 times, slst to join [48]29. ch 1, *sc 2, dec* 12 times, slst to join [36]30. ch 1, *sc, bobble* 18 times, slst to join [36]Stuff Head & Add Safety Eyes: Stuff head ¾ full, create indents for the eyes, then add your safety eyes. See “Stuff Head & Add Safety Eyes” in the Notes section for details and a video tutorial.31. ch 1, *sc, dec* 12 times, slst to join [24]32. ch 1, *sc, bobble* 12 times, slst to join [24]33. ch 1, *dec* 12 times, slst to join [12]34. ch 1, *sc, bobble* 6 times, slst to join [12]Finish stuffing.35. *dec* 6 times [6]Cut your working yarn and close with an Ultimate Finish.
Step 3
Now we’ll be adding a border of single crochets around the face, working into the exposed front loops from round 19 of the head. This border helps create the illusion that the wool is sitting “on top” of the sheep’s skin. With white yarn: 01. Single crochet in each exposed loop around [54]End with an Invisible Finish, and secure with a knot. Hide the tail inside the work.
Step 4
With white yarn:01. start 6 sc into a magic ring, slst to join [6]02. ch 1, (sc + bobble) in each st around, slst to join [12]03. ch 1, inc in each st around, slst to join [24]04. ch 1, *sc, bobble* 12 times, slst to join [24]05. ch 1, *sc, inc* 12 times, slst to join [36]06. ch 1, *sc, bobble* 18 times, slst to join [36]07. ch 1, sc, inc, *sc 2, inc* 11 times, sc, slst to join [48]08. ch 1, *sc, bobble* 24 times, slst to join [48]09. ch 1, *sc 7, inc* 6 times, slst to join [54]10. ch 1, *sc, bobble* 27 times, slst to join [54]11. ch 1, sc in each st around, slst to join [54]12. ch 1, *sc, bobble* 27 times, slst to join [54]13. ch 1, *sc 7, dec* 6 times, slst to join [48]14. ch 1, *sc, bobble* 24 times, slst to join [48]15. ch 1, sc in each st around, slst to join [48]16. ch 1, *sc, bobble* 24 times, slst to join [48]17. ch 1, sc 3, dec, *sc 6, dec* 5 times, sc 3, slst to join [42]18. ch 1, *sc, bobble* 21 times, slst to join [42]19. ch 1, *sc 5, dec* 6 times, slst to join [36]20. ch 1, *sc, bobble* 18 times, slst to join [36]21. ch 1, sc 2, dec, *sc 4, dec* 5 times, sc 2, slst to join [30]22. ch 1, *sc, bobble* 15 times, slst to join [30]23. ch 1, *sc 3, dec* 6 times, slst to join [24]24. ch 1, *sc, bobble* 12 times, slst to join [24]25. ch 1, sc in each st around, slst to join [24]Fasten off and leave a tail the length of your arm span (roughly 5+ feet) for sewing. Stuff with fiber fill.
Step 5
With brown yarn: 01. start 6 sc into a magic ring [6]02. inc in each st around [12]03. *sc, inc* 6 times [18]04. sc, inc, *sc 2, inc* 5 times, sc [24]05. BLO: sc in each st around [24]06 – 07. sc in each st around [24]Switch to tan yarn:08. sc in each st around [24]09. sc 11, dec, sc 11 [23]10. sc in each st around [23]11. sc 21, dec [22]12. sc in each st around [22]13. sc 10, dec, sc 10 [21]14. sc in each st around [21]15. sc 19, dec [20]16. sc in each st around [20]17. sc 9, dec, sc 9 [19]18. sc in each st around [19]19. sc 17, dec [18]20. sc in each st around [18]21. sc 8, dec, sc 8 [17]22. sc in each st around [17]23. sc 15, dec [16]24 – 25. sc in each st around [16]26. *sc 2, dec* 4 times [12]To prep the arm to attach at a later step, see "How to Make Cloven Hooves" in the Notes section of the pattern.
Step 6
With brown yarn:01. start 6 sc into a magic ring [6]02. inc in each st around [12]03. *sc, inc* 6 times [18]04. sc, inc, *sc 2, inc* 5 times, sc [24]05. *sc 3, inc* 6 times [30]06. BLO: sc in each st around [30]07 – 08. sc in each st around [30]Switch to tan yarn:09. sc in each st around [30]10. sc 14, dec, sc 14 [29]11. sc 27, dec [28]12. sc 13, dec, sc 13 [27]13. sc 25, dec [26]14. sc 12, dec, sc 12 [25]15. sc 23, dec [24]16. sc 11, dec, sc 11 [23]17. sc 21, dec [22]18. sc 10, dec, sc 10 [21]19. sc 19, dec [20]20. sc 9, dec, sc 9 [19]21. sc 17, dec [18]22. *sc 7, dec* 2 times [16]23. *sc 2, dec* 4 times [12]To prep the leg to attach at a later step, see "How to Make Cloven Hooves" in the Notes section of the pattern.
Step 7
With white yarn:01. Chain 5 start: ch5, inc in 2nd ch from hook, sc 2, 5sc in the last ch. Continue on the other side of the chain base, sc 2, 3sc in the last ch [14]02. inc, sc 4, *inc* 3 times, sc 4, *inc* 2 times [20]03 – 05. sc in each st around [20]06. sc, dec, *sc 2, dec* 4 times, sc [15]07. *sc, dec* 5 times [10]08. sc in each st around [10]Fasten off and leave an 18" tail for sewing. Lightly stuff, then fold the top opening in half and slip stitch closed.
Step 8
With tan yarn:01. start 6 sc into a magic ring [6]02. *sc, inc* 3 times [9]03. sc, inc, *sc 2, inc* 2 times, sc [12]04. *sc 3, inc* 3 times [15]05. sc 2, inc, *sc 4, inc* 2 times, sc 2 [18]06. *sc 5, inc* 3 times [21]07 – 09. sc in each st around [21]10. *sc 5, dec* 3 times [18]11. sc 2, dec, *sc 4, dec* 2 times, sc 2 [15]12. *sc 3, dec* 3 times [12]13. *sc, dec* 4 times [8]Fasten off and leave a 12" tail. Fold the top opening in half and slip stitch closed, then hide the tail inside the work using a yarn needle.Your ear is now ready to crochet into the head at a later step.
Step 9
With tan yarn:01. start 6 sc into a magic ring [6]02. inc in each st around [12]03. *sc, inc* 6 times [18]04. sc, inc, *sc 2, inc* 5 times, sc [24]05. *sc 3, inc* 6 times [30]06. sc 2, inc, *sc 4, inc* 5 times, sc 2 [36]07 – 08. sc in each st around [36]09. *sc 5, inc* 6 times [42]10 – 11. sc in each st around [42]12. sc 3, inc, *sc 6, inc* 5 times, sc 3 [48]13 – 14. sc in each st around [48]15. *sc 7, inc* 6 times [54]Marking Stitches for the Eyes: Insert two markers 18 stitches apart between rounds 14 & 15. These markers will show you where to place your safety eyes at a later step.For additional details and a photo, see "Head: Round 15 – Marking Stitches for the Eyes" in the Notes section of the pattern.16 – 17. sc in each st around [54]Switch to white yarn & 4.5mm hook:18. slst in each stitch around [54]Switch back to 3.5mm hook:19. BLO: sc in each st around, slst to join [54]20. sc 4, inc, *sc 8, inc* 5 times, sc 4 [60]21 – 24. sc in each st around [60]Marking Stitches for the Ears: You are now going to mark 4 stitches in round 24 (the round you just completed) to show where you should attach the ears in round 25. See "Head: Round 24 – Marking Stitches for the Ears" in the Notes section of the pattern for instructions.Crochet Ears to Head: As you crochet round 25, attach the ears where indicated. I've included a video tutorial under "Head: Round 25 – Crochet Ears to Head" in the Notes section.25. sc in each st around, attaching the ears where indicated [60]26 – 29. sc in each st around [60]30. sc 4, dec, *sc 8, dec* 5 times, sc 4 [54]31. *sc 7, dec* 6 times [48]32. sc 3, dec, *sc 6, dec* 5 times, sc 3 [42]33. *sc 5, dec* 6 times [36]34. sc 2, dec, *sc 4, dec* 5 times, sc 2 [30]Stuff & Add the Eyes: Stuff head ¾ full and create indents for the eyes. See “How to Indent the Eyes” in the notes section. Insert your safety eyes and secure the backings.35. *sc 3, dec* 6 times [24]36. sc, dec, *sc 2, dec* 5 times, sc [18]37. *sc, dec* 6 times [12]Finish stuffing.38. *dec* 6 times [6]Cut your working yarn and close with an Ultimate Finish.
Step 10
Now we’ll be adding a border of single crochets around the face, working into the exposed front loops from round 19 of the head. This border helps create the illusion that the wool is sitting “on top” of the sheep’s skin. With white yarn: 01. Single crochet in each exposed loop around [54]End with an Invisible Finish, and secure with a knot. Hide the tail inside the work.
Step 11
With white yarn:01. start 6 sc into a magic ring [6]02. inc in each st around [12]03. *sc, inc* 6 times [18]04. sc, inc, *sc 2, inc* 5 times, sc [24]05. *sc 3, inc* 6 times [30]06. sc 2, inc, *sc 4, inc* 5 times, sc 2 [36]07. *sc 5, inc* 6 times [42]08. sc 3, inc, *sc 6, inc* 5 times, sc 3 [48]09. *sc 7, inc* 6 times [54]10. sc 4, inc, *sc 8, inc* 5 times, sc 4 [60]11 – 17. sc in each st around [60]18. sc 4, dec, *sc 8, dec* 5 times, sc 4 [54]19. sc in each st around [54]20. *sc 7, dec* 6 times [48]21. sc in each st around [48]22. sc 3, dec, *sc 6, dec* 5 times, sc 3 [42]23 – 24. sc in each st around [42]25. *sc 5, dec* 6 times [36]26 – 27. sc in each st around [36]28. sc 2, dec, *sc 4, dec* 5 times, sc 2 [30]29 – 30. sc in each st around [30]31. *sc 3, dec* 6 times [24]Fasten off and leave a tail the length of your arm span (roughly 5+ feet) for sewing. Stuff with fiber fill.
Step 12
With brown yarn: 01. start 6 sc into a magic ring [6]02. inc in each st around [12]03. *sc, inc* 6 times [18]04. sc, inc, *sc 2, inc* 5 times, sc [24]05. BLO: sc in each st around [24]06 – 07. sc in each st around [24]Switch to tan yarn:08. sc in each st around [24]09. sc 11, dec, sc 11 [23]10. sc in each st around [23]11. sc 21, dec [22]12. sc in each st around [22]13. sc 10, dec, sc 10 [21]14. sc in each st around [21]15. sc 19, dec [20]16. sc in each st around [20]17. sc 9, dec, sc 9 [19]18. sc in each st around [19]19. sc 17, dec [18]20. sc in each st around [18]21. sc 8, dec, sc 8 [17]22. sc in each st around [17]23. sc 15, dec [16]24 – 25. sc in each st around [16]26. *sc 2, dec* 4 times [12]To prep the arm to attach at a later step, see "How to Make Cloven Hooves" in the Notes section of the pattern.
Step 13
With brown yarn:01. start 6 sc into a magic ring [6]02. inc in each st around [12]03. *sc, inc* 6 times [18]04. sc, inc, *sc 2, inc* 5 times, sc [24]05. *sc 3, inc* 6 times [30]06. BLO: sc in each st around [30]07 – 08. sc in each st around [30]Switch to tan yarn:09. sc in each st around [30]10. sc 14, dec, sc 14 [29]11. sc 27, dec [28]12. sc 13, dec, sc 13 [27]13. sc 25, dec [26]14. sc 12, dec, sc 12 [25]15. sc 23, dec [24]16. sc 11, dec, sc 11 [23]17. sc 21, dec [22]18. sc 10, dec, sc 10 [21]19. sc 19, dec [20]20. sc 9, dec, sc 9 [19]21. sc 17, dec [18]22. *sc 7, dec* 2 times [16]23. *sc 2, dec* 4 times [12]To prep the leg to attach at a later step, see "How to Make Cloven Hooves" in the Notes section of the pattern.
Step 14
With white yarn:01. Chain 5 start: ch5, inc in 2nd ch from hook, sc 2, 5sc in the last ch. Continue on the other side of the chain base, sc 2, 3sc in the last ch [14]02. inc, sc 4, *inc* 3 times, sc 4, *inc* 2 times [20]03 – 05. sc in each st around [20]06. sc, dec, *sc 2, dec* 4 times, sc [15]07. *sc, dec* 5 times [10]08. sc in each st around [10]Fasten off and leave an 18" tail for sewing. Lightly stuff, then fold the top opening in half and slip stitch closed.