DIY BOOKMARKS: FUN WITH FRUITDIY BOOKMARKS: FUN WITH FRUIT
Your folders
Your folders
Ingredients
Export 2 ingredients for grocery delivery
Instructions
Step 1
Upload the file into Cricut Design Space.
Step 2
In the Layers Panel, you will see that there are six "line" images in the file — these are these are the score lines for folding your bookmarks. Click on each line and change it from a cut line to a score line in the Layer Attributes. The solid lines will turn to dotted lines in your file.
Step 3
Then "Ungroup" your entire file, so instead of being attached together, everything is in individual pieces.
Step 4
Then attach each score line to its main solid bookmark piece. This ensures the score line will score properly on the bookmark.
Step 5
Then you're ready to cut! Once you have all your pieces cut out, sort them into piles for each bookmark.
Step 6
You can use craft or spray glue to adhere each of the pieces, or the Xyron Creative Station as used here.
Step 7
Once you've adhered all the fruit pieces to the main bookmark pieces, fold along the score lines.
Step 8
Then add a bit of craft glue to glue the two triangle flaps together, making sure not to glue the flaps to the interior of the bookmark—you still need to be able to slide your book page in there.
Step 9
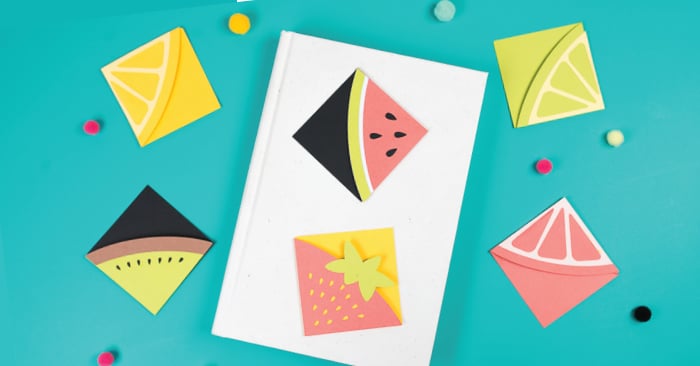
There you go! Six delicious DIY bookmarks that are perfect for summer!
Step 10
Upload the file into Cricut Design Space.
Step 11
In the Layers Panel, you will see that there are six "line" images in the file — these are these are the score lines for folding your bookmarks. Click on each line and change it from a cut line to a score line in the Layer Attributes. The solid lines will turn to dotted lines in your file.
Step 12
Then "Ungroup" your entire file, so instead of being attached together, everything is in individual pieces.
Step 13
Then attach each score line to its main solid bookmark piece. This ensures the score line will score properly on the bookmark.
Step 14
Then you're ready to cut! Once you have all your pieces cut out, sort them into piles for each bookmark.
Step 15
You can use craft or spray glue to adhere each of the pieces, or the Xyron Creative Station as used here.
Step 16
Once you've adhered all the fruit pieces to the main bookmark pieces, fold along the score lines.
Step 17
Then add a bit of craft glue to glue the two triangle flaps together, making sure not to glue the flaps to the interior of the bookmark—you still need to be able to slide your book page in there.
Step 18
There you go! Six delicious DIY bookmarks that are perfect for summer!