DIY Wooden Pumpkins
Your folders
Your folders
Total: 15
Ingredients
Export 7 ingredients for grocery delivery
Instructions
Step 1
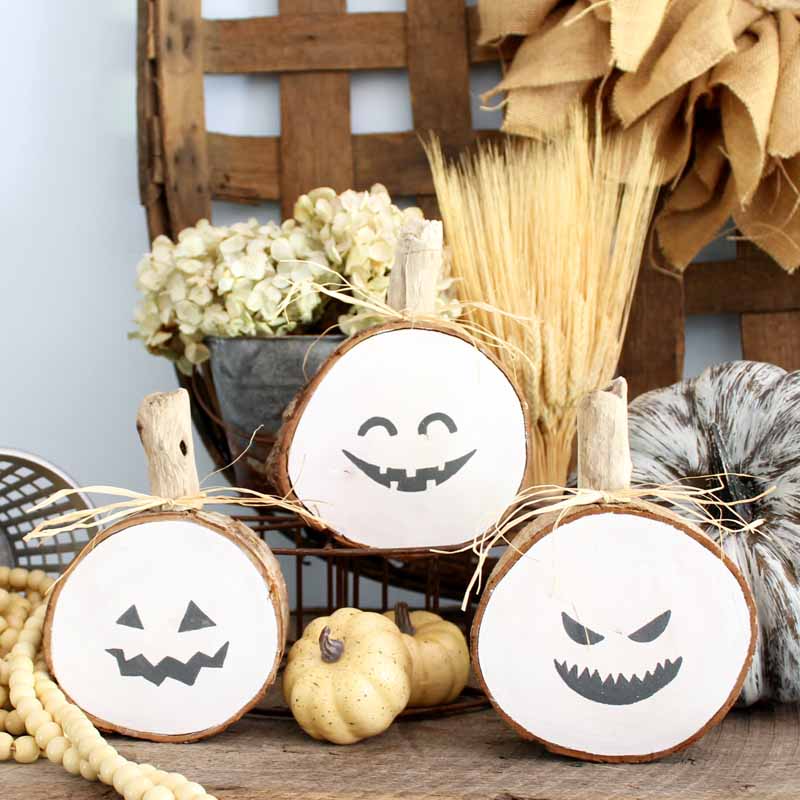
Paint one side of your rustic wood slices with white paint. Leave the bark around the edges unpainted. For a rustic look, only use one light coat of paint. Allow to dry completely before continuing.
Step 2
Then get your pumpkin pattern using the form above and print.
Step 3
Place the pumpkin pattern on the white painted side of your wood slice. Tape or hold in place and use a pen to trace around all of the details pressing down well. Trace only the facial features.
Step 4
After tracing, lift up your paper and you will see a slight indent in your wood slice everywhere you traced the pattern. These make the perfect guides for painting.
Step 5
Add dark paint (in this case a dark grey) in the outline areas. Again, I only added one coat because I wanted rustic wooden pumpkins. You can add several coats of paint if you would like.
Step 6
Allow your pumpkin faces to dry then use hot glue to add on a driftwood stem and tie on some raffia to complete the look.