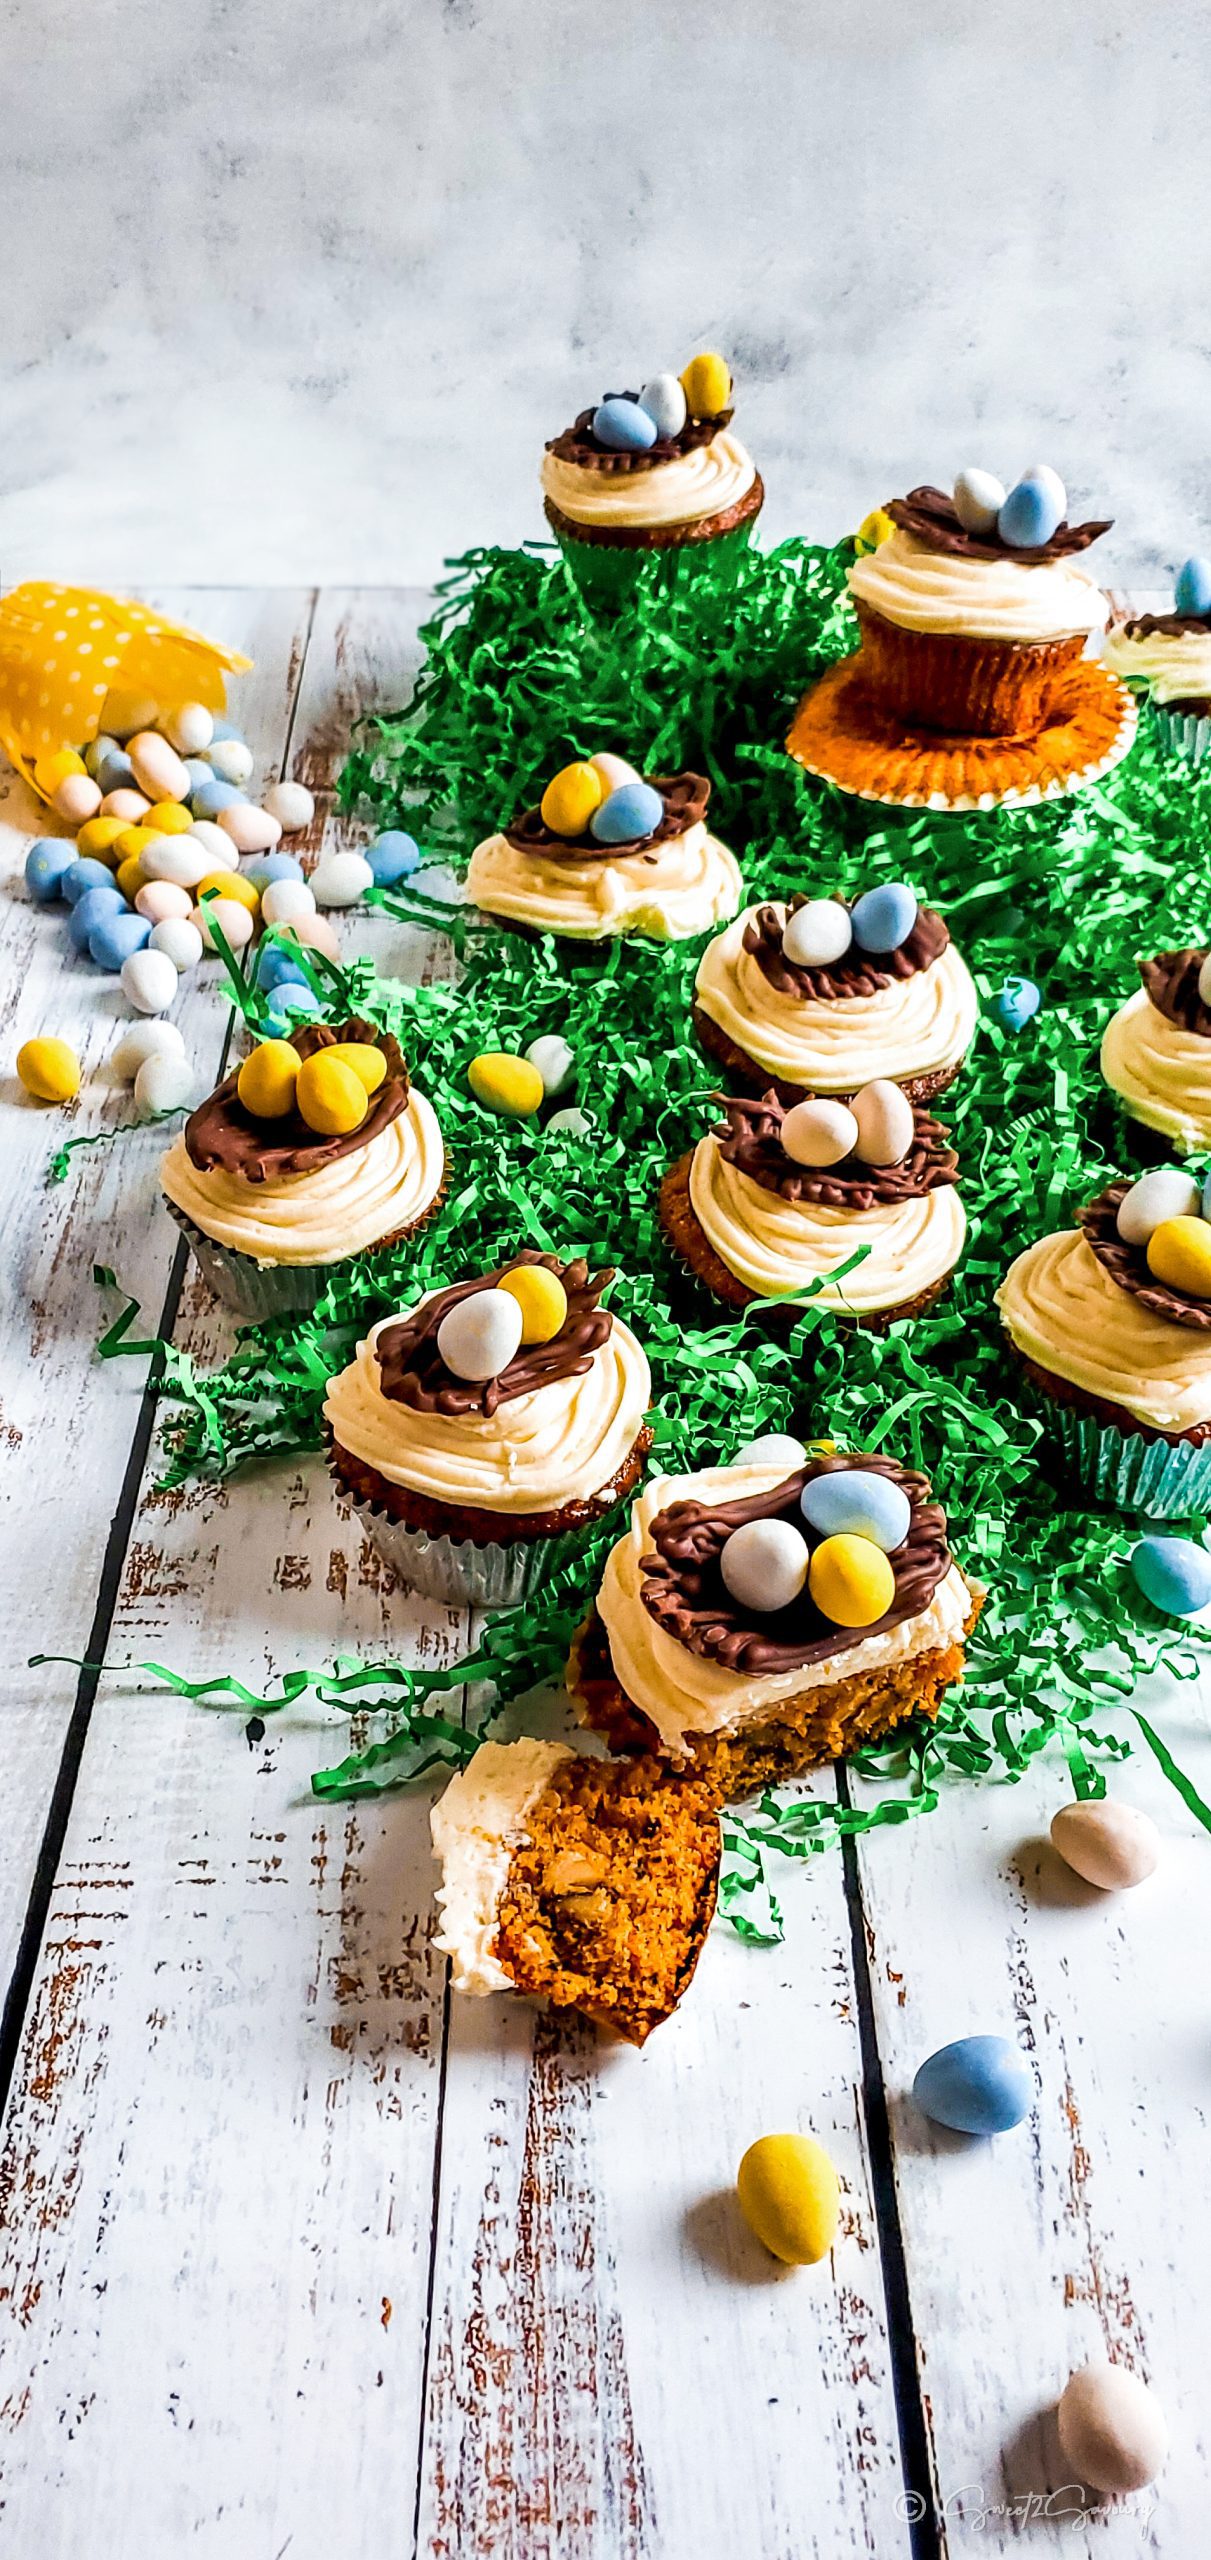
Easter Carrot Cupcakes with Chocolate Eggs and Nest
Your folders
Your folders
Prep Time: 75 minutes
Cook Time: 25 minutes
Total: 160 minutes
Servings: 21
Ingredients
Export 15 ingredients for grocery delivery
Instructions
Step 1
Preheat your oven to 350°F (177°C). Make sure your oven rack is moved to the middle shelf. Line your muffin pan with cupcake liners and set aside for now.
Step 2
In a large bowl, whisk together the first 7 ingredients (AP flour, baking powder, baking soda, salt, cinnamon, ginger, nutmeg). Set aside.
Step 3
In a separate large mixing bowl, whisk brown sugar, vegetable oil, and eggs until smooth, and most of the sugar is dissolved. Then whisk in crushed pineapple and grated carrots.
Step 4
Add half of the flour mix into the batter and whisk until just combined. Add the remaining flour and mix until just combined. Lastly, fold chopped toasted walnuts in with a spatula until just combined! Do not overmix the batter to keep the cupcakes soft after baking.
Step 5
Use a 1/4 measuring cup and scoop batter into each cupcake liner. Make sure the batter is only filled 2/3 in each liner to leave room for cupcakes to rise. Tap the muffin pan on your counter a few times to remove air bubbles. Bake cupcakes for 25 minutes or until a toothpick inserted into the center comes out clean. You will need to bake in batches if you only have one muffin pan. Cool cupcakes on a wire rack. Store them in a single layer in an airtight container if you are baking them a day ahead.
Step 6
Make sure to use room temperature unsalted butter and cream cheese for easier mixing. Place the cream cheese block and unsalted butter into the bowl of your mixer (with paddle attachment). If you do not have a mixer, you can do this with a whisk and mix by hand. Mix the butter and cream cheese until well combined. Add salt, vanilla extract, and icing sugar and combine until the frosting is a smooth texture. Store frosting in an airtight container in the refrigerator for 1 hour up to 24 hours. When ready to decorate, give the frosting a good stir before adding it to the piping bag.
Step 7
When you are ready to decorate, attach an icing tip of your choice to the piping bag and fill 1/2 the bag with cream cheese frosting. If you have a decoration kit like me, choose an icing tip you like. I used icing tip #9 from this decorating kit I bought from Amazon. It created a nice ‘swirl’ I wanted for my frosting. Depending on the decorating kit brand you use, this tip might be a different number. If you do not have a decoration kit, you can keep it simple and use a large plastic zip-top bag for the frosting. Cut the corner to have a 2 cm opening or bigger if you prefer.
Step 8
Melt milk chocolate chips in a heatproof bowl in 30-second intervals in your microwave. Stir the chocolate each time until it is completely melted and smooth.
Step 9
I used a disposable plastic piping bag, but you can also use a large plastic zip-top bag. Place the bag, corner facing down into a tall cup and pour the melted chocolate into the bag. Carefully squeeze the chocolate into the corner and remove excess air by massaging the bag, then twist the bag a few times to seal it. You can use a rubber band to tie the twisted end to keep it in place. With a scissor, snip the tip to create a 0.25 cm opening. Start with a small opening and test the streak of chocolate on a piece of paper towel or a plate. If it is too small, carefully snip a little more to create a bigger opening. The goal is to mimic a bird’s nest straws.
Step 10
Line a baking tray with wax paper or aluminum foil. Use stainless steel spoons for easier removal later by using a lighter to heat the bottom of the spoon. This will lightly melt the chocolate nest and make it easier to release it from the spoon. You can create different chocolate patterns for each nest or keep it uniform. I piped the chocolate in a criss-cross pattern on a few spoons and some with just horizontal or vertical lines. Others had a mix of vertical and criss-cross lines or loops. The key is to create a nest with minimal gaps in order to release it from the spoon without breaking it, so make sure you pipe enough chocolate to create at least a 0.5 cm thickness. You may end up with leftover chocolate in the bag. Save it! You will need it for the decoration later.
Step 11
Carefully place each piped spoon onto your lined tray. Then slowly transfer the tray to your refrigerator and chill the chocolate for a minimum of 1 hour or longer.
Step 12
To remove chocolate nest from the spoon, wear food-safe gloves to minimize the chocolate from melting while you handle it. Use a lighter to heat the bottom of the spoon (with back and forth motion) for 10 seconds. Then use your thumb to push the chocolate nest forward to release it from the spoon. Keep chocolate nests refrigerated until you are ready to decorate them on the cupcakes.
Step 13
Start on the outside of the cupcake and pipe the frosting inward in a single, circular layer until you get to the center. Swirl the frosting in the center around 2 or 3 times to give it a little height for the bird’s nest and eggs.
Step 14
Place a chocolate nest in the center on top of the frosting and lightly press it down.
Step 15
I alternated between placing 2 and 3 eggs for each nest. Use the leftover melted chocolate from before and pipe a small dot of chocolate on the egg, then ‘glue’ it onto the nest.
Step 16
Position some eggs to be upright and some on the side for a more realistic appeal of a bird's nest.