Gelatin Bubbles
4.6
(55)
Your folders
Your folders
Prep Time: 20 minutes
Cook Time: 20 minutes
Total: 4 hours, 40 minutes
Servings: 30
Author : Chelsey White
Ingredients
Export 9 ingredients for grocery delivery
Instructions
Step 1
Partially inflate 30 small balloons, tying a knot high up at the neck of the balloon to make it into a (somewhat) spherical shape. If desired, tie the balloon to the end of paper straw to make it easier to handle.
Step 2
Cover each balloon with a thin coat of shortening. You shouldn't be able to see any white streaks of shortening. The bubbles should just look shiny and lightly greased. This will make it easier to remove the balloons later in the process.
Step 3
Then 3/4 cup of cold water to a small, heat-proof bowl. Pour in 6 Tbsp of unflavored gelatin (ratio should always be 2 parts water, 1 part gelatin). Gently swirl the water in the bowl to fully hydrate the gelatin in the water. Let the mixture sit for a couple minutes to let the gelatin bloom (absorb water).
Step 4
Once the mixture firms up, pop the bowl into the microwave for about 20 seconds (time can vary based on your microwave). The gelatin should be warm and very fluid, but not hot to the touch.
Step 5
Stir in a few drops of gel food coloring (and/or luster dust). Make sure the gelatin is fully dissolved at this stage. If it's not, heat it in additional 10 second intervals and stir in between until it's fully melted. If you notice small bubbles or foam on top of the gelatin, carefully spoon it out of the container. This will cause your gelatin bubbles to have a cloudy, bubbly, surface.
Step 6
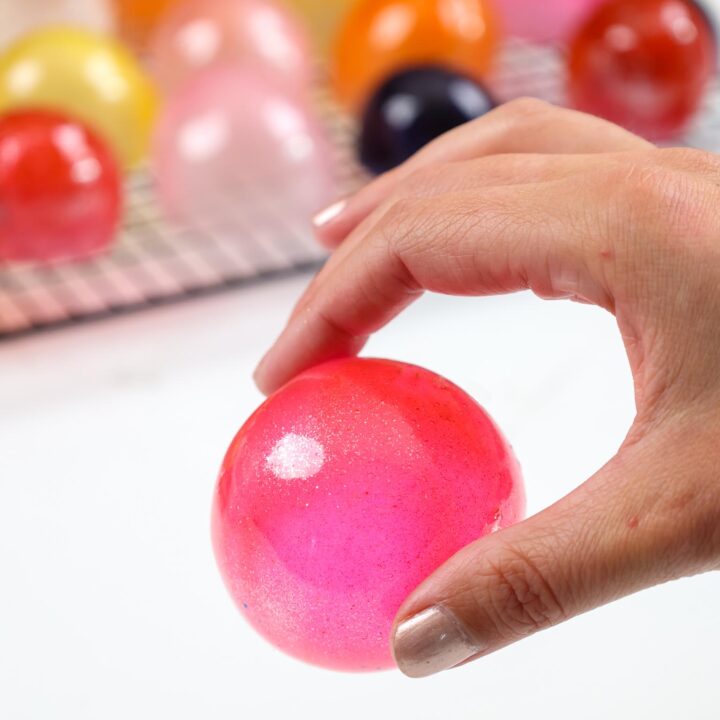
Gently dip each balloon into the gelatin, rolling it to cover a majority of the balloon. Make sure each balloon is covered in a thin, even coat of gelatin. Gently shake off any excess gelatin. If you tied the balloons to straws, place them in a heavy glass to dry like in the photos above. If you skipped the straws, rest the balloons with the tie side down on a cooling rack.
Step 7
If the gelatin cools off and thickens while you're dipping the balloons, pop the gelatin into the microwave and heat for 10 seconds to get it back to the right consistency.
Step 8
Once all the balloons are dipped, dip them one more time. Two coats of gelatin help them be stronger and more brightly colored.
Step 9
Let the balloons sit for about 12 hours, or overnight to let them fully harden. If you're in a time crunch, you can use a fan to speed up the drying process (it takes about 4 hours with a fan). If using a fan, let the balloons rest for about 30 minutes (I found they had started to harden by this point), then use a small fan (on a LOW SPEED) to speed up the rest of the drying process. Be VERY careful when you do this. If your fan is too strong, it will blow your bubbles right off your counter!!
Step 10
Once the bubbles have hardened, use scissors to gently puncture the exposed balloon. Once it shrinks, gently loosen the balloon from the bubble and remove it.
Step 11
If the bubbles collapse a bit during this process, don't worry! They are rather sturdy, and any indents can be popped back into place.
Step 12
Use sharp scissors to trim away any jagged edges around the base of each bubble. Then use as desired!