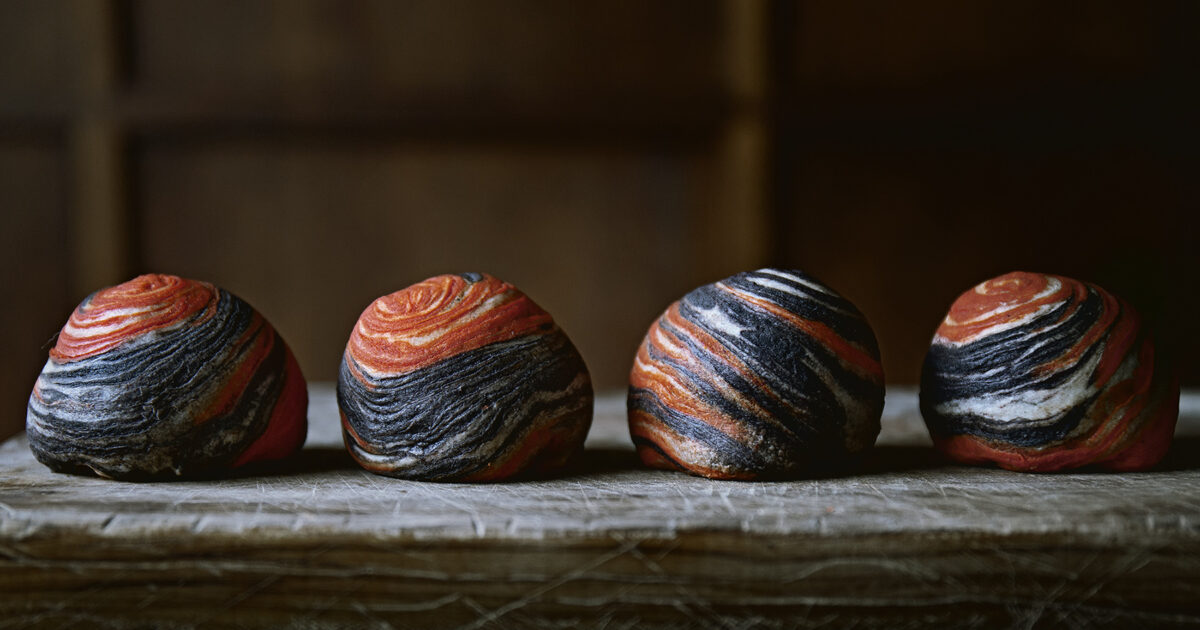
Halloween spiral pastry stuffed with pumpkin and cheddar – Lady and Pups
Your folders
Your folders
Servings: 12

Ingredients
Export 5 ingredients for grocery delivery
Instructions
Step 1
START THE DAY BEFORE: We want to prepare the pumpkin filling and the water dough the day ahead or up to 3 days before serving. To make the filling, you can either start from fresh pumpkins or canned pumpkin puree. Make sure you choose a low-moisture pumpkin such as Japanese/Korean Kent pumpkin (the video demo shows what it looks like). Peel and remove the seeds, then cut into 1/2-inch small pieces. Scatter on a baking rack and bake in a 270 F/130 C FAN-ON or 300 F/150 C NO-FAN oven for about 1 to 1:30 hour, until the pieces have lost about 1/2 of their original volume and look shrivelled up. Blend with an immersion blender or food-processor until smooth and sweeten with light brown sugar to your liking. The puree should be very thick, more paste-like than puree. To use canned pumpkin, evenly spread the puree on a baking sheet, then bake under the same temperature for about 1 hour, until it has lost 1/2 of its volume. Blend again to make it smooth and sweeten with light brown sugar as needed. Store in the fridge until needed.
Step 2
MAKE THE WATER-DOUGH: At least one day ahead of time, knead all the ingredients for water dough for about 5 minutes, until supple, soft and smooth. Wrap in plastic wrap and let sit in the fridge at least overnight or up to 3 days to allow gluten to further develop. It can be used straight from the fridge when needed.
Step 3
ON THE DAY OF SERVING: With an ice-cream scoop about 3 tbsp in total volume, make a scoop of pumpkin paste and press a bite-size piece of cheese in the middle. Level out the top and release it onto a parchment-lined baking sheet. Repeat until you have 12 scoops. Transfer into the freezer to let it harden slightly before use, but do not let them completely freeze (cheese doesn't freeze well).
Step 4
MAKE FAT/OIL DOUGH: In a bowl, knead together AP flour and lard or unsalted butter until smooth. Divide the dough in 2 equal portions, then color 1 portion with black food dye, and the other with orange food dye. How much to use will depend on the dye you're using, so add a little bit as you go until you reach the desired shade. Then roll each colored dough into a log and divide into 12 equal portions each, and shape into little tubular nubs (like in the video). You'll have 12 nubs of black, and 12 nubs of orange. Set aside.
Step 5
SHAPE THE PASTRY: Take the water-dough out of the fridge and divide into 6 equal portions. Shape into a ball, and set aside each in the CHRONOLOGICAL ORDER they are handled. Cover loosely with plastic wrap. Go back to the first water-dough ball, roll it out into a 3"x4" (8x10 cm) oval shape, then place 1 black tube, then 1 orange, then 1 black then another orange side by side in the center of the oval. Bring the water-dough together to wrap the colored-dough inside and pinch the seams to tightly close it. Gently flatten it down slightly, then place it back to its chronological order. Repeat with the 2nd water-dough, so on so forth until all 6 are done.
Step 6
Now go back to the first dough you worked with, turn it so the alignment of the colored dough is perpendicular to you. Roll it out, with even pressure on both hands, into a long oval that is 1 feet/30 cm long, not longer (or you risk losing the layers). If there are excess white dough at each ends of the oval, trim it off. Then roll it from one end to the other into a little cigar. Place it back to its chronological order. Repeat with the 2nd dough, so on so forth until all 6 are done.
Step 7
Now go back to the first cigar, place it perpendicular to you, then roll it out again into a 1 feet/30 cm oval. Fold it onto itself length wise (now you'll have a really skinny strip), then gently roll it again just to enclose the fold. If the strip gets slightly longer then 1feet/30 cm, it's ok, but no more than by 1 inch/3 cm. If there are excess white dough on each ends, trim it off. Roll it from one end to the other into a tight snail, then put it back where it belongs, and repeat until all 6 are done.
Step 8
Go back to the first snail. With a sharp knife, slice the snail right down the middle into equal 2 disks. Place the cut-side down, then roll it out into 4 inch/10 cm wide circle, keeping the centre of the spiral in the middle. Place a filling (straight from the freezer is fine) in the middle, with the round side facing down, then bring the dough together and pinch to enclose. Set aside on a parchment-lined baking sheet, and repeat until you're done with all 12.
Step 9
Preheat the oven on 340 F/170 C (meanwhile keep the pastries in the fridge), then bake *on the lowest rack (to prevent top browning) for 25 minutes. Let cool on a cooling rack for 15 minutes before serving.