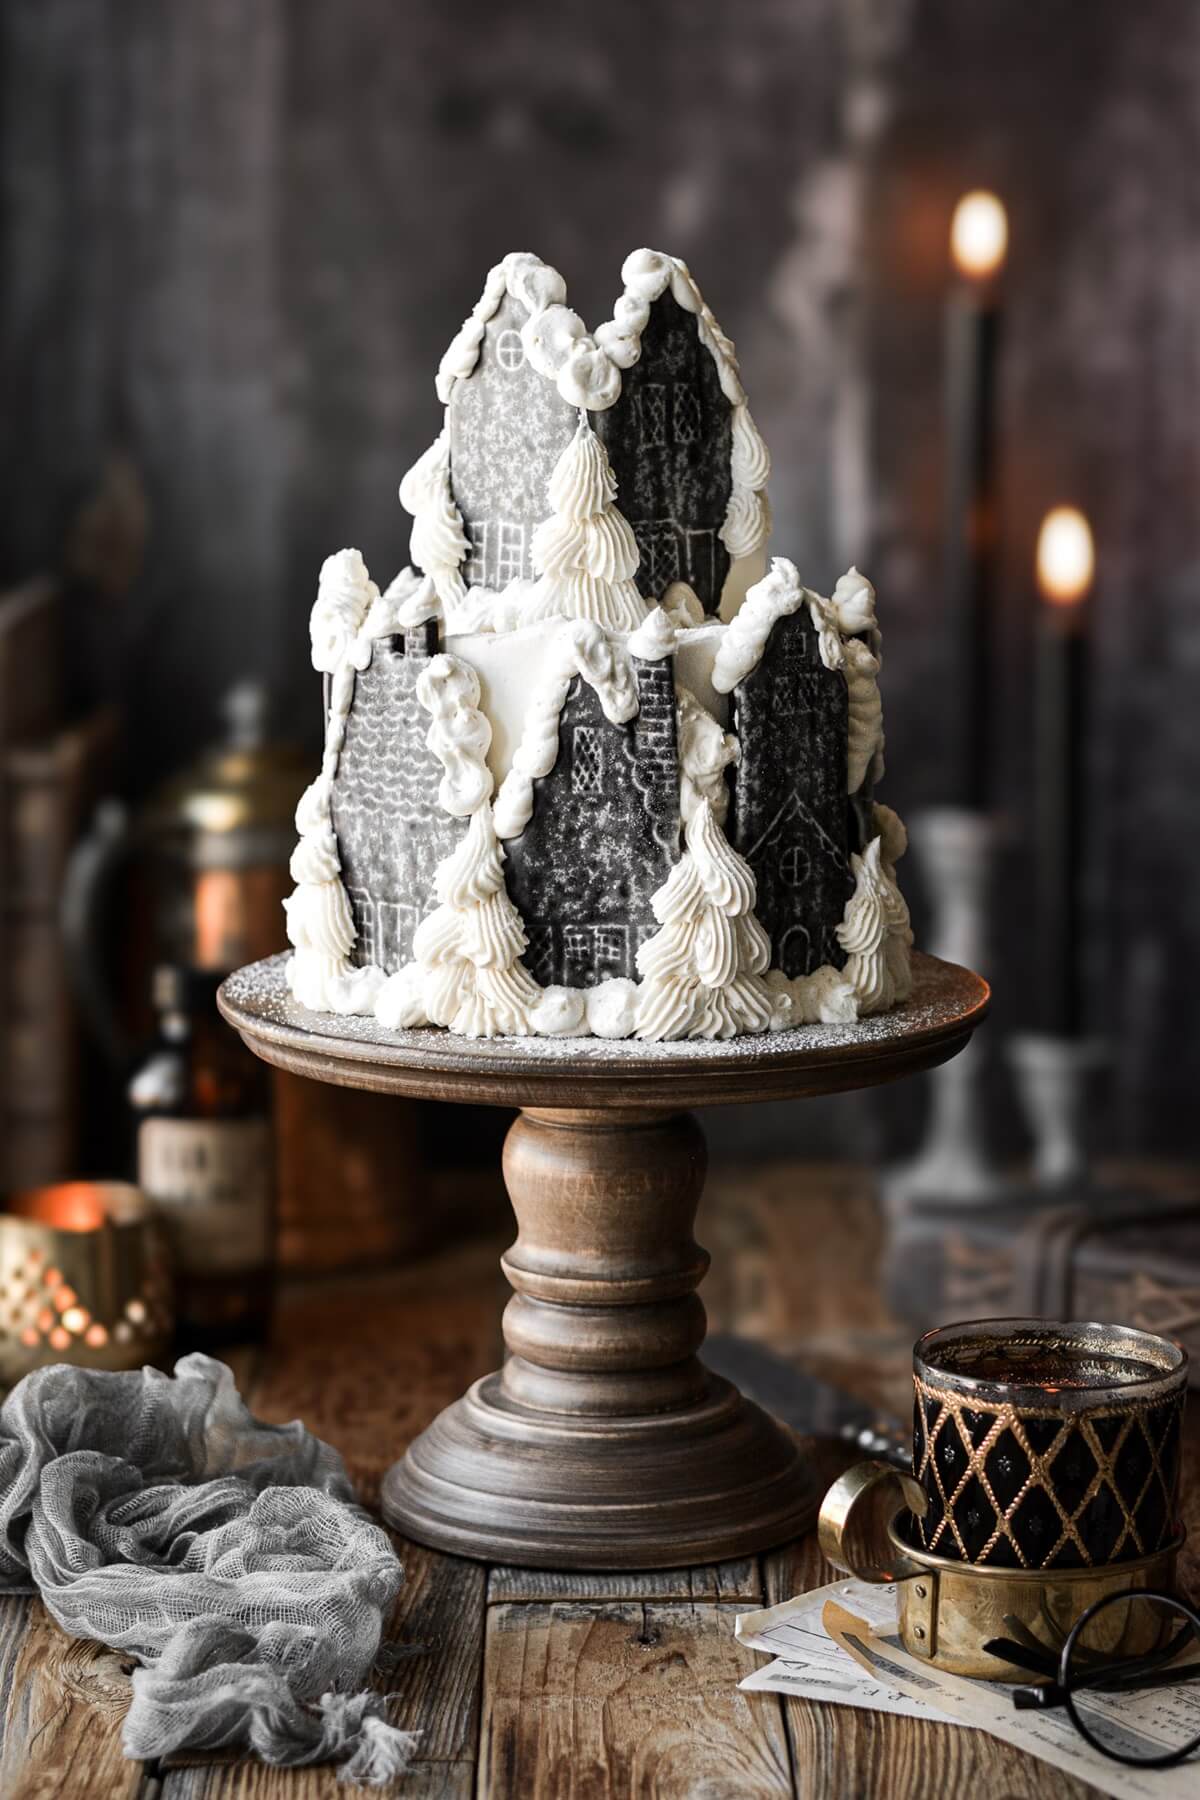
Hogsmeade Village Christmas Cake
5.0
(1)
Your folders
Your folders
Prep Time: 195 minutes
Cook Time: 45 minutes
Total: 240 minutes
Servings: 12

Ingredients
Export 3 ingredients for grocery delivery
Instructions
Step 1
DOUGH:You'll need 2x the recipe for Chocolate Shortbread Dough. Prepare the dough, wrap in plastic wrap, and refrigerate for 20 minutes before rolling and cutting your houses.
Step 2
HOUSE TEMPLATE:Draw and cut a template on a piece of card stock. First, cut a rectangle measuring 2 1/4 inches x 4 1/2 inches. Then, cut off two corners at the top to make the roof line. You can make other shapes of houses, as you can see I did on my template, but it's helpful to keep them similar in width and height.
Step 3
CUTTING THE HOUSES:Roll out the dough on a lightly floured surface, to just under 1/4 inch thick. Set your card stock template onto the dough, and use a sharp knife, bench scraper, or palette knife to cut out the dough.You'll need to cut 12 houses, 4 for the top, and 8 for around the cake. You may even want to make a few extra, in case you break any cookies. Wrap any leftover dough, and freeze for another project.Place the houses 1 inch apart on a large baking sheet lined with parchment paper.
Step 4
EMBOSSING THE HOUSE DETAILS:It's helpful if you have some small shapes cutters, palette knives, or other tools to use to make impressions on the houses. For example, squares, rectangles, circles, stars, hearts, etc, all work well for impressing windows, doors, and other designs on the dough. For the roof line, you can use the end of a piping tip to impress a scalloped pattern. Be creative, look around your house for little things you can use to impress interesting patterns and designs. Everything you stamp onto your dough will be highlighted when you ice your cookies. Try to do a variety of designs on the cookies, to keep them different and interesting.When embossing your dough, press the cutters and tools (blunt side against the dough) deep enough to leave an impression, but not deep enough to cut through the dough.Once you're satisfied with your designs, set the pan in the refrigerator and chill for 1 hour before baking. Chilling the dough ensures your pattern will be preserved, and the dough won't spread while baking.
Step 5
BAKE THE COOKIE HOUSES:Preheat the oven to 350 F. Bake the chilled cookies for 11-12 minutes. Cool on the baking sheet for exactly 5 minutes, then gently transfer to a cooling rack. Immediately brush the warm cookies with the icing (recipe follows).
Step 6
ICE THE WARM COOKIE HOUSES:Icing Ingredients:1/2 cup powdered sugar1 tbsp melted butter1/4 tsp vanilla extract3 tbsp warm waterAs soon as the cookies come out of the oven, you can quickly make the icing. In a bowl, whisk together all ingredients until smooth. The glaze should be thin, with a consistency like warm honey. After cooling the cookies on the baking sheet for 5 minutes, gently transfer to a cooling rack. Use a pastry brush to immediately and quickly brush the icing over the warm cookies, getting it into all the crevices, and letting it drip over the edges.
Step 7
Once you've finished a cookie, don't brush over it again or touch it until the glaze sets completely. The glaze will crust over and set quickly, in about 30 minutes. Let cool and set completely for several hours. Then store in a single layer, or stacked with sheets of wax paper between each layer, in an airtight container, until ready to decorate your cake.The cookies can be baked and iced 1 day in advance.Icing Note: Soon after icing your cookies, the glaze will develop whiter patches that look crystallized, which add to the icy appearance of the snowy scene. You can also encourage more crystallization by freezing the cookies. For a milkier, more opaque looking icing that doesn't crystallize as easily, use my updated icing recipe in this post.
Step 8
FLAVOR:You can bake any flavor cake you like, but I chose my Chocolate Cake with Vanilla Buttercream recipe.
Step 9
SIZE:I made a small 6-inch 3-layer cake (which is 1/2 the cake recipe), but you can certainly make yours an 8-inch 3-layer cake. You'll need to make 5x the buttercream recipe to have enough for frosting and decorating.
Step 10
GETTING READY:Bake, cool, stack and frost your cake. Smooth out the sides of the cake, but it doesn't have to look perfect, since it will be covered up with cookies.
Step 11
HOUSES:Arrange 4 of the houses on top of the cake, so that they form a square, pressing them gently into the frosting. Spread or pipe a little buttercream at the seams to help hold them in place. If needed, you can support them by inserting a popsicle stick into the cake behind each.Arrange the remaining houses around the side of the cake, pressing them gently against the buttercream.
Step 12
TREES:Fit a piping bag with a coupler and a medium star tip, like tip 18, and fill with buttercream. Pipe trees between each of the houses.
Step 13
SNOW DRIFTS:Switch to the round tip, and pipe swirls of buttercream at the base of each of the houses, and along the roof tops.Finish by lightly sprinkling the cake with a little granulated sugar or sparkling sugar.