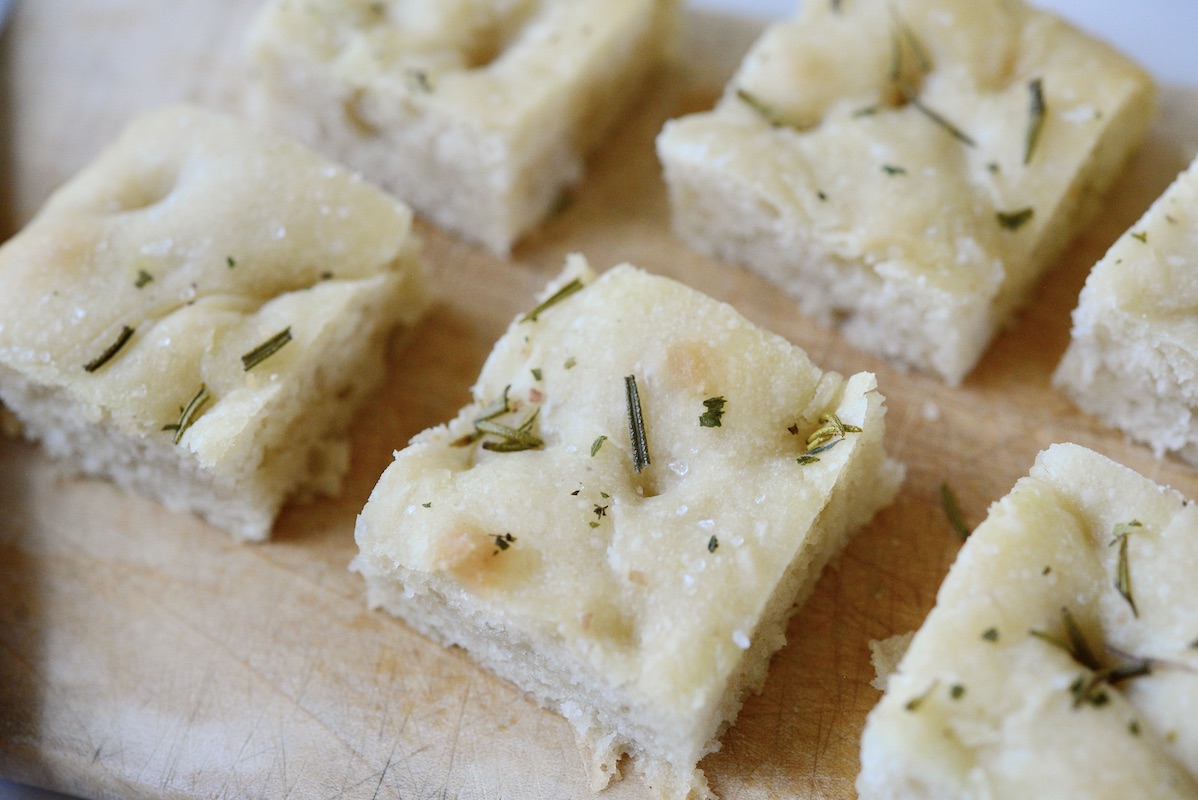
Honey Butter Sourdough Focaccia
5.0
(1)
Your folders
Your folders
Prep Time: 30 minutes
Cook Time: 25 minutes
Total: 1315 minutes
Servings: 16

Ingredients
Export 6 ingredients for grocery delivery
Instructions
Step 1
Mix together ripe/active sourdough starter with all-purpose or bread flour and water. Cover loosely and let sit 10-12 hours at 78-80°F until doubled, bubbly & peaked.Note: If you have a ripe, bubbly, active sourdough starter that is fed equal parts flour and water – it can be substituted equally for the levain in this recipe.
Step 2
Mix Dough: To a large bowl, mix together ripe levain with water and honey . Add salt and bread flour. Mix together using a dough whisk or spoon until a wet and sticky dough forms and the ingredients are fully combined. Cover and let rest for 30 minutes.Note: This dough is very sensitive to temperature. It's important to maintain a temperature where the dough will rise AND the butter stays chilled and flaky. I've found a 70-72ºF temperature to work well. I wouldn't go above 75ºF for this recipe or the butter will get too soft. To do this, use cooler water when mixing your dough and take the temperature with a thermometer throughout the process.
Step 3
Stretch and Folds or Coil Folds: After the dough has rested, you will perform a series of "stretch and folds” or “coil folds" over the next 1 ½ hours. The goal is to strengthen the dough through a gentle kneading process. You will also add cold butter into the dough during this process which will be evenly dispersed throughout the dough through the folds.You can choose if you prefer to use stretch and folds or coil folds for this dough. I typically use coil folds for focaccia dough because it has a higher hydration content. BUT, I like adding my butter in with stretch and folds. So I often use a combination of stretch and folds/coil folds. Use what you feel most comfortable with. To “stretch and fold,” wet your hand (so it doesn’t stick to the dough). Reach around the dough down to the bottom of the bowl, pull the dough up and over and place it on top of the dough. Turn the bowl a quarter turn and repeat the stretch and fold. Turn another quarter turn and repeat. Perform one more quarter turn, stretching and folding the dough. Cover and set aside. Take note of how the dough feels through this process. It will go from feeling a little shaggy to smooth and elastic. Cover the bowl and wait about 30 minutes in between stretch and folds.To "coil fold" use damp hands and place your hands under the middle of the dough and pull up. The dough will stretch up (but should not tear) and release from the bottom of the bowl. Once the dough releases, let the dough fall back under itself. Repeat the process for both sides of dough. Then turn the container and repeat the coil fold. I find it very helpful to watch this process before attempting it. You can watch a video of the coil fold here.
Step 4
Fold #1: After 30 minutes, perform your first set folds. Cover the dough and let rest for 30 minutes.
Step 5
Fold #2: After 30 minutes, grate the cold butter. Put half of the grated butter on top of the dough. The other half of the butter should be placed in the refrigerator to chill until the next set of folds. Stretch and fold the dough again, incorporating the flakes of butter into the dough. Cover and let rest for 30 minutes.
Step 6
Fold #3: 30 minutes later, add the rest of the butter to the top of the dough. Stretch and fold again. The butter will continue dispersing throughout the dough. Cover and let rest for 30 minutes.
Step 7
Fold #4: After 30 minutes do your final set of folds. You should notice the dough feeling more cohesive and strong. If your dough still feels loose, add in another couple stretch and folds to help strengthen and tighten the gluten strands. Cover the dough and let rest and start to rise for about 2 more hours.
Step 8
Prepare the Pan: After a couple of hours resting, prepare the focaccia pan. Pour 40 grams (3 Tablespoons) melted butter in a metal baking pan. Tip the pan around to cover the entire bottom of the baking pan. If your pan is not metal or has issues with dough sticking, put some parchment paper down first.
Step 9
Prepare Focaccia: Turn the dough out into the pan and stretch slowly to fill the edges of the pan. Pull up gently on the underside of the dough to stretch it into place. If it doesn't want to stretch, let the dough rest for a minute and then try again. Drizzle 30 grams of cooled, melted butter over the top of the focaccia and spread around with your hands to cover the dough. Cover the pan with plastic wrap and set in a 70-72ºF place to rise for about 7-9 hours. Note: If you want to break this process up into a couple of days, cover the focaccia dough and place in the refrigerator for a long fermentation. Pull it out and let it rise before baking.
Step 10
Proof: The focaccia dough takes a long time to rise because of the cooler environment. Be careful not to go over 75ºF or else the butter in the dough will start to melt. Let the dough rest for about 7-9 hours until it has doubled in size, feels light, airy and jiggly. If it doesn't feel this way, give it more time and try to warm it up just a bit. Do not bake this focaccia if it hasn't risen.
Step 11
Preheat Oven and Dimple Dough: Once the dough has doubled in size and is ready to bake, preheat the oven to 425ºF. Take your fingers and gently dimple the dough. Start at the top and work your way down the dough until the entire focaccia is dimpled and bubbly.
Step 12
Bake: Bake for 25-30 minutes until bubbly, crispy and light golden brown on top. Immediately after you pull the focaccia from the oven, drizzle honey on top of the dough and brush all over the top of the focaccia. Let cool in the pan for 5-10 minutes before removing to a wire rack to cool. Enjoy!
Top similar recipes
Curated for youYour folders

 412 views
Sourdough Focaccia
homegrownhappiness.co.nz
4.8
(23)
25 minutes
Your folders
 395 views
Sourdough Focaccia
baked-theblog.com
4.8
(15)
25 minutes
Your folders
 337 views
Sourdough Focaccia
schoolnightvegan.com
4.5
(21)
Your folders
 163 views
Sourdough Focaccia
cravethegood.com
4.5
(14)
25 minutes
Your folders
 455 views
Sourdough Focaccia
kingarthurbaking.com
4.7
(90)
25 minutes
Your folders
 24 views
Sourdough Focaccia
ourgabledhome.com
4.7
(3)
25 minutes
Your folders
 929 views
Simple Sourdough Focaccia
alexandracooks.com
4.9
(165)
25 minutes
Your folders
 423 views
Quick Sourdough Focaccia
bojongourmet.com
4.3
(26)
Your folders
 215 views
Easy Sourdough Focaccia
breadsandsweets.com
5.0
(5)
20 minutes
Your folders
 433 views
Easy Sourdough Focaccia
girlversusdough.com
4.2
(5)
30 minutes
Your folders
 547 views
sourdough discard focaccia
dusdoughs.com
5.0
(10)
Your folders
 284 views
Sourdough Discard Focaccia
farmhouseonboone.com
4.4
(29)
30 minutes
Your folders
 341 views
Sourdough discard focaccia
eva-bakes.com
4.3
(4)
30 minutes
Your folders
 110 views
Sourdough Discard Focaccia
sistersandspice.com
5.0
(1)
30 minutes
Your folders
 54 views
Pumpkin Sourdough Focaccia
amybakesbread.com
4.8
(5)
25 minutes
Your folders
 100 views
Sourdough Discard Focaccia
enwnutrition.com
4.9
(11)
30 minutes
Your folders
80 viewsEasy Sourdough Focaccia
nordickitchenstories.co.uk
30 minutes
Your folders
11 viewsSimple Sourdough Focaccia
alexandracooks.com
4.9
(544)
25 minutes
Your folders
8 viewsSimple Sourdough Focaccia
alexandracooks.com
4.9
(544)
25 minutes