How To Make Soft and Fluffy Pandan Chiffon Cake (Complete Guide)
4.8
(69)
Your folders
Your folders
Prep Time: 35 minutes
Cook Time: 65 minutes
Total: 65 minutes
Servings: 8
Author : Marvellina
Ingredients
Export 31 ingredients for grocery delivery
Instructions
Step 1
Make sure your chiffon cake pan does not have a non-stick coating or your cake will not rise. The cake needs to cling to the side of the pan to rise tall
Step 2
Before you start making the recipe, make sure eggs, pandan juice, and coconut milk (if you keep in the fridge) are at room temperature. Get them out from the fridge 20-30 minutes and let them sit at room temperature before you plan to start working on this
Step 3
Make sure you cut the leaves into little pieces to extract the juice out from the leaves. Put in a blender and add water and process for a minute or so or until it becomes paste-like. Transfer to a cheesecloth or muslin cloth or use a strainer to squeeze the juice out. Measure out the amount of pandan juice you need and keep the leftover in the fridge for up to one week
Step 4
Preheat your oven to 330 F (165 C). Place the oven rack 3rd from the top
Step 5
My oven is a conventional oven with bottom heat only, no fan. Place the oven rack 3rd from the top. Place the egg whites in a clean mixing bowl. I use a stand mixer with a whisk attachment. You will have trouble whipping your meringue if there's a trace of grease in your utensils or bowls
Step 6
Separate the egg yolks from the white. The meringue whips better at room temperature. In a separate bowl, whisk the egg yolks, sugar and cooking oil, then add coconut milk and pandan essence. Sift in the cake flour, baking powder (if using), and salt into the batter, there will be no lumps when you do this. Whisk to mix into a smooth batter. Set aside
Step 7
Beat the egg whites on medium speed until frothy, add cream of tartar or lemon juice/vinegar and whip until it turns whitish and air bubbles are fine. Gradually add the sugar as you beat, in 3 batches. I beat them at medium speed (speed 6 on Kitchen Aid). This will take a bit longer compared to beating at high speed. I used to do higher speed (speed 8), but the meringue is smoother and nicer when I maintain the speed on I highly recommend stopping several times to check on the consistency and scraping the sides of the bowl to make sure no sugar left on the side of the bowl. Whip until you reach a stiff peak but still have a slight bent on the tip. Then lower the speed to 4 and whip for 1 minute to even out large bubbles and stop beating
Step 8
If you beat until the meringue clumps on the whisk attachment in one HUGE chunk/lump, you know you've gone too far beating the meringue. You will have to start over when you overbeat the meringue. If you use it, the meringue will separate when you fold it into the yolk batter and won't hold much air and your cake will deflate later
Step 9
Gently fold 1/3 of the meringue into the thick batter. Using a whisk, using a cutting motion and fold over to mix. Repeat this motion several rounds. Continue on with the second 1/3 of the meringue again to mix. For the last 1/3 of the meringue, use a rubber spatula instead to ensure you get all the batter at the bottom of the bowl mixed in as well. Use a cut down in the middle and fold over motion to fold gently but quickly. Make sure you don't see any more white meringue. The mixture should be fluffy and voluminous.
Step 10
Pour the batter into an UNGREASED chiffon cake pan. Use a rubber spatula to smooth the surface. Gently drop the cake pan from about 10 cm height on the counter 2-3 times. Use a skewer to draw a zig zag to pop bubbles inside the cake batter.
Step 11
Pop into the oven and let it bake at 330 F for 50 minutes (for 8-inch chiffon cake), see my post above for more details on cooking time for a different size). DO NOT open your oven door at least for the first 30 minutes of baking or you will deflate the cake. Then lower the heat to 300 F (150 C) and bake for another 10-15 minutes
Step 12
NOTES on baking time: Please note that the baking time is just for reference. Your oven may bake faster or slower and the type of oven you use may be different than mine
Step 13
I know this is weird to say, but it's actually "safer" to overbake chiffon cake than underbaking. Underbaking tends to cause the cake to collapse. Usually if you insert a skewer inside the cake and no crumbs stick to it or very minimal crumbs, it is safe to say that the cake is cooked through. You can also touch the top and if it springs back, it's a good sign that it's cooked through. I like to have some golden brown on top. I don't know if you notice, but when the cake has a golden brown color on top, it's actually more flavorful too than when the cake is pale in color
Step 14
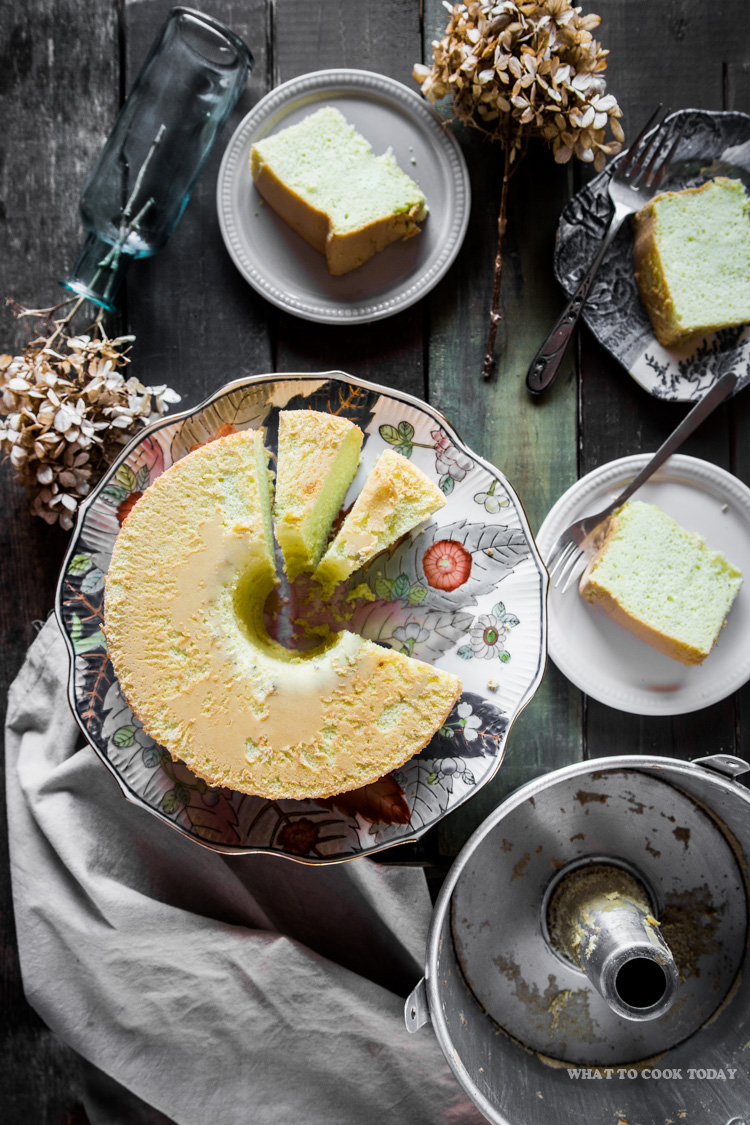
Don't be alarm if your cake has some cracks on top. What you are looking at will become the bottom of your cake. I know many people mind it a lot and make a big fuss when the top of the chiffon cake cracks, but actually it's not a flaw.
Step 15
Once out of the oven, drop the cake pan from about 10 cm height on the counter several times to prevent shrinkage. Then carefully invert the pan upside down immediately. Your chiffon pan may have the little stands for you to invert, but I find it not high enough. I use a glass jar and set the inverted pan on top of the jar and let it cool down completely. Please don't be tempted to remove from the pan if it's still warm. It takes about one to two hours to cool down completely
Step 16
Once it's cool down completely, use a spatula knife to run through the edge and the outer center of the tube to help release the cake. Gently push the base to lift the cake out. Use the knife again to run through the base of the pan and then carefully release the cake. There you have it !!! :) Enjoy and try to finish it within 3 days (which I'm sure it will be gone before then)