How to Make Sourdough Starter
5.0
(3)
Your folders
Your folders
Prep Time: 25 minutes
Servings: 12
Ingredients
Export 2 ingredients for grocery delivery
Instructions
Step 1
Measure 4 ounces by weight of whole wheat or whole rye flour (a scant 1 cup by volume) and 4 ounces by weight (1/2 cup by volume) of lukewarm water into a food safe container. Stir until no dry pockets remain. It'll look like this.
Step 2
Cover this loosely. This could mean you lay a lid that fits the container on top without snapping it into place OR that you lay a piece of plastic wrap or waxed paper over the top.
Step 3
You're looking to make sure some air can get in and out while trying to minimize evaporation and keep it moist. A tight fitting lid can literally blow off of an active starter, so loose fitting is always going to be the name of the cover game.
Step 4
And while we're talking about the name of the game, consider the temperature of your room. If your room is below 68°F, like my cool-climate house, you'll want to find a place that IS at that temp or above to help coax your starter into reliable activity.
Step 5
If you just plain don't have a part of your house suitable to do that, you can pop it -still loosely covered!- into a cold oven with the oven light on. The light should provide enough heat to keep your stove the right temperature to encourage starter growth.
Step 6
If your oven light is out, you can lay a folded towel over a heating pad set to low and put your container of starter on top of that. Some other good, warm-ish places are behind a woodstove (ask me how I know), on top of a refrigerator or desktop computer CPU, or next to (not directly in front of) a space heater.
Step 7
The goal is just to find a place that has a steady, warmish temperature to grow your starter but not a place that is wickedly hot or drafty.
Step 8
SAMPLE SCHEDULE TIME: START THE PROCESS AT 9AM.
Step 9
24 hours later, it might not look like much is going on with your starter when you look down on it from the top, but if you're using a glass or clear plastic container, you may see a few small bubbles under the surface when you look at it from the side. If you don't, don't worry.
Step 10
It's okay if you don't see bubbles. It could mean that your room is on the cooler side. Just keep on keeping on.
Step 11
You'll stir down the starter, discard half of it (into a container that you'll keep covered and in the refrigerator), and then add 4 ounces of all-purpose flour (that's a scant cup by volume) and 4 ounces of lukewarm water (that's 1/2 cup by volume) to the remaining starter. Once again, stir well until there are no dry pockets.
Step 12
You're going to loosely cover it and tuck it back into its warm bed, wherever that is, for another 24 hours.
Step 13
SAMPLE SCHEDULE TIME: FEED THE STARTER AT 9AM.
Step 14
24 hours later, you should see increased bubbling in your starter and it should start to smell a bit more, well, sour. But this is sour in a pleasant way; kind of fruity, kind of happy.
Step 15
Now, we're going to shift the feeding schedule. You're going to move to feeding your starter every 12 hours. Each time, you'll repeat the stir down, divide in half, feed with 4 ounces by weight each lukewarm water and all-purpose flour. (Remember, if you're going by volume, that'll be 1 scant cup of all-purpose flour plus 1/2 cup water.)
Step 16
After each feeding, you'll loosely cover and tuck it in. You're getting to the good part.
Step 17
SAMPLE SCHEDULE TIME; FEED THE STARTER AT 9 AM AND AGAIN AT 9PM.
Step 18
By this point, when you go to feed your starter, you should see some more bubbles in your starter. Some of them might be stacking on top of each other and you may see little rivulets of liquid near the top.
Step 19
It should smell very fruity and tangy now. Toward Day Five, you should start noticing that the starter is rising higher and higher close to feeding time.
Step 20
If it hasn't quite gotten to that phase, don't worry... just repeat the twice daily feedings until you get there. It may take up to 2 weeks to get there, but you'll be alright!
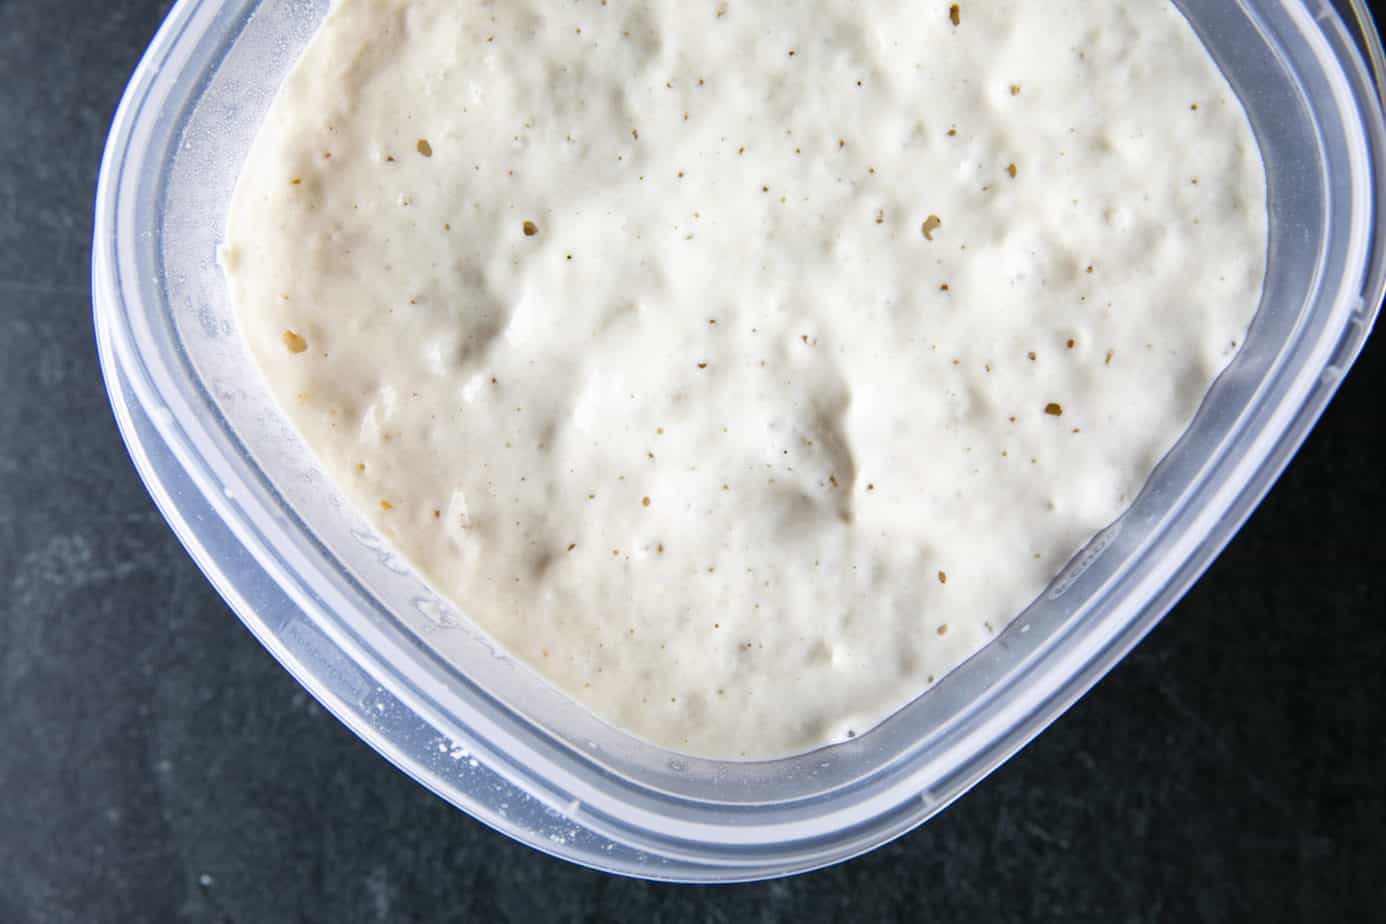
Step 21
When you notice that your starter is full of tiny and variable sized bubbles, rises to almost twice its original height over when you feed it, and smells very fruity and tangy, you're ready to bake with it!
Step 22
You'll notice that this starter has climbed almost all the way up in the container. You can either carry on with twice daily feedings, or discard, re-feed, and stash in the refrigerator.
Step 23
If you do that, you'll need to bring starter back out to room temp and feed it for a couple of days before making any recipes that require ripe starter.