How To Refresh Hollow Core Doors
Your folders
Your folders
Ingredients
Export 7 ingredients for grocery delivery
Instructions
Step 1
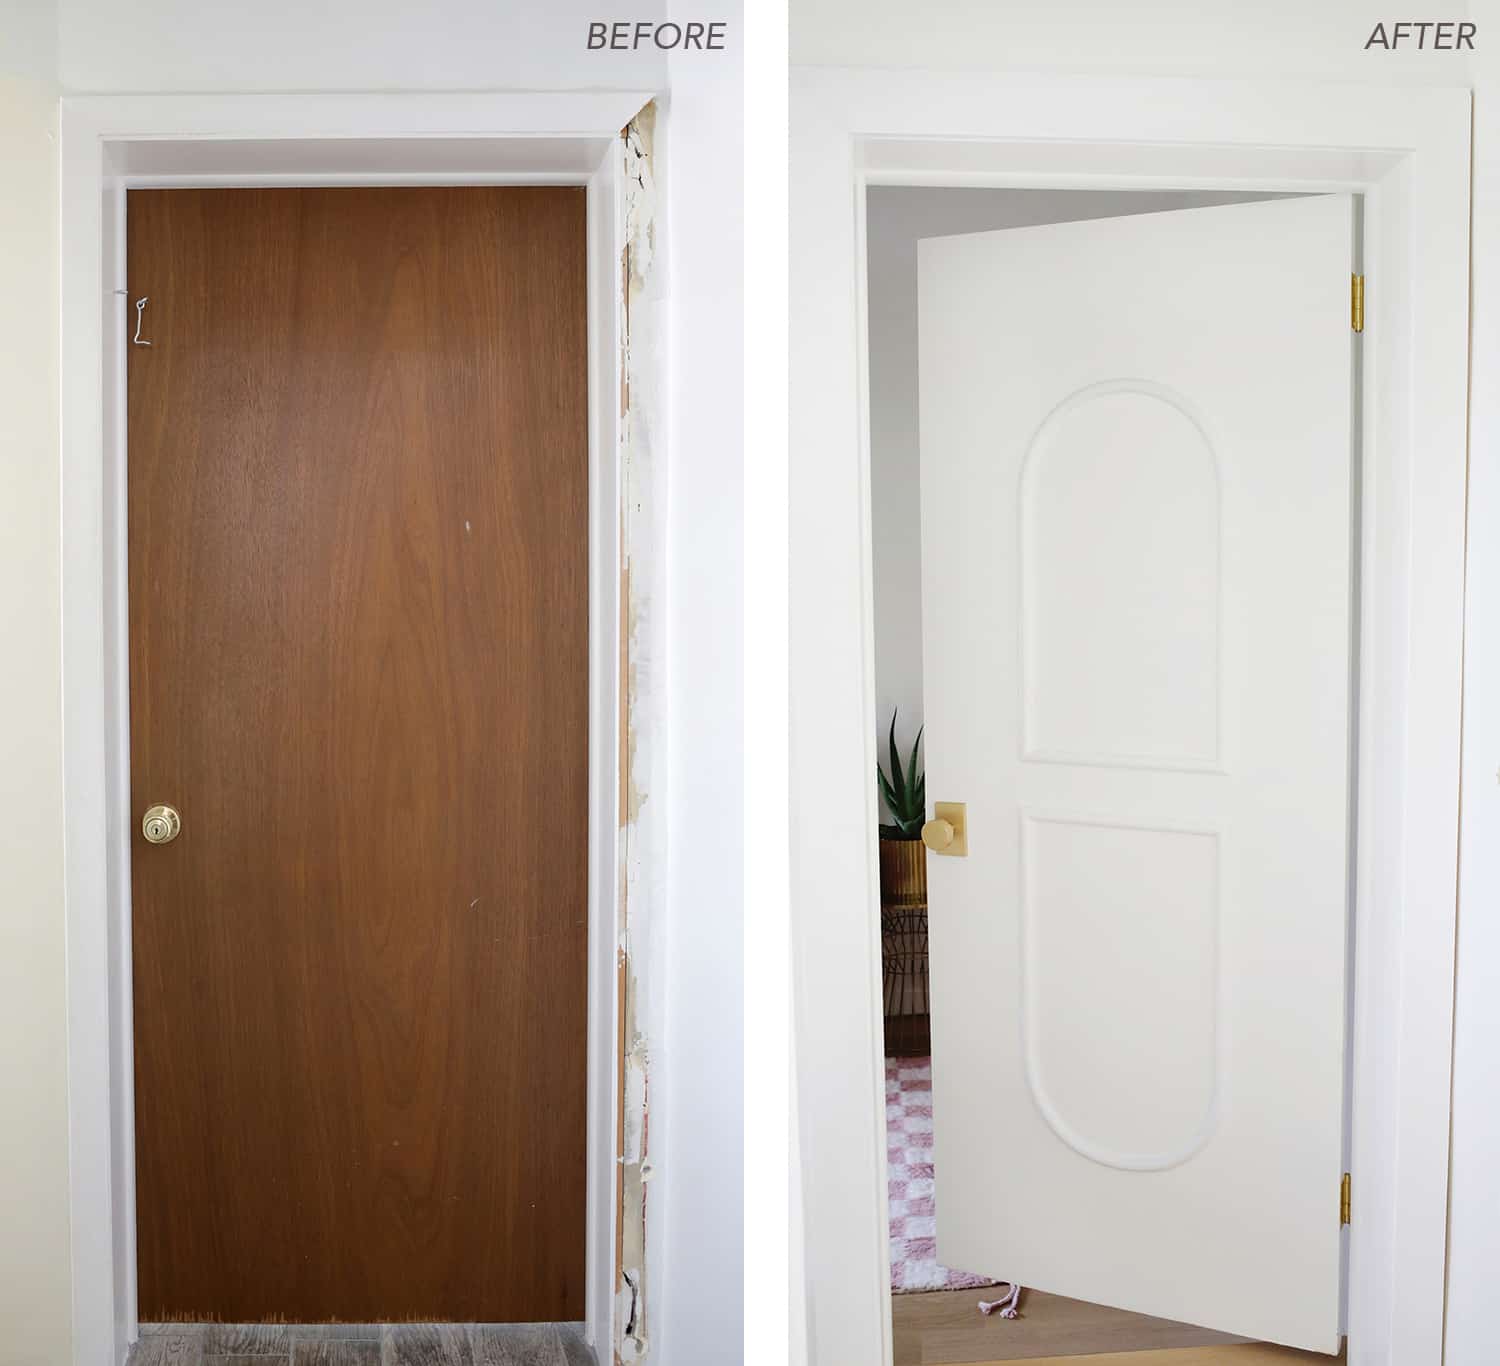
Repair splinters and cracks: It’s not uncommon on hollow core doors for the bottom of the door to start to splinter off and leave some uneven surfaces. The best way to repair that is to get some wood filler and a putty knife to fill the splintered areas. Put a layer of wood filler that’s a little higher than the surface of the door so you can sand it down to a level surface once the wood filler has dried.
Step 2
Paint the door: The color and tone of the wood on hollow core door is always a dead giveaway that it’s a cheap door, so painting it helps to hide those splintered areas you just repaired and makes it look like it could be a solid slab door. I like to sand down the door lightly with a medium sandpaper to rough up the surface and then do a coat or two of a stain-blocking primer to keep the wood stains from bleeding through (if painting the doors a dark color, you can probably get away with a paint/primer in one rather than separate coats). Then use a semi-gloss paint in the color of your choice (I usually do white) to refresh your door with a low nap roller for smooth surfaces.
Step 3
Replace the hinges: A lot of the time, an older hollow core door will also have older hinges that could use a swap for something nicer and newer. Our doors had really clunky heavy hinges that are meant for outdoor doors (very heavy duty) and they were also rusty and splattered with several colors of previous trim paint colors. Getting a pack of sleek modern hinges can go a long way in modernizing a door and making the whole thing feel refreshed (you’ll want these if your hinge cutouts are rounded).
Step 4
Switch the door hardware: Now this is the final step in making your door makeover a real success! Getting some sleek modern door hardware will be a giant leap forward for your hollow core door project. I wanted to spend a little more on the hardware to really make the end result feel more luxe (and since we saved so much on rehabbing the doors that was possible), so I bought this one that has a 5-year finish warranty for the finish color I wanted (a nice thing to have for brass hardware) and here’s a pretty budget-friendly option too. If you are wanting to save all around, they have more budget-friendly options that are similar like these and these that would be beautiful too!
Step 5
Add some custom trim: Now that you have a repaired door with a fresh coat of paint and new hardware, you can call it a day and admire your new door, OR, you can go one step further and make the door pretty special with some custom trim additions. I’ve made quite a few basic doors feel much more special with either wooden trim or wooden cutout designs, but in this house I added an arched half-round trim design to the back and all the main interior doors with flexible moulding and I just LOVE how it made the doors feel so much more luxe and custom.