Marc Vetri’s Naples Style Pizza Dough Recipe at 70% Hydration
3.6
(91)
Your folders
Your folders
Prep Time: 30 minutes
Servings: 12

Ingredients
Export 4 ingredients for grocery delivery
Instructions
Step 1
Day 1: Make the starter. Mix everything together in the bowl of an electric mixer, crumbling in the yeast if it’s fresh or sprinkling the dry yeast over the water. Mix just long enough to make sure all the flour is wet. The starter will be wet and sticky. Cover tightly with plastic wrap and let the starter rest at room temperature, about 70°F (21°C) for 24 hours.
Step 2
Day 2: Make the dough. By this time, the starter should be bubbly and smell like sex. For the dough, pour the water into a small bowl, crumble in the yeast, and whisk them together until no lumps remain; or, if using dry yeast, you can just sprinkle the yeast over the starter.
Step 3
Mix and knead. Add the water (or water/yeast mixture) to the starter and then the flour, and then the salt. Attach the dough hook and mix on low speed for 8 minutes. Switch to medium-low speed and mix for another 4 minutes. The dough should be somewhat loose, since it has a fair amount of water in it. But if you’re mixer is less than 600 watts (600 J/s) and the mixer is straining, remove half of the dough and mix the dough in 2 batches to avoid burning out your mixer motor. Recombine the dough at the end of mixing both batches.
Step 4
Ferment. Cover tightly and let the dough ferment in the refrigerator until it proofs, rises, and almost doubles in size, at least 2 hours or up to 24 hours for more flavor. You could also let the dough rise at room temperature for 5 to 6 hours if you’re pressed for time.
Step 5
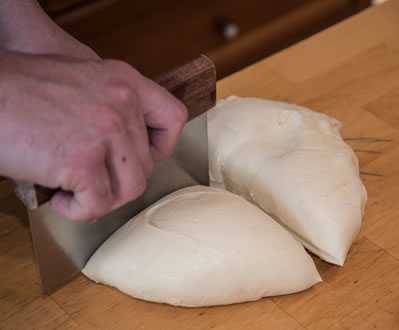
Ball up and ferment again. Lightly flour your hands and a bench knife (the bigger the better). Resist the temptation to dust the dough or your work surface with more flour; that will just make the dough stiffer. You want to keep the dough soft. Use your hand to scrape and dump the mass of dough onto a dry work surface. Use the bench knife to cut and divide the dough into 6 pieces, each about 9.5 oz (270 g). Just cut and scrape away a 9.5-oz (270-g) piece from the dough, transferring the piece to a scale to weigh it (at least weigh the first piece so you can eyeball the rest). The dough will be loose, wet, and sticky—especially if you use some fresh-milled whole grain flour. Handle it with authority. Scoop it up with the bench knife and scrape it off with your fingers. Transfer the 9.5-oz (270-g) piece to a 2-foot-square (61 cm) area on the dry work surface. Then scrape and shape the dough into a ball. To do that, position the bench knife at one edge of the dough and then push the dough in the opposite direction, scraping and pushing the dough at least a foot or two away from you. It will swell up and form an oval shape. Remove the bench knife (using your fingers if necessary), reposition the knife on the pointy end of the dough, and proceed to push the dough in a direction perpendicular to the first, tilting the knife down a bit and scraping the dough with some pressure, swelling up the dough again. Repeat this process of pushing, repositioning, and scraping the dough in opposite directions all around the 2-foot (61 cm) square until the dough goes from a loose oval shape to a more organized round one. It’s almost like shaping a water balloon, so it’s a somewhat delicate operation. You want to gently squeeze all around the balloon to swell it up into a round ball, always increasing the surface tension. When the dough becomes a somewhat organized round ball, use the bench knife to quickly transfer the dough ball to a proofing box or a wide tray with a tight-fitting lid. It will flatten out quite a bit, so leave room for the other dough balls. Repeat the process with each lump of dough, transferring the dough balls to the container and leaving several inches between each—you don’t want the balls reconnecting themselves. I don’t dust them with flour. They get plenty of flour when you shape them. Cover tightly and refrigerate for 24 hours. Or leave at room temperature for up to 12 hours.
Step 6
Day 3: Use or chill the dough. After the dough balls have rested, use them immediately or chill them for up to 36 hours after that (until the evening of Day 4). Let the dough rest at room temperature for 1 hour before using to take the chill off. That will make the dough easier to shape.