Mushroom and Cabbage Pan-Fried Buns (Sheng Jian Bao)
5.0
(6)
Your folders
Your folders
Prep Time: 1 hours, 20 minutes
Cook Time: 18 minutes
Total: 2 hours, 30 minutes
Servings: 18
Author : King Arthur Baking
Ingredients
Export 19 ingredients for grocery delivery
Instructions
Step 1
To make the dough: In a medium bowl or the bowl of a stand mixer, combine all the dough ingredients and knead — by hand or with a mixer — to make a soft, elastic dough. It will take about 8 to 10 minutes on medium speed in a stand mixer and a bit longer if kneading by hand.
Step 2
, Place the dough in a lightly greased bowl, cover, and let it rise for 60 to 90 minutes, until it's nearly doubled in bulk. While the dough rises, prepare the filling.
Step 3
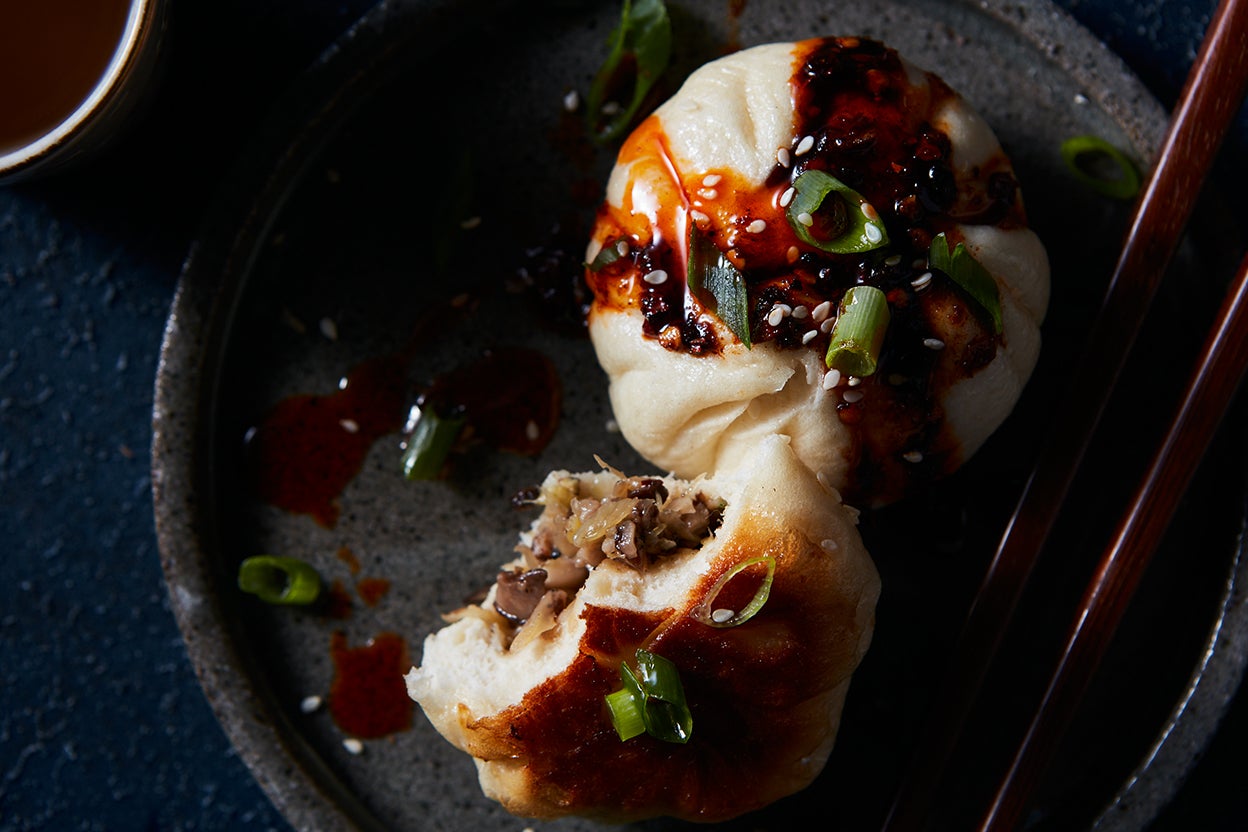
, To make the filling: Place a large skillet over medium heat. When hot, add the oil, ginger, and garlic and cook, stirring frequently, until fragrant, about 30 seconds. Add the mushrooms, cabbage, five-spice powder, salt, and pepper. Cook, stirring occasionally, until the mushrooms and cabbage are soft and any liquid has evaporated, about 5 to 6 minutes.
Step 4
, To the skillet, add the soy sauce, sesame oil, and scallion and stir until combined, about 1 minute. Taste to check seasonings, adding more salt if needed (this filling should be on the salty side to balance the sweetness of the bun).
Step 5
, To shape the buns: After the dough has risen, divide it into 18 pieces (they should be about 36g each). Roll each piece into a ball. Cover with a damp tea towel.
Step 9
, Working with one ball at a time, place it onto a lightly floured surface and flatten using the palm of your hand. Then use a rolling pin to roll the disk into a 3" to 3 1/2" diameter round, making sure the edges are thinner than the middle. (This will make it easier to pleat.) To achieve thin edges, hold the dough in your non-dominant hand, rotating it gradually as you roll out the edges of the circle using a pin in your dominant hand. (A wooden dowel or a small tapered rolling pin is the best tool here.)
Step 13
, Place the dough circle in your palm and put about 2 teaspoons of the filling into the center. (A rounded teaspoon cookie scoop is just about right here.) Pleat the edges together, then twist to secure. Place the bun onto a sheet of parchment and cover with a damp tea towel. Continue with the remaining dough, taking note of the first 9 buns you shaped (you’ll cook these buns first). When all of the buns are shaped, allow them all to rest for 10 minutes.
Step 14
, To cook the buns: Work in two batches to cook the buns, starting with the first 9 buns you shaped. Heat a 10" skillet (well-seasoned cast iron or non-stick will both work) over medium-high. When the pan is hot, reduce the heat to medium, add 1 to 2 tablespoons of the oil (it should be enough to coat the bottom of the pan), and place the first batch of buns into the pan (either flat side or pleated side down). The buns should be spaced slightly apart to give them room to expand.
Step 15
, Cook the buns for about 2 to 3 minutes, rotating the pan for even cooking and lifting the buns to check when the bottoms have turned golden brown. Add 1/4 cup of the water and immediately cover with a lid. Cook for 5 to 6 minutes, until the buns are puffed. Uncover pan. If there is still water in the skillet, cook until it has evaporated. Remove the buns from the pan and repeat with the remaining 9 buns. (Since your pan is already hot, you may need to adjust the heat to avoid too much browning.)
Step 16
, To serve: Top with scallions and sesame seeds. Serve with chili oil, chili crisp, or black vinegar.
Step 17
, Storage information: These buns are best eaten immediately. Cooked buns can be stored in an airtight container in the fridge for up to 4 days or in the freezer for up to 3 months. To reheat, add the buns to a pan with a small amount of oil until re-crisped, then add water, cover, and steam until the buns are warmed through and the dough is puffy again.