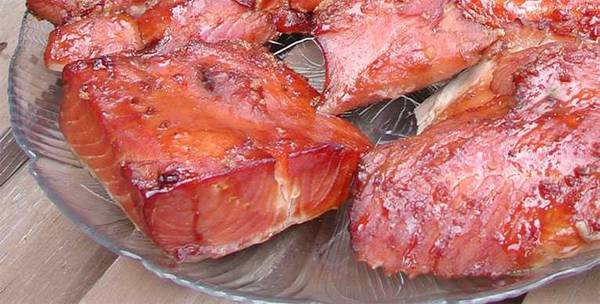
Native American Style Hot Smoked Salmon Recipe
4.6
(263)
Your folders
Your folders
Prep Time: 3 minutes
Cook Time: 75 minutes
Servings: 16

Ingredients
Export 1 ingredients for grocery delivery
Instructions
Step 1
Prep the fish. Remove the scales but leave the skin on. Don't worry if there are a few scales left on the skin. You will be removing the skin eventually. Run your fingers over the flesh of the fish and make sure all the pin bones are gone. If not, drape the fish over the edge of a bowl so the bones stick out, and yank them with tweezers or needle nose pliers. Sometimes the lining of the belly of the fish has a milky membrane on it. With a sharp filleting knife, remove it. It will get leathery when you cook. Cut the meat into pieces about 3" wide.
Step 2
Brine it. Chose your brining container carefully. It needs to be food grade, large enough to hold the meat and the brine with the meat submerged, and it cannot be made of aluminum, copper, or cast iron, all of which can react with the salt. Do not use garbage bags or a garbage can or a bucket from Home Depot. They are not food grade. Do not use a styrofoam cooler. It might give the meat an off flavor and you'll never get the cooler clean when you're done. Zipper bags work fine. For large cuts, get Reynolds Brining Bags, Ziploc XL, and XXL bags.
Step 3
You can make the brine days in advance and keep it chilled if you wish. Start by adding 1/2 cup (117ml) hot water to a one cup measuring cup. Then pour in salt, any salt, until the water line reaches 3/4 cup (177ml). The water will swallow up almost exactly 1/4 pound regardless of whether you use table salt, kosher salt, pickling salt, or sea salt. The volume of these salts may differ, but their water displacement will be the same! Pour the slurry into your very clean non-reactive brining container that's large enough to hold the meat and a bit more than 1/2 gallon of water. Then add 1/2 gallon (1.9 L) of cold water. Then add the sugar, garlic, and black pepper. Stir until most of the sugar is dissolved. The garlic and pepper will not dissolve much at first.
Step 4
If you are using a pan, submerge the fish skin side up in the brine and refrigerate. Make sure the meat part is thoroughly submerged. If you need to, hold it under with a plate with a weight on top. Cover with plastic wrap not aluminum foil. Gently stir the container occasionally to make sure all parts of the fish come into contact with the brine.
Step 5
If you brine in a zipper bag, periodically grab the bag and squish things around and flip the meat so the brine can get in from all sides. Place the bag in a pan to catch leaks.
Step 6
The brining time will vary depending on how thick the fillets are. Brine 2" (5 cm) thick fillets for about 2 hours in the fridge, 1" (2.5cm) fillets for 1 hour. Drain the fish and discard the brine. Then rinse the fish to remove excess surface salt. Pat dry with paper towels. Some folks like to put the fillets in the fridge for an up to 3 hours so that a shiny tacky film or pellicle will form on the surface. It is said to help retain moisture and smoke. I have tried it with and without pellicle and see no quality difference. But a few hours of resting will help the brine to distribute itself evenly through the flesh.
Step 7
Cut pieces of a paper bag or plain white paper about the same size as each piece of fish and place the fish on the paper, skin side down. Don't use foil or parchment paper. We want the fish to stick to the paper to help us remove the skin, and it will not stick to foil or parchment. If you are glazing, sprinkle some brown sugar on top of the fillets or paint them with maple syrup.
Step 8
Fire up. Set up your grill in a 2-zone configuration or get the smoker started, and get the indirect zone up to about 225°F (107°C).
Step 9
Cook. Place the fish on a rack on your grill or smoker so the pieces are not touching each other. Add the smoking wood if you're using a grill. Start spot checking the meat temps after about 30 minutes. As the meat approaches doneness, droplets of milky liquid will often come to the surface. Some cooks call them boogers, but they are actually a protein liquid called albumin from within the muscle fibers. It just looks gross, but it's OK. You can wipe it off or brush it off with a wet brush if you want. Remove the meat when it is at about 135°F (57°C) internal. No more than 140°F (60°C). Total cooking time will be about 60 minutes depending on the actual temperature of your oven and the thickness of the meat.
Step 10
Cool. Remove the fillets and let them cool for about 15 minutes, until you can handle them. Then peel off the paper and the skins should come right off with it. While you are looking at the skin side, if there is any dark brown flesh, scrape it off with a serrated steak knife and discard it. It can taste muddy.