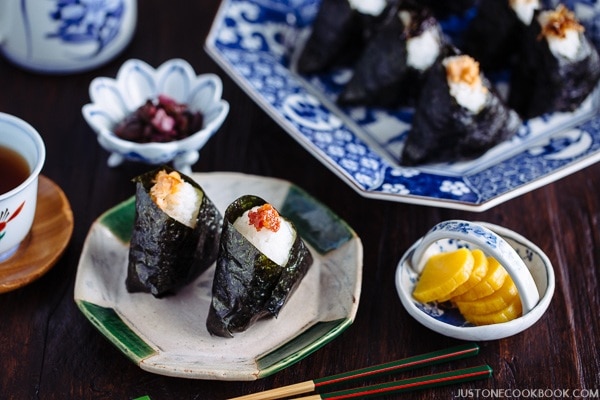
Onigiri (Japanese Rice Balls)
4.7
(47)
Your folders
Your folders
Prep Time: 30 minutes
Cook Time: 30 minutes
Total: 60 minutes
Servings: 12
Author : Namiko Chen
Ingredients
Export 13 ingredients for grocery delivery
Instructions
Step 1
Gather all the ingredients.
Step 2
Put the rice in a large bowl and gently wash the rice in a circular motion and discard the water. Repeat this process about 3-4 times.
Step 3
Let the rice soak in water for 30 minutes. Transfer the rice into a sieve and drain completely, at least 15 minutes.
Step 4
Combine the rice and water in a heavy-bottom pot (See Notes). Cover the lid and bring it to a boil over medium heat.
Step 5
Once water is boiling, turn the heat to the lowest setting and continue to cook covered for 12 to 13 minutes, or until the water is completely absorbed. At 12-13 minute mark, take a quick peek and if you see there is any water left, close the lid and continue cooking for another minute or so.
Step 6
Remove the pot (with the lid on) from the heat and let it steam for another 10 minutes. Then transfer the rice to a large plate (I use Sushi Oke). Fluff the rice with a rice scooper. Let the cooked rice cool a little bit until you can hold rice without burning your hands. However, do not let the rice completely cool down.
Step 7
While rice is being soaked and drained (45 minutes), prepare the onigiri fillings.Salted salmon filling: Sprinkle kosher salt on both sides of the salmon fillet. Bake at 400 ºF (200 ºC) degrees in a toaster oven or oven for 25 minutes.
Step 8
Break the cooked salmon into flakes and set aside.
Step 9
Umeboshi filling: Place umeboshi (Japanese pickled plums) on a 10” x 10” sheet of plastic wrap. Fold in half and squeeze the seed out from each umeboshi. Discard the seeds and keep the umeboshi flesh.
Step 10
Okaka filling: Put katsuobushi (dried bonito flakes) in a bowl and add 2 Tbsp soy sauce. Mix to combine. Katsuobushi should be moisten but soy sauce should not be left at the bottom of the bowl.
Step 11
Tuna mayo filling: Put drained canned tuna in a bowl and add 2 Tbsp Japanese mayonnaise and ½ Tbsp soy sauce. Mix to combine.
Step 12
Seasoned kombu filling: Put the purchased seasoned kombu in a bowl for easy access later.
Step 13
Cut the nori sheets in thirds (1/3).
Step 14
First, wet both of your hands with water in order to prevent the rice from sticking to your hands.
Step 15
Then put some salt in your hands and rub to spread all around your palms. How much salt? I dip 3 finger tips in kosher salt shown in the picture below. If you are using table salt, use half amount as it’s saltier than kosher salt.
Step 16
Scoop out a handful of warm rice (about 1/3 cup) into one hand. Create a small well (indentation) in the center of the rice. Put one kind of fillings (about 1-2 tsp.) inside. Then mold the rice with your hands around the well to cover your filling completely.
Step 17
Press the rice around the filling to gently form the rice into a triangle. I use three fingers (thumb, index finger, middle finger) to make a triangle corner. Your hands should be just firm enough so the onigiri doesn't fall apart. You don't want to squeeze the rice too tight.
Step 18
Wrap the onigiri with nori (seaweed).
Step 19
Place a little bit of each filling on top of onigiri so we know which kind it is.
Step 20
If you do not want to touch the rice at all, you can place a piece of plastic wrap in a rice bowl (or any small bowl) and put the rice on top. Sprinkle some kosher salt (remember, salt is used to preserve the rice for a long time here).
Step 21
Pull the plastic wrap corners and twist a few times.
Step 22
Form into a triangle shape with the same manner as I described above.