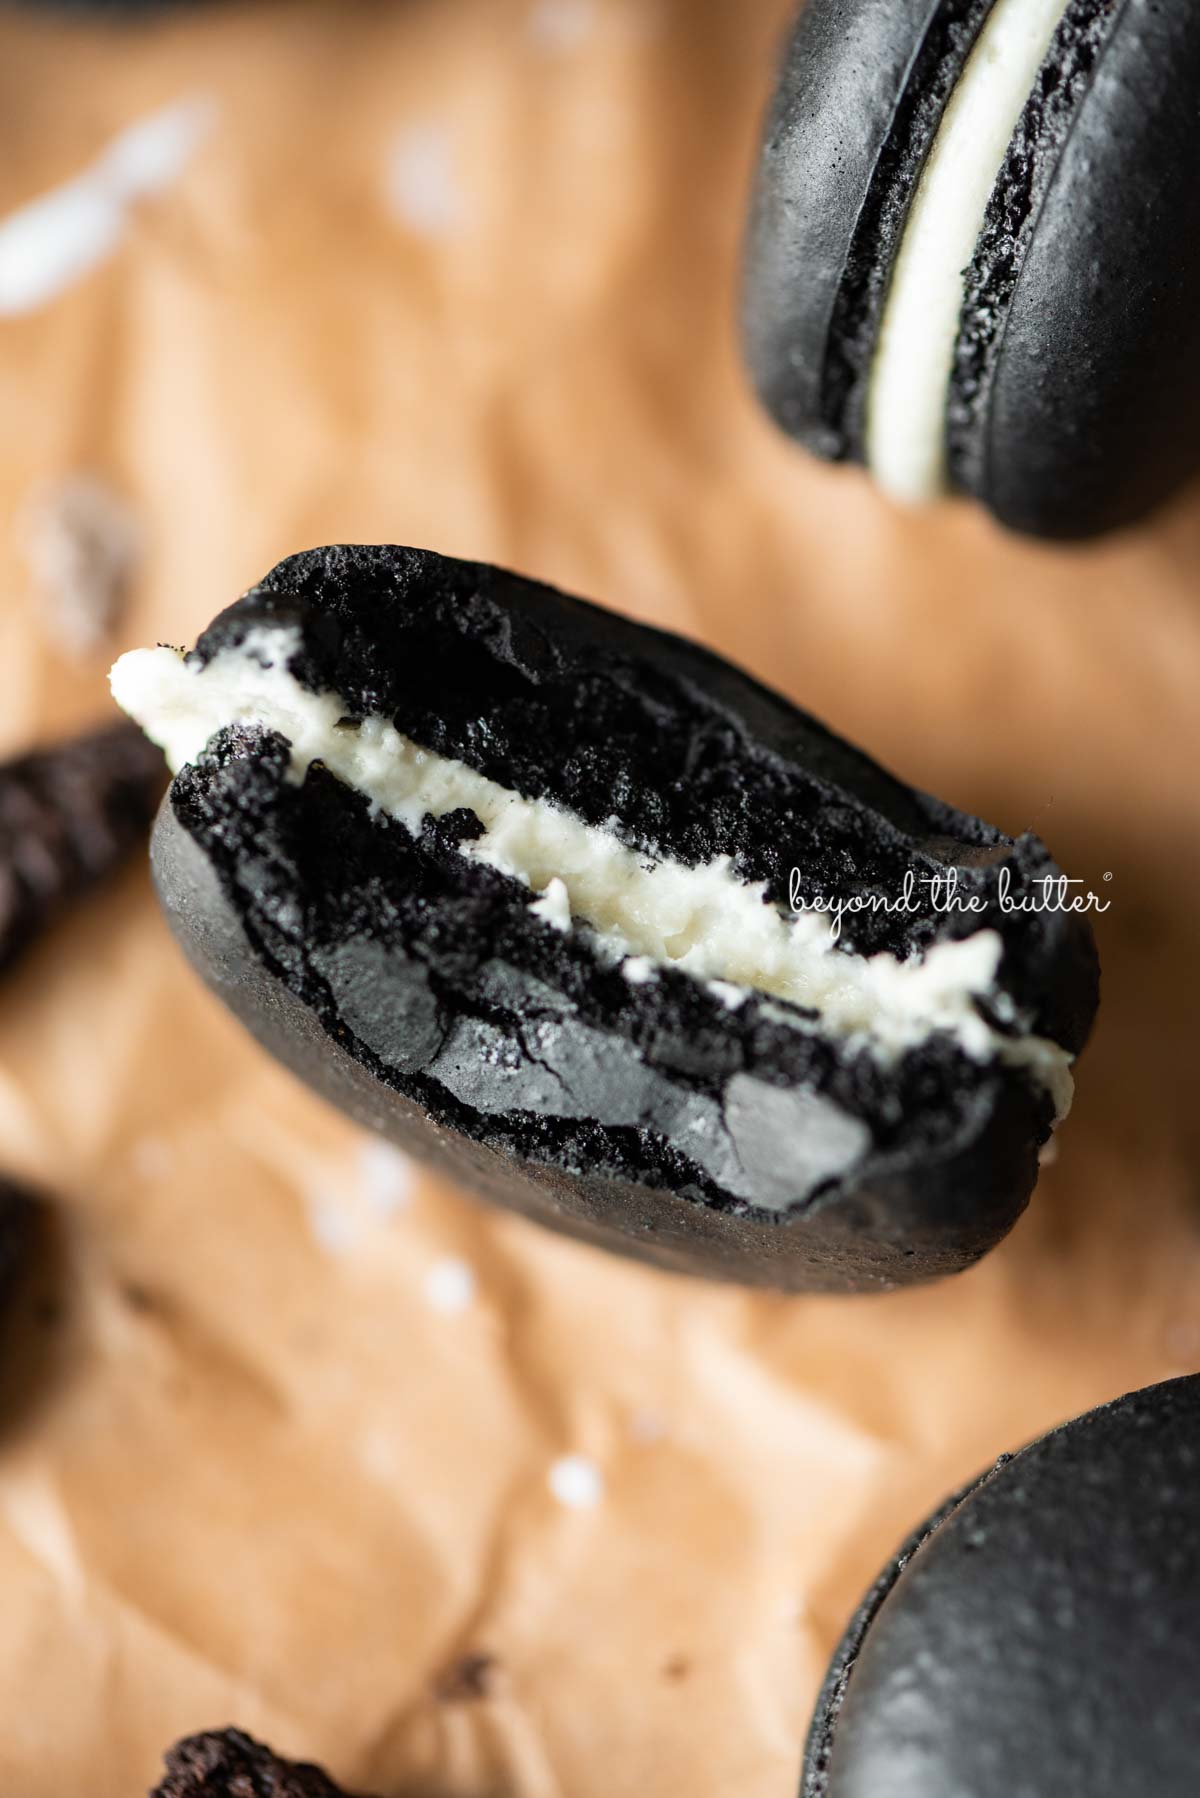
Oreo Macarons
Your folders
Your folders
Prep Time: 30 minutes
Cook Time: 16 minutes
Total: 91 minutes
Servings: 21
Cost: $1.95 /serving
Author : Jennifer
Ingredients
Export 7 ingredients for grocery delivery
Instructions
Step 1
Prep your work area by cleaning your mixing bowls, whisks, and any other baking tools that will be used for making the macarons. Use a little white vinegar on a paper towel will help remove any grease left behind.
Step 2
Line 2 baking sheets with either macaron silicone mats (my preference) or parchment paper with circles drawn on the opposite side. Fit a large piping bag with a round decorating tip (like the Wilton 2A). Set to the side.
Step 3
In a medium bowl, sift the almond flour, powdered sugar, and black cocoa powder together twice, removing any bits left behind from the sifter. Then whisk to fully blend together (or use a food processor).
Step 4
Using a double boiler, heat the granulated sugar and egg whites over 1 - 1.5 inches of simmering water, continually whisking until the sugar has fully dissolved and the mixture is frothy in appearance (about 5-6 minutes). Test the mixture by rubbing a little of it between your pointer finger and thumb to make sure all sugar granules have dissolved.
Step 5
Carefully transfer the mixture to a mixing bowl of a stand mixer fitted with the whisk attachment and set the speed to high. When the mixture initially reaches the soft peaks stage, add in the salt and vanilla extract. Continue to mix at high speed right until stiff peaks form (about 10 minutes). The meringue should look glossy and be able to hold its shape when you invert the whisk attachment.
Step 6
Using a spatula, gently fold in the sifted dry ingredients with the stiff meringue. As you continue to fold, press the batter against the side of the bowl. Midway through folding, add anywhere from 4-10 drops of black gel food coloring (optional). Keep folding until the batter is the consistency of lava. If the batter falls easily off the spatula in ribbons (or can make a figure 8 pattern) with no breaking, it's time to pipe! If not, fold 2-3 more times, then test again.
Step 7
When ready, carefully scoop the batter into the piping bag. Holding your bag perpendicular to the silicone mat (or parchment paper), pipe out a circles close to 1.5 inches in diameter. When you tap/bang the baking sheets on the counter after piping they should spread out just a little.
Step 8
Gently bang your baking sheets on the counter 3-4 times to release the air bubbles. Use a toothpick or needle scriber tool to carefully remove them.
Step 9
Set the trays of oreo macaron shells to the side, somewhere cool and dry, where they can rest/dry for 35-45 minutes. The oreo macarons are ready to be baked when the tops are dry to the touch and no longer sticky. Use a ceiling fan to help dry them, if you have one. Drying times will vary based on where you live. The higher the humidity, the longer the rest time.
Step 10
When you're close to the end of the resting time, preheat your oven to 300ºF and place your oven rack on the 2nd level mark (just above the center).
Step 11
Bake only 1 tray of the oreo macarons at a time for 16 minutes at 300ºF, rotating the baking sheet at the 8-minute mark. Do not skip this step!
Step 12
When done, remove from the oven and allow to cool completely before trying to remove them from the mats. If your shells are still a little sticky after this time frame, you can pop them in the freezer for 15-20 minutes.
Step 13
If not making/piping the frosting until the next day, keep the macaron shells stored in an airtight container either in the refrigerator or freezer.
Step 14
Using your hand mixer or stand mixer fitted with a paddle attachment, mix together the unsalted butter, vegetable shortening, sifted powdered sugar, and vanilla extract on low speed until fully blended and smooth. Use a spatula to scrape down the sides of the bowl as needed.
Step 15
Fit a medium-size piping bag with a coupler and open or round decorating tip (like the Wilton 10), then fill the bag with the frosting.
Step 16
In a circular motion, starting from the center, pipe the vanilla cream filling onto a macaron shell, then gently press another macaron shell on top. Repeat until you have used all the macaron shells. Store any leftover filling in the refrigerator for up to 1 week. It will need to be brought to room temperature for piping.
Step 17
Keep the oreo macarons stored in an airtight container in the refrigerator. Macarons taste their very best after 2-3 days of sitting in the refrigerator. They taste like a thicker, fancier version of the classic Oreo. YUM!