Pressure Canning Potatoes
4.5
(2)
Your folders
Your folders
Prep Time: 30 minutes
Cook Time: 35 minutes
Servings: 12
Author : Grow a Good Life
Ingredients
Export 1 ingredients for grocery delivery
Instructions
Step 1
Clean your jars and lids with warm, soapy water and rinse well. Set aside until you are ready to use them.
Step 2
Place the canning rack into the pressure canner, set the jars in the canner, add water to the jars and fill canner to submerge the jars. Cover the canner, bring it to a simmer (180˚F) for 10 minutes, and keep warm.
Step 3
Fill a large pot about half way with cold water.
Step 4
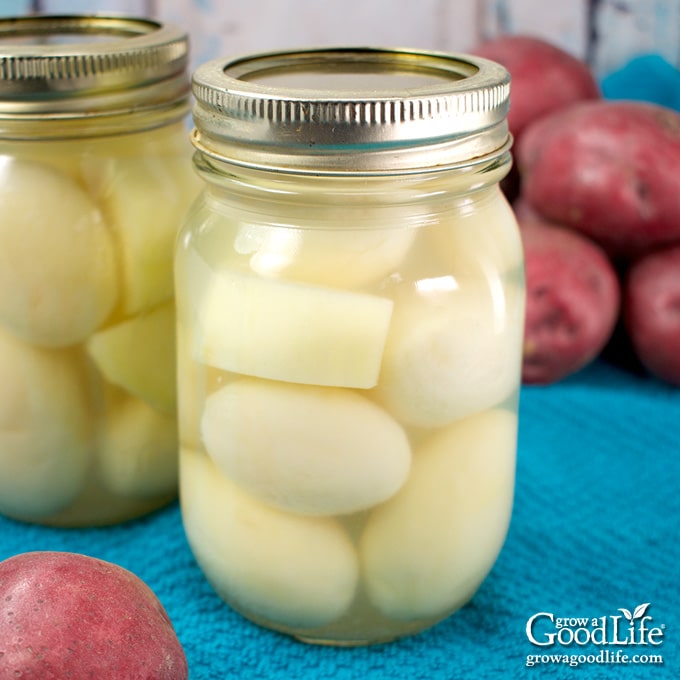
Wash, peel the potatoes, and cut into 2-inch pieces. Leave small potatoes whole if they are about 2-inches in diameter. Trim off eyes, bruises, and any green spots.
Step 5
As you work, drop the cut potatoes into the pot of cold water. This will help remove some of the surface starch and prevent the potatoes from discoloring from exposure to air.
Step 6
Drain, and rinse the potatoes with cold water. Fill the pot, par-boil the potatoes for 10 minutes, reduce the heat, and keep them warm until you are ready to fill the jars.
Step 7
While the potatoes are cooking, bring a second large pot of water to a boil over high heat, reduce the heat to a simmer (180˚F), and keep hot until you are ready to can. This is the water you will be using to fill your jars. Do not use the water that the potatoes were cooked in. There is too much starch to can properly.
Step 8
Spread a kitchen towel on the counter. Using your jar lifter to remove one jar from the canner, drain, and place on the towel. Keep the remaining jars in the canner, so they stay hot.
Step 9
Use tongs or a slotted spoon to remove the potatoes from the pot and fill the jar while maintaining about a 1 1/2 inch headspace.
Step 10
If using salt, add up to 1/2 teaspoon to each pint jar, and up to 1 teaspoon to each quart (salt is optional but adds a lot of flavor).
Step 11
Add fresh hot water to the jar, leaving a 1-inch headspace.
Step 12
Run your bubble popper through the jar to release any bubbles that may be caught in between the potatoes, and wipe the rim with a damp towel.
Step 13
Center a lid on the jar, and screw on band until it is fingertip tight. Use the jar lifter to place the jar back on the rack in the canner, and repeat with the rest of the jars until the canner is filled, or you run out of potatoes.
Step 14
Once the jars are all in canner, adjust the water level per your pressure canner's instructions. If adding water, use the hot water from your large pot.
Step 15
Secure the lid, leave the vent open, adjust the heat to medium-high, and bring the canner to a boil. Allow the pressure canner to vent for 10 minutes, then place weight on the vent. Follow the directions for your pressure canner.
Step 16
Once the canner has reached the correct pressure (10 pounds of pressure for weighted gauge pressure canner, and 11 pounds for dial gauge canners.), set a timer, and process pints for 35 minutes, and quarts for 40 minutes at altitudes of less than 1,000 ft. Adjust for your altitude if necessary (see note below). Regulate the heat as needed to maintain a steady pressure.
Step 17
When processing time is complete, turn off the heat and let the pressure canner cool and depressurize. The time will depend on your brand and should be between 30 to 60 minutes.
Step 18
When the pressure canner is depressurized, spread a kitchen towel on the counter, remove the weight from the vent pipe or open the petcock, and wait 10 minutes for the jars to adjust to the change in pressure.
Step 19
While wearing pot holders, unlock the cover and remove the lid while tilting it away from you so that steam does not burn your face. Allow another 10 minutes for the jars to adjust to the change in pressure.
Step 20
Use a jar lifter to remove the jars from canner and place on the towel. Keep the jars upright, and don't tighten bands or check the seals yet. The jars will be hot and bubbling. Let the jars sit undisturbed for 12 to 24-hours to cool.
Step 21
Wait until the jars have cooled for at least 12-hours, and then check to be sure jar lids have sealed. Test the seal by pushing on the center of the lid. The lid should not pop up. If the lid flexes up and down, it did not seal. Refrigerate the jar and use up within a few days.
Step 22
Remove the screw on bands and wash the jars. Label, date, store the jars in a cool, dark place (50 to 70 degrees F). Use within a year for the best quality. Yields 9 pints or 7 quarts.