Scallop neck t-shirt tutorialScallop neck t-shirt tutorial
Your folders
Your folders
Total: 80
Servings: 11
Ingredients
Export 4 ingredients for grocery delivery
Instructions
Step 1
Use a small circular object to trace the scallop pattern onto your fabric scraps and the Heat N Bond.
Step 2
Carefully cut the Heat N Bond along the traced lines using your craft scissors.
Step 3
Fuse onto the circles traced onto fabric.
Step 4
Remove the backing paper.
Step 5
Cut out the fabric circles using your pinking shears.
Step 6
Fold the circles in half and cut along the fold line.
Step 7
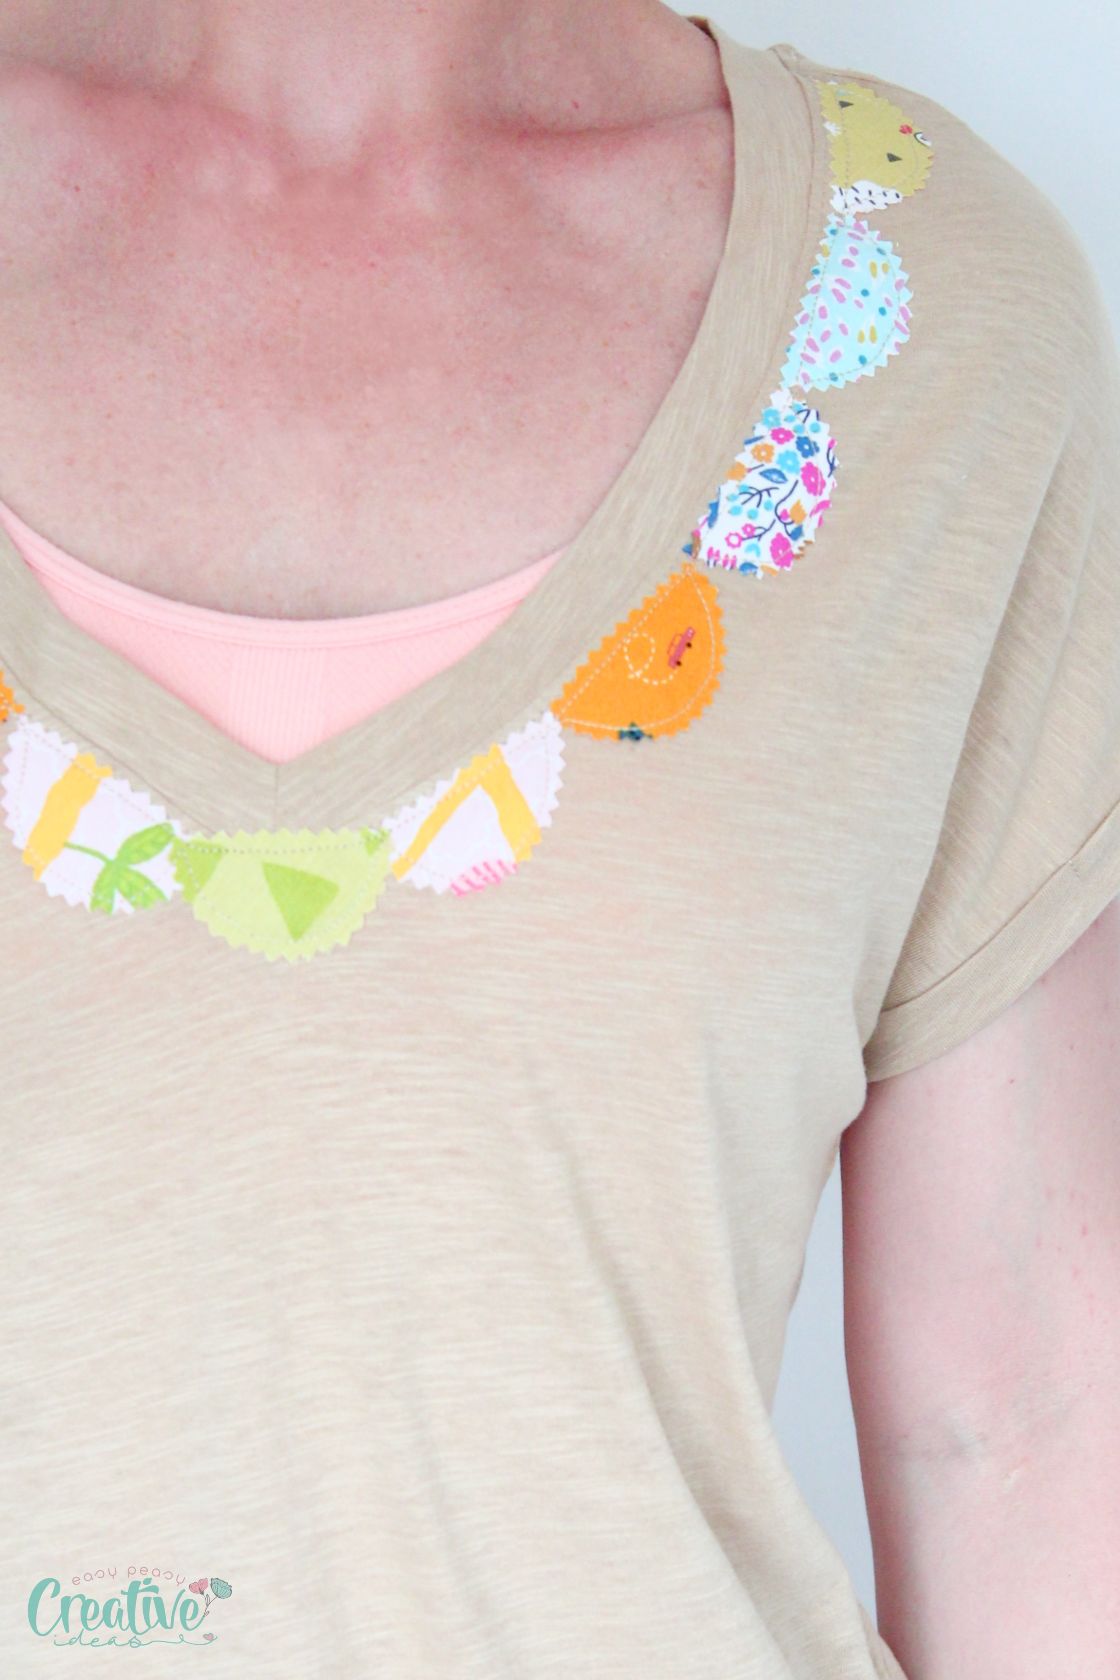
Arrange the scallops to the neckline and move them around until you are happy with the layout. You can start in the middle on the neckline or at the shoulders. Once you are satisfied with the scallop placement, start ironing them onto your t-shirt.
Step 8
Using a matching thread color, carefully sew around each scallop, leaving a 1/8 inch seam allowance.
Step 9
Use a small circular object to trace the scallop pattern onto your fabric scraps and the Heat N Bond.
Step 10
Carefully cut the Heat N Bond along the traced lines using your craft scissors.
Step 11
Fuse onto the circles traced onto fabric.
Step 12
Remove the backing paper.
Step 13
Cut out the fabric circles using your pinking shears.
Step 14
Fold the circles in half and cut along the fold line.
Step 15
Arrange the scallops to the neckline and move them around until you are happy with the layout. You can start in the middle on the neckline or at the shoulders. Once you are satisfied with the scallop placement, start ironing them onto your t-shirt.
Step 16
Using a matching thread color, carefully sew around each scallop, leaving a 1/8 inch seam allowance.