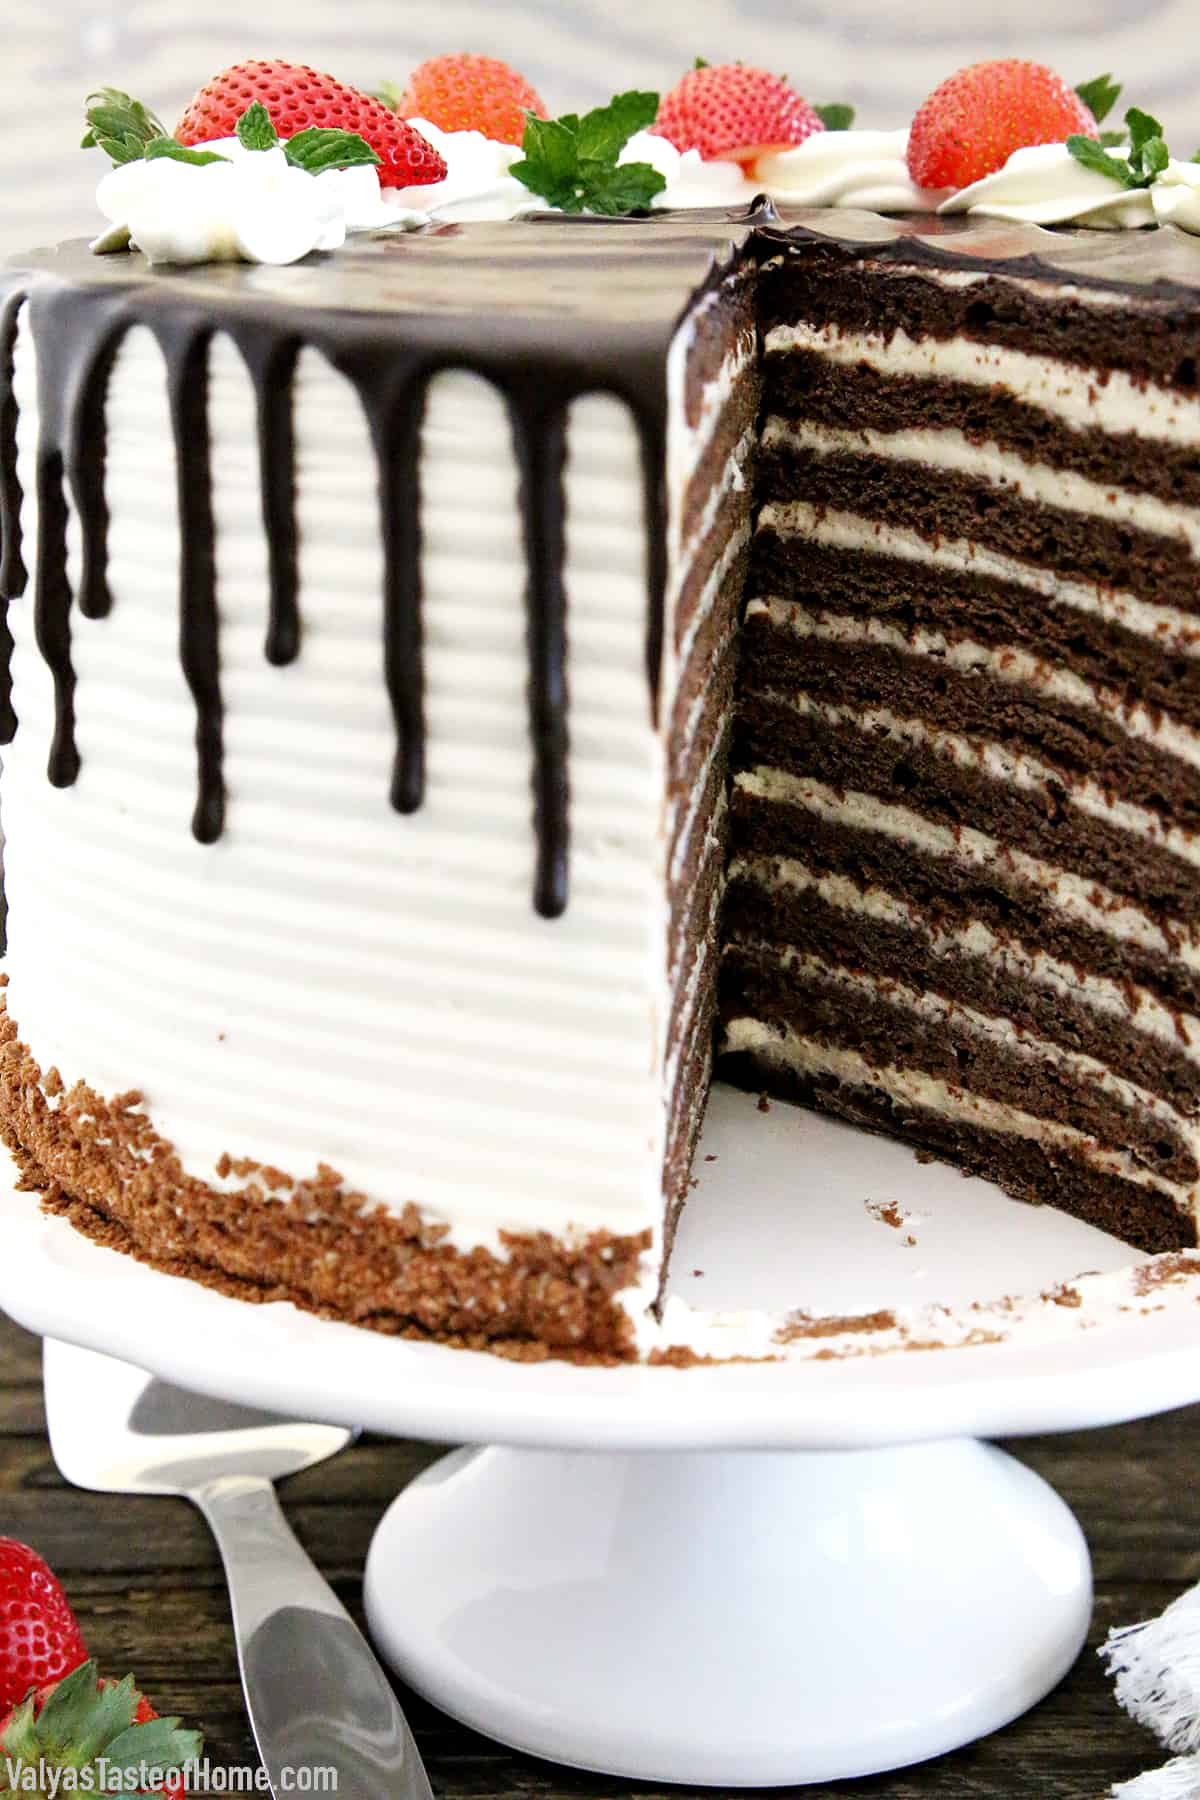
The Best Chocolate Spartak Cake
4.8
(10)
Your folders
Your folders
Prep Time: 135 minutes
Cook Time: 40 minutes
Total: 415 minutes
Servings: 12
Author : Valya's Taste of Home
Ingredients
Export 14 ingredients for grocery delivery
Instructions
Step 1
First things first, measure out and sift dry ingredients: flour, cocoa powder, baking soda, baking powder, salt, and set aside until ready for use.
Step 2
Prepare a water bath by pouring water into a saucepan that perfectly fits under a glass mixing bowl and bring it to a boil.
Step 3
While the water is coming to a boil beat eggs and sugar on high for 5 minutes or until light, fluffy and pale yellow in color.
Step 4
Remove the mixer bowl from the stand mixer and add milk, vanilla (not pictured), cubed and softened butter into the mixer bowl with the egg mixture.
Step 5
Reduce the water bath heat to med/high (to prevent the water splashing out) and place the mixer bowl over the saucepan with boiling/steaming water, making sure that the bowl doesn't touch the water.
Step 6
Cook the mixture for 8 minutes, stirring constantly, using a silicone spatula (important for easier stirring). The consistency will thin out at first (which is normal), then will start foaming and doubling in size.
Step 7
Remove the mixer bowl from the heat and immediately add in the sifted flour/cocoa mixture. Using a firm silicone spatula, mix the hot foamy wet mixture with the dry mixture from the bottom of the bowl upward until well combined, with no dry ingredients left behind. It should have a smooth and stretchy consistency.
Step 8
Set the dough aside and cool to room temperature for about 30 minutes or so before working with it. The dough will thicken as it cools.
Step 9
Using a silicone spatula, scoop and weigh out 8 oz. of the dough (exact measuring is helpful for even layers). Roll the dough around in flour to coat it and place it onto a parchment paper dusted with more flour. Flatten it into a disk.
Step 10
Using a rolling pin, roll the dough out flat, working from the center outward. Flip the disk over from the bottom side up (just like you would pizza dough). Dust the paper with additional flour if the dough gets sticky, and roll until it's spread out 1/4 inch beyond your preferred cutting form.
Step 11
Place the round disk (I use the bottom disk of a springform pan) over the rolled out dough. Then, using a pizza cutter, cut along the perimeter of the form (if the dough gets stuck to the pizza cutter dusted with more flour).
Step 12
NOTE: I use an 8" disk to cut out 8 oz. of rolled out dough for tall cakes (the layers will be thicker) and a 10" disk to cut out 8 oz. of rolled out dough for shorter cakes. The look is up to you, however thick or thin you like your layers. You can even make a 12" wide in diameter using the same amount (8 oz.) of dough.I use a large sheet (16 x of parchment paper. Roll and bake 2 layers at a time.
Step 13
After 2 layers of dough is ready to bake, transfer the parchment paper by sliding it onto this cookie baking sheet (it works best).
Step 14
Bake in a preheated oven to 350 F for 8 minutes. While the cake layers are baking, repeat the same rolling instructions.
Step 15
Remove from the oven, slide the parchment paper with baked layers onto the countertop for them to cool for 5 minutes before transferring them onto a cooling rack. Immediately place the second set of rolled-out cake layers into the oven and repeat the same baking instructions.
Step 16
Using a cake spatula, separate the cake layer from the parchment paper by running it under the layer and gently. Transfer the layers onto cooling racks to cool completely before frosting. The layers will be pretty soft after baking be pretty gentle not to chip or break them during the transfer process.
Step 17
NOTE: I use 3 sheets of parchment paper and rotate them. While the first set of layers are cooling down the second is baking and on the third sheet, I'm rolling out the next cake layers. I repeat these rotation steps until all the cake layers are baked.
Step 18
While the chocolate cake layers are cooling, make the frosting.
Step 19
Start by beating softened butter until creamy and smooth, about a minute or so. Add softened cream cheese and beat again until both are well combined for another minute. Scrape down the cream off the sides of the mixer bowl halfway through.
Step 20
Next, add condensed milk and beat again for a minute or so, scraping down the cream off the sides of the mixer bowl halfway through mixing.
Step 21
Then add vanilla and salt mix for another minute.
Step 22
Finally, add cold heavy cream. Start beating the cream slowly on low, then gradually increase the mixing speed to medium. Again, scraping down the cream multiple times to ensure all the ingredients are well incorporated.
Step 23
As the heavy whipping cream gets combined with the buttercream it will liquify more. The frosting will thicken during the mixing process. Do not overbeat the frosting! As soon as it starts to hold its shape the frosting is ready.
Step 24
Place the first chocolate cake layer onto your favorite cake stand (2" wider than the cake layers). Using a 1/2 cup ice cream scoop, scoop 3 scoops (ha-ha, tongue twister) of frosting and spread it out evenly over the cake layer.
Step 25
Place the second chocolate cake layer over the frosting and repeat the same scooping, spreading instructions until you're done frosting all the cake layers.
Step 26
Using the remaining cream, frost the sides and the top of the cake.
Step 27
Warning: since this cake is almost 6' tall and the frosting is not very thick you need to frost the cake carefully for the layers to stay in place and not slide off or lean.
Step 28
As soon as you're done frosting the cake, gently transfer the cake into the fridge for the buttercream frosting to set/harden. Chill for about 4 hours or overnight (my preference).
Step 29
Break a chocolate bar into smaller pieces and place them in a glass bowl. Add milk and place it over a saucepan with 1" of water.
Step 30
Place the saucepan on a stovetop burner turned to high and bring the water to a boil.
Step 31
Reduce the heat to low and mix the milk with the chocolate, stirring frequently, until it becomes smooth in texture with no lumps.
Step 32
Carefully remove the bowl from the saucepan and set aside for the ganache to cool to room temperature.
Step 33
If the ganache gets thickened too much you can simply soften it with warm milk to the desired dripping consistency.
Step 34
Beat cold heavy cream with powdered sugar just until thickens. Do not overbeat otherwise you will end up with butter.
Step 35
If you wish to crumb the cake instead of decorating, simply roll out the dough of the last chocolate cake layer very thinly and bake it for 15 minutes. The layer will dry out and be great to crush.
Step 36
Spread out the whipping cream frosting over the sides of the cake evenly. Using a cake icing smoother, engrave the design on the sides of the cake.
Step 37
NOTE: I prefer to place the cake into the freezer for a bit before decorating with chocolate ganache, it helps the ganache to stick to the whipping cream frosting faster.
Step 38
Transfer half of the ganache into the ganache bottle and make drips all around the cake. Then pour the rest of the ganache on top of the cake. Using a regular cake spatula, make the swirly design on top of the cake.
Step 39
Pipe some roses or any desired design, place fresh strawberries over the roses, garnish with mint leaves and that's it!
Step 40
Chill the cake for an hour or so for the outer cake frosting to set/harden.
Step 41
If you like to see nice and clean slices of cake as I do, it is important to know a few tips that will deliver that satisfying look for you. Slicing the cake with a warmed clean knife will turn out each and every slice of the cake clean and beautiful.
Step 42
Place a long knife into a tall cup filled with hot water for 20 seconds or so. Remove the knife from the water and dry it using a paper towel. The hot knife will melt away stickiness and cleanly slice through the layers of the cake if you cut only in one downward direction, and pull the knife out at the base of the cake.
Step 43
Repeat the same instruction each time you make a slice and you’ve got a drool-worthy presentation with each slice of this deliciousness you worked so hard on. Happy slicing and eating!
Step 44
Enjoy with hot cup of tea or homemade latte.