Tutorial: How To Make A Canvas Log Carrier
Your folders
Your folders
Servings: 2

Ingredients
Export 3 ingredients for grocery delivery
Instructions
Step 1
Cut the yard of canvas in half. You will have a 36″ x 26″ piece for each carrier (approximately, depending on the initial width of fabric). Or cut to the finished size if making one with 3/4 yard fabric, or cut in half and sew together if using 1/2 yard.
Step 2
Make side hems. Fold over the long 36″ sides 1/4-inch, press with a hot iron, and then turn another 1/4-inch to enclose the raw edge. Press again with iron to hold seams for sewing.
Step 3
Sew close to inside edge of side hem, remembering to bar tack (go back and forth in the first few stitches) at the beginning and the end to lock in the stitching. Repeat sewing for other side hem.
Step 4
Make the casing (pockets) for dowels. Once both side hems are complete, turn over a 1/4-inch on each shorter, unfinished end and press with iron to hold. Measure the width needed for the casing by holding the dowel in place and folding the fabric over the dowel.
Step 5
Measure the amount needed for dowel casing. You want enough room to easily slide the dowel in (and out for cleaning, if needed), but not so much that it will fall out on its own. I found that a 3/4″ hem was sufficient for the 3/8″ sized dowels I used.
Step 6
Remove the dowel and pin the fold at the measurement you have before sewing in place close to the inner edge, creating the pocket for the dowel.
Step 7
Make the Straps. Measure the placement of the webbing for the strap of the carrier. Start in the middle of the canvas, as shown, so that the webbing seam will be on the bottom of the carrier.
Step 8
This is somewhat arbitrary, but I found that placing the webbing at 6″ in from the sides created the best balance. I then distributed the 3 yards of webbing around the canvas, (pinning as I went) making sure that each handle was the same length and ended by folding 1/4″ of the end over the beginning of the webbing to join the ends.
Step 9
Test that both handles are the same by holding them together to be sure they will carry correctly. I did have to adjust sometimes to make them even.
Step 10
Sew the webbing. Start at the top of one side of the webbing and then sew across the webbing just underneath, or right on top of the top edge seam (to leave pocket free for the dowel). Sew back and forth a couple of times to reinforce these top edges, as they will get a lot of pressure when carrying wood.
Step 11
Turn the carrier and sew close to the edge of the webbing all the way to the other side, turn again and go across just like the other end (again reinforcing a couple of times), and then turn and continue up the other side, again close to the edge. Repeat for the other side of the webbing.
Step 12
When you come to where the webbing joins, sew over the joint like normal, but come back when you’re finished and sew across the joining seam to secure.
Step 13
To help the handles lay better where the webbing meets the tops of the holder, sew a little bit of the webbing together for the handle as shown in the photo above. Start about an inch up from where you sewed the handle to the carrier, and fold the webbing in half towards the inside
Step 14
Pin at the 1-inch mark and the 3-inch mark and sew between these pins, tacking back and forth at the beginning and the end to hold the thread.
Step 15
TIP: On the first carrier I made, I folded the entire handle over but found it made the handle too narrow, making it uncomfortable to carry when loaded with wood. The wider webbing is much easier to hold.
Step 16
Cut the dowels. The last step is to cut the dowels to the length needed to fit inside your dowel pocket without showing on either end. I used a miter saw, but a hand saw and miter box would work as well.
Step 17
Insert the dowels and you’re done.
Top similar recipes
Curated for youYour folders
![How To Make A Tutu Skirt [No-Sew Tutorial]-image](https://www.skiptomylou.org/wp-content/uploads/2020/09/tutufacebook.png)
 215 views
How To Make A Tutu Skirt [No-Sew Tu...
skiptomylou.org
Your folders
 239 views
How to Clean Canvas Shoes
onegoodthingbyjillee.com
Your folders
 251 views
How to make Snow White sleeves tuto...
raegunramblings.com
Your folders
 326 views
How to Make a Burlap Wreath Tutoria...
skiptomylou.org
Your folders
 545 views
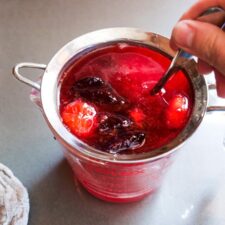
How to make a Shrub!
feastingathome.com
5.0
(2)
24 hours
Your folders
 1206 views
How To Make A Mojito
gimmesomeoven.com
Your folders
 586 views
How to Make a Highball
esquire.com
Your folders
 624 views
How to Make a Milkshake
spendwithpennies.com
5.0
(27)
Your folders
 660 views
How To Make a Frittata
thekitchn.com
4.3
(43)
Your folders
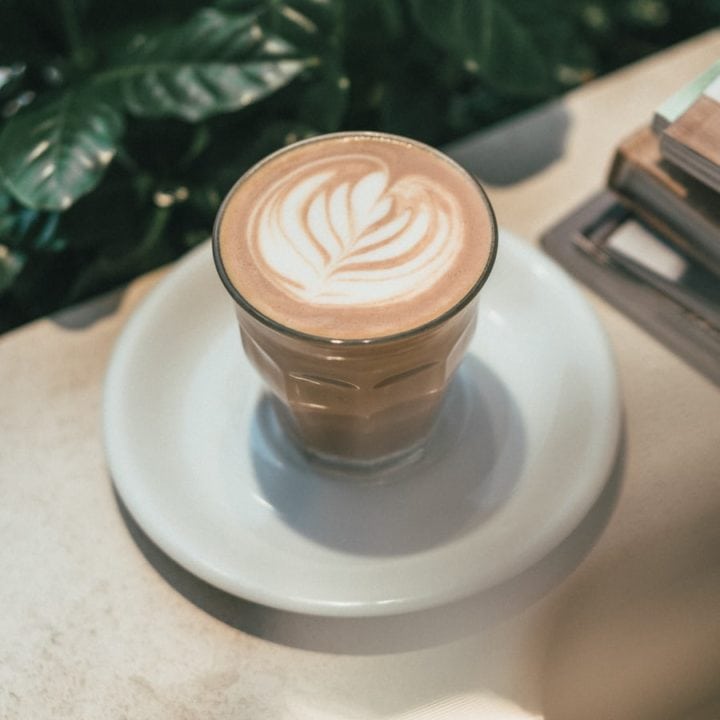 358 views
How To Make A Cortado
roastycoffee.com
4.8
(6)
5 minutes
Your folders
 484 views
How to Make a Smoothie
delish.com
4.6
(44)
Your folders
 496 views
How to make a soufflé
bbc.co.uk
4.0
(11)
30 minutes
Your folders
 315 views
How To Make a Lanyard
blog.treasurie.com
Your folders
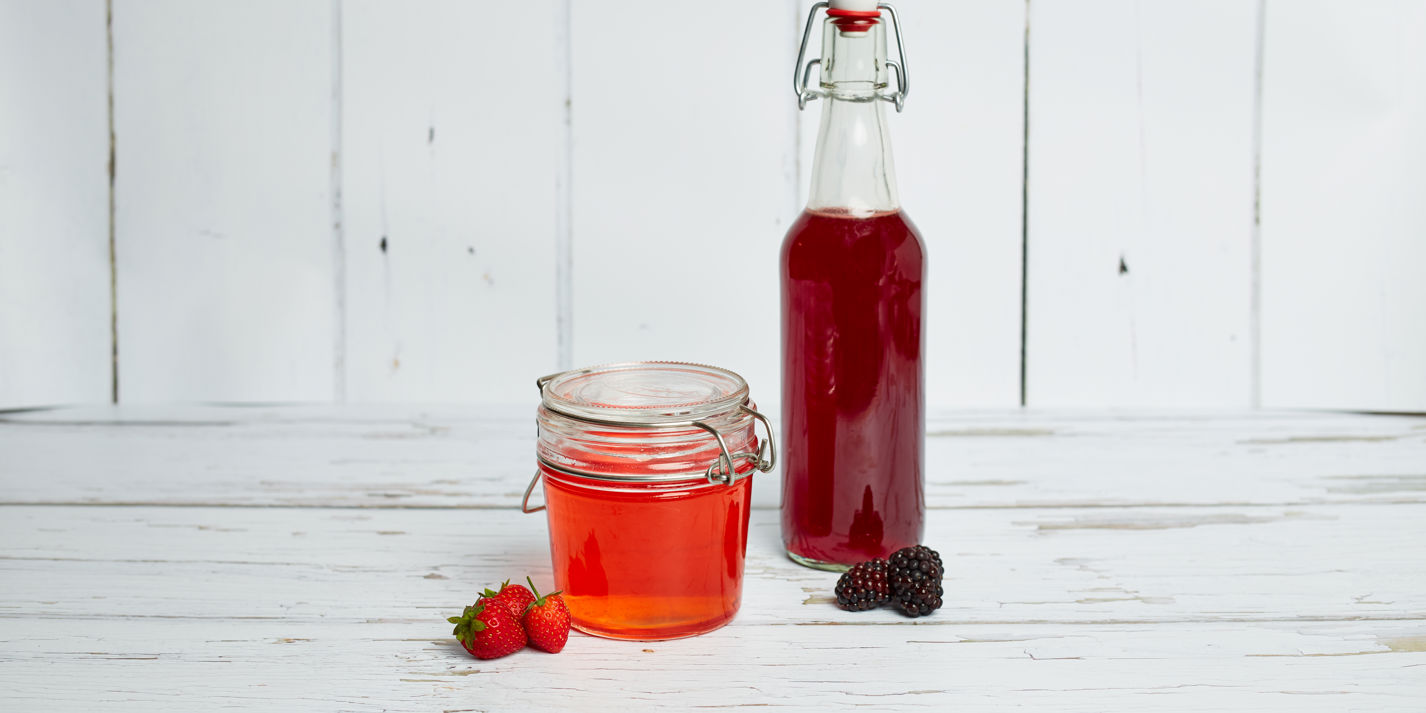 219 views
How to make a shrub
greatbritishchefs.com
Your folders
 358 views
How to Make a Milkshake
preppykitchen.com
5.0
(45)
Your folders
 317 views
How to Make a Milkshake
bakingmischief.com
5.0
(2)
Your folders
 249 views
How to Make a Macchiato
acouplecooks.com
4.0
(4)
Your folders
 472 views
How To Make a Mojito
drinksmixer.com
Your folders
 94 views
How to make a Sidecar
stevethebartender.com.au
2.9
(144)