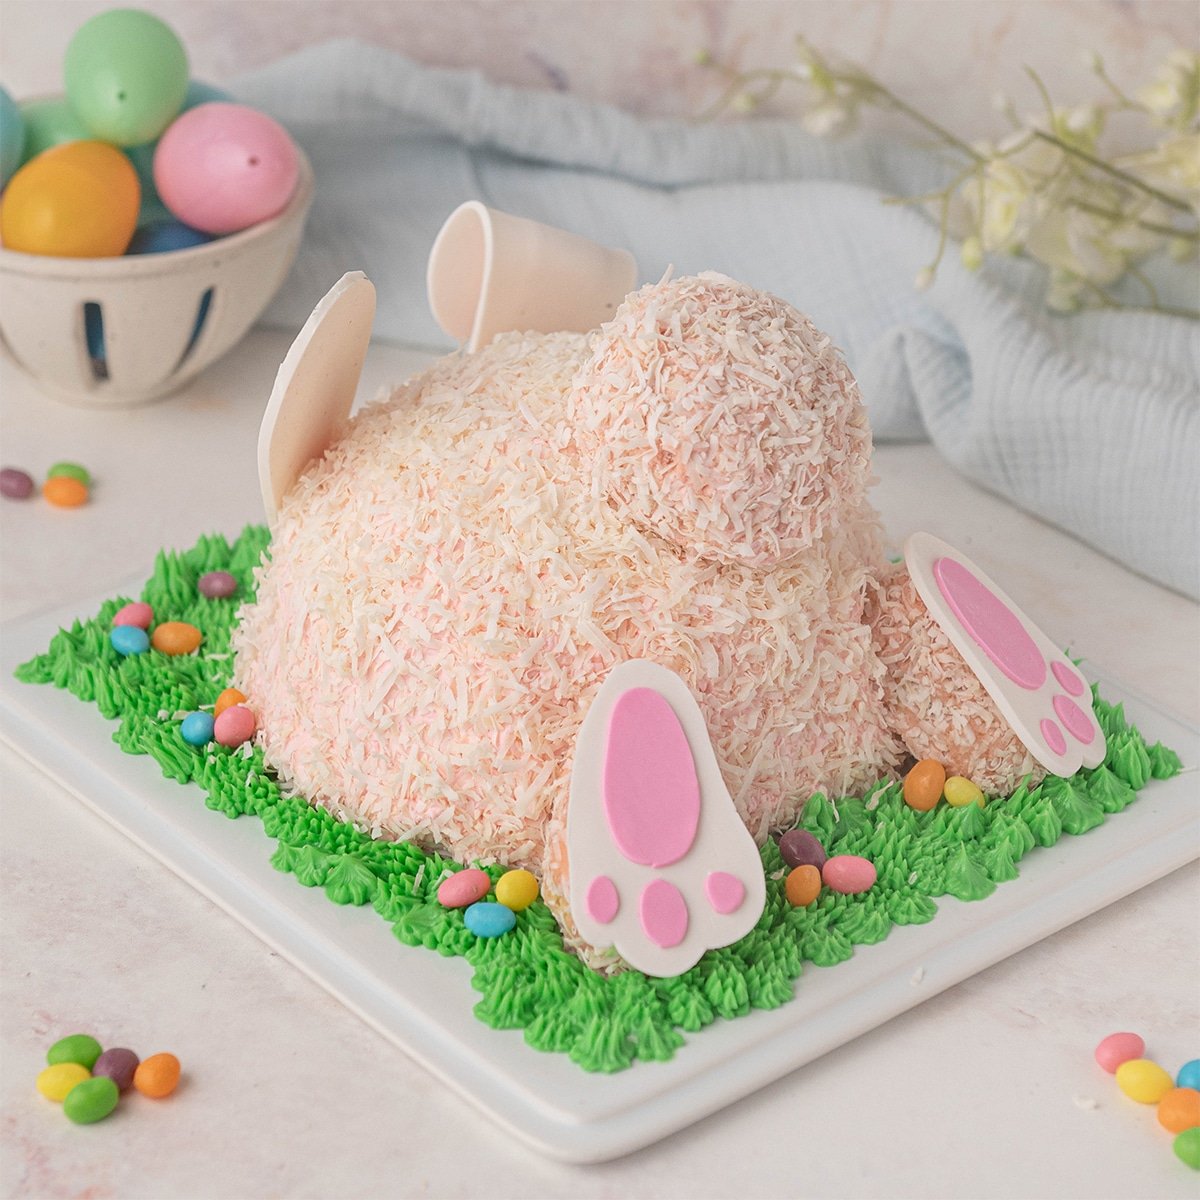
Bunny Butt Cake
5.0
(1)
Your folders
Your folders
Prep Time: 30 minutes
Cook Time: 30 minutes
Total: 180 minutes
Servings: 8
Ingredients
Export 14 ingredients for grocery delivery
Instructions
Step 1
Preheat the oven to 335ºF (168ºC) and prepare one 7-inch hemisphere-shaped cake pan or a 2-quart ovenproof bowl of equivalent size, with cake goop or another pan release.
Step 2
Measure out all of the ingredients using a digital kitchen scale. Pro-tip: You can mix the wet and dry ingredients separately for a finer texture, or just measure and add directly into the bowl of your stand mixer for fewer dishes.
Step 3
In a large bowl, combine and mix together the buttermilk, butter, oil, eggs, and vanilla. The wet ingredients should all be slightly warm.
Step 4
Combine the flour, sugar, salt, baking soda, and baking powder in the bowl of your stand mixer with the paddle attachment on low speed.
Step 5
While the mixer is on low speed, pour the wet ingredients slowly into the dry ingredients.
Step 6
Mix the batter on medium speed and mix for 1 minute until the batter is combined and looks like pancake batter. Scrape the sides of the bowl to make sure all of the ingredients are combined.
Step 7
Pour cake batter into the dome cake pan and then fill 6 prepared muffin cups with the remaining batter.
Step 8
Bake the cupcakes in the same oven as the cake, but set a time to remove them at 12-15 minutes.
Step 9
Use an empty 6-inch cake pan as a stabilizer for your dome pan while it is baking. Bake the cake for 40-50 minutes, or until a toothpick inserted in the center comes out clean.
Step 10
Allow the cake to cool for 10 minutes and flip it out onto a wire rack. Pro-tip: If you plan to frost and decorate the cake on the same day, you can place the cakes into the freezer unwrapped for about an hour or until they are cold (but not frozen). If you plan to decorate your cake at a later date, then you will wrap the cakes in plastic wrap first before freezing them.
Step 11
Place the egg whites and the powdered sugar in the bowl of your stand mixer. Use the whip attachment and combine the ingredients on low speed, and then whip them on high for 4-5 minutes (until shiny) to dissolve the powdered sugar.
Step 12
Then, add the salt and the vanilla extract.
Step 13
Add in the softened butter piece-by-piece, and whip it with the whisk attachment to combine. It will look curdled at first. This is normal. It will also look pretty yellow, keep whipping.
Step 14
Whip it on high speed with the whisk attachment for 8-10 minutes until the buttercream is white, light, and shiny. If it tastes like sweet ice cream, then it's ready!
Step 15
Finally, switch to a paddle attachment and mix the buttercream on low speed for up to 18-20 minutes to make the buttercream ultra smooth and remove any air bubbles.
Step 16
Color about 2 cups of buttercream green for the grass and prepare a piping bag with a grass tip.
Step 17
Color about 2 cups of buttercream pink for the body of the bunny, or leave it white if you prefer.
Step 18
Make the ears and feet a day ahead so that they have time to dry, or you can buy a cute little set already made.
Step 19
Color about 2 ounces of white fondant with pink food coloring for the details in the ears and feet.
Step 20
Roll the white and pink fondant very thin on a surface prepared with cornstarch to avoid sticking.
Step 21
While the fondant surface dries slightly, trace ears and feet shapes on a piece of paper and cut them out. This is to make a guide for your blade while cutting out the shapes.
Step 22
Cut all of the white and pink shapes out with a sharp blade.
Step 23
Using a brush moistened with water, brush the pink bits and stick them to the white bunny's feet and ears.
Step 24
Bend over one ear and lay all of the cutouts on a tray lined with parchment paper to dry. The ears need extra dry time to stand up.
Step 25
Crumble the cupcakes in a large bowl.
Step 26
Add about 1/2 cup of buttercream to the crumbs and mix them together until it forms a dough. You can use another tablespoon of the buttercream if the dough is still crumbly.
Step 27
Using your hands, create one big cake ball of dough for the tail and 2 smaller balls for the feet. I elongated the shape of the feet so they are a little more rabbit-like and so they match the fondant feet.
Step 28
Roll the tail ball and feet in the shredded coconut.
Step 29
Let the cake dough balls set up in the fridge for 10 minutes while you assemble the bunny.
Step 30
Trim the bunny cake so that the dome can sit level and trim the cake board to fit evenly with the cake.
Step 31
On a large round cake board or platter, place the baked domed cake flat side down in the center.
Step 32
Spread a generous layer of easy buttercream evenly over the cake.
Step 33
Press the shredded coconut onto the side of the cake until fully covered.
Step 34
Add two wooden skewers to the top-back of the dome cake and add the tail.
Step 35
Using a dollop of buttercream, stick the bunny feet in the desired locations.
Step 36
Pipe the green grass buttercream around the bottom edge of the bunny's body and fill in the remaining space on the platter.
Step 37
Use another dollop of buttercream on the foot pads and stick the bottoms of bunny feet with the toes facing down.
Step 38
Next, add the fondant ears on the front of the bunny with a dollop of buttercream.
Step 39
Sprinkle colorful jellybeans or chocolate eggs around in the "grass".