Chinese Chive Dumplings (Jiu Cai Jiao)
4.8
(11)
Your folders
Your folders
Prep Time: 70 minutes
Cook Time: 20 minutes
Total: 90 minutes
Servings: 18
Author : Victoria
Ingredients
Export 15 ingredients for grocery delivery
Instructions
Step 1
Combine the soy sauce, rice wine, and 1 teaspoon of the cornstarch in a bowl, stirring to dissolve the cornstarch. Add the raw shrimp and stir to coat well. Set aside. In another bowl, create a seasoning sauce by combining the remaining 2 teaspoons cornstarch, sugar, pepper, oyster sauce, sesame oil, and water. Set aside.
Step 2
Heat the oil in a medium skillet over medium-high heat. Add the dried shrimp and cook stirring constantly, for about 30 seconds, or until fragrant. Add the Chinese chives and keep stirring and cooking for 1 minute, or until the chives have wilted slightly. Add the raw shrimp and cook for 1 minute, or until they have just turned orange.
Step 3
Make a well in the center, give the seasoning sauce a stir, and add to the skillet. Stir and cook for about 45 seconds, or until the mixture thickens and comes together. Taste and, if needed, add salt. Transfer to a bowl and set aside to cool completely. Make the filling up to 1 day ahead of time and refrigerate it until needed. You should have about 1 ¼ cups.
Step 4
In a bowl combine the wheat starch, tapioca starch, and salt. Make a well in the center and pour in about 14 tablespoons of the water (to measure easily, this is exactly halfway between ¾ cup and 1 cup in a liquid measuring cup). Use a sturdy metal spoon to stir the ingredients together. The dough will look translucent at first and then become mottled, whitish, and lumpy.
Step 5
Once the water has been roughly incorporated, add the oil. Stir at first with the spoon, and later with your hands (beware the mixture will be relatively hot) to work in the oil. If the dough looks dry, add a little more water. Aim for a medium firm texture, not a soft and mushy one. Add wheat starch by the tablespoon if you add too much water. Press the ingredients together into a rough ball that feels a bit bouncy.
Step 6
Knead the dough either in the bowl if it's large enough or on an unfloured surface for 1 to 2 minutes, until snowy white, smooth and resembling Play-Doh in texture. When you squeeze on it, it should not crack. If it cracks, very lightly oil one hand and knead it into the dough to increase the dough’s suppleness.
Step 7
Cut the dough into 3 equal pieces (weigh them with a digital scale if you have one for accuracy) and put them into a zip-top plastic bag and seal well. Set aside for 5 minutes to rest before using. This dough can be made up to 6 hours in advance and left at room temperature in the zip-top bag.
Step 8
Before assembling the dumplings, line steamer trays and baking sheets with parchment paper (perforated preferred for steamer trays), then lightly oil the paper with oil spray.
Step 9
Cut the sides of a zip-top bag, leaving the far side connected so it opens like a book. Smear a little oil on the inside of the cut zip-top bag. Working with 1 piece of dough at a time, roll it on an unfloured work surface into a chubby 6-inch log, and cut into 6 equal pieces. To prevent drying and sticking, dab your finger in some neutral oil and rub a tiny bit on each of the ends of the dough pieces, pressing each into a ¼-inch-thick disk as you go.
Step 10
Place a disk inside the cut zip-top bag (inside the "book"). Apply moderate pressure with a tortilla press, the flat side of a cleaver, or the bottom of skillet. You maybe have to press more than once to arrive at the desired size (about 4 inches in diameter). Unpeel the plastic and set the slightly shiny wrapper aside. Repeat with the remaining prepped dough pieces. There should be no need to re-oil the plastic between pressings. To prevent the dough from drying, assemble a batch of dumplings before forming more wrappers from another portion of dough.
Step 11
To assemble a dumpling, hold a wrapper in a slightly cupped hand. Use a spoon or small cookie scoop to center a heaping tablespoon of filling atop the wrapper, flattening the filling a bit and keeping about ½ to ¾ inch of wrapper clear on all sides. Then fold, pleat, and press to enclose the filling. Try to make large pleats so that the dumpling is not too thick on one side. After pinching the opening closed, twist off any excess dough and discard. If the skin breaks, dab a tiny bit of oil on the area and try smoothing out and patching up the wrapper.
Step 12
Set the finished dumpling closed side down in a prepared steamer tray. Assemble more dumplings from the remaining wrappers before working on the next batch of dough. Space them about ½ inch apart (if using a metal steamer tray, keep the dumplings 1 inch away from the edge where condensation will collect). Place overflow dumplings on the baking sheet with a good ½ inch between each and cover with plastic wrap to prevent them from drying out as you go. Once assembled the dumplings should be cooked as soon as possible, because they cannot be refrigerated uncooked.
Step 13
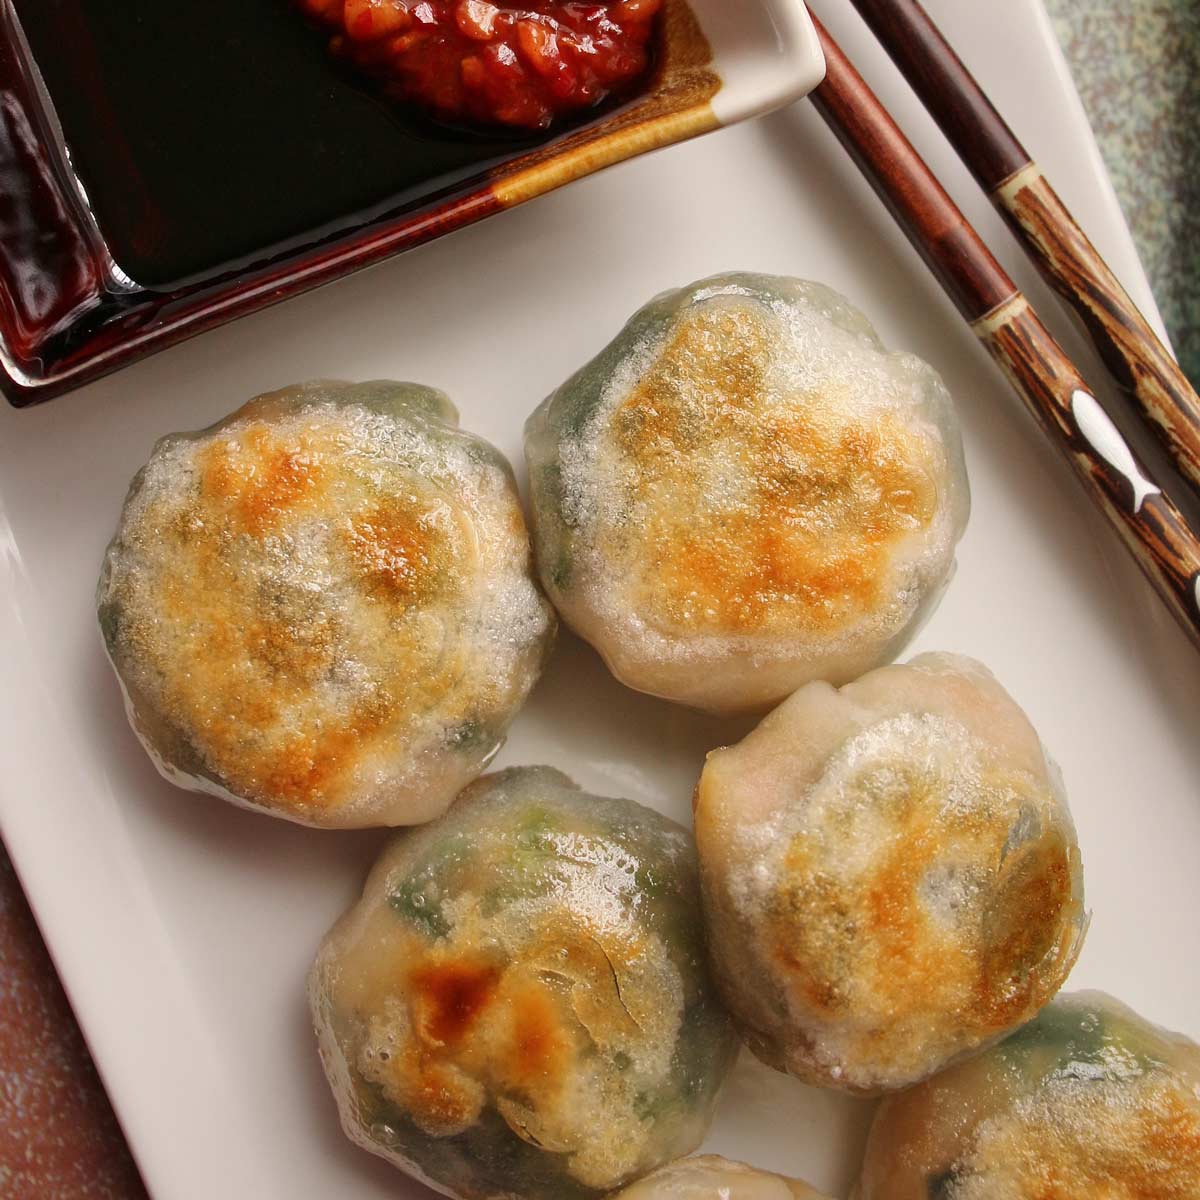
Steam the dumplings over boiling water for about 7 minutes, or until they have puffed slightly and are glossy and translucent (they will become more translucent as they begin to cool as well). Remove each tray and place it atop a serving plate if serving as steamed dumplings.
Step 14
To pan-fry, remove the trays and let the dumplings cool to room temperature. They can sit for up to 2 hours. Heat a nonstick skillet over medium-high heat and add a bit of oil just to lightly coat the surface (1 tablespoon or so depending on the dimensions of the pan).
Step 15
When the oil is just about to smoke, add the dumplings, smooth side down, in batches if necessary. Fry for about 3 minutes, or until crisp and barely golden brown. Flip over to crisp the sealed (pleated) side for about 2 minutes. Reduce the heat if the oil smokes. There is no need to brown the bottom as it will not show. Transfer to a platter.
Step 16
Serve hot or warm with soy sauce and chile garlic sauce for guests to create their own dipping sauce.