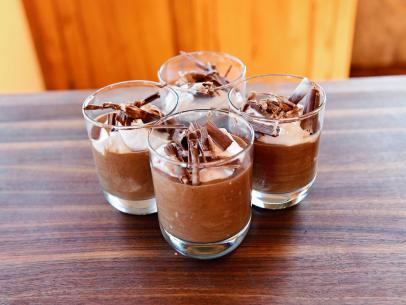
Chocolate Mousse
Your folders
Your folders
Cook Time: 40 minutes
Total: 1 hours, 25 minutes
Servings: 4
Cost: $10.73 /serving
Author : Ree Drummond : Food Network

Ingredients
Export 9 ingredients for grocery delivery
Instructions
Step 1
For the mousse: Melt the chocolate and butter in a double boiler. Remove and allow to cool a little.
Step 2
Add the cream to a large bowl and start to whip using a hand mixer. Slowly add the sugar and continue to whip until you have stiff peaks, 4 to 5 minutes.
Step 3
Place the egg yolks in a pitcher, add the vanilla and whisk together by hand.
Step 4
Temper the egg yolks by adding a little of the melted chocolate to them and whisking together. Pour the yolks into the bowl of melted chocolate and stir in gently.
Step 5
Fold three-fourths of the whipped cream into the chocolate, reserving the rest.
Step 6
Divide between 4 serving glasses.
Step 7
Gently fold the raspberry preserves into the reserved whipped cream until you achieve a swirled appearance. Spoon some of the swirled whipped cream on top of the mousse in each glass.
Step 8
Place the glasses into the fridge and chill for 1 hour. Remove from the fridge and decorate with Marbled Chocolate Curls before serving.
Step 9
Add the semi-sweet and white chocolate to separate small microwave-safe bowls or pitchers. Add 2 teaspoons of the coconut oil to each. Pop in the microwave together for 1 minute. Stir each until smooth, microwaving for another 10 to 15 seconds, if needed, to fully melt the chocolate.
Step 10
Lay a sheet pan on the counter upside down. Start by pouring the white chocolate in a zig-zag pattern over the underside of the cookie sheet; do not get too close to the edges. Repeat with the semi-sweet chocolate, making sure to fill the holes where there is no white chocolate. Using an offset spatula or knife, spread the chocolates in a very thin layer, then stick the sheet pan in the freezer for 2 to 3 minutes. This step is key!
Step 11
After a few minutes, check the chocolate by pressing it with your finger; it should leave only the slightest mark, but not an actual depression.
Step 12
Using a somewhat sharp-edged spatula, scrap the chocolate from the bottom of the pan. If the chocolate is the correct temperature, it should begin to curl. If the chocolate is breaking, it is too cold so let it sit for a few seconds to warm, then try again. If it gets too soft, stick it back in the freezer for a minute.
Step 13
Pretty soon you will have some pretty marbled chocolate curls. Use as a garnish immediately on chilled desserts or immediately transfer to a cold plate and place back in the freezer to harden. Store in an airtight container in the freezer until you need them. The curls are perfect for topping your favorite pies, cakes or elevating a simple fruit platter.