Crochet Potted Cactus Pattern
Your folders
Your folders

Ingredients
Export 3 ingredients for grocery delivery
Instructions
Step 1
Start with a magic ring.R1: 8 sc in the round , 1 ss, 1 ch [8]R2: ( 2 sc in each st ) * 8 times, 1 ss, 1 ch [16]R3: (1 sc, 2 sc in each st)* 8 times, 1 ss, 1 ch [24]R4: (2 sc, 2 sc in each st)* 8 times, 1 ss, 1 ch [32]R5: (3 sc, 2 sc in each st)* 8 times, 1 ss, 1 ch [40]R6: (4 sc, 2 sc in each st)* 8 times, 1 ss, 1 ch [48]R7: work back loops only(BLO): 48 sc , 1 ss, 1 ch [48]R8: ( 22 sc, sc2tog/dec )* 2 times, 1 ss, 1 ch [46]R9-17: 46 sc , 1 ss [46]R18: 2 ch, 46 dc , 1 ss [46] R19: 2 ch, work front loops only(FLO): 46 dc, cut and leave a long tail. [46]Make ss a round in R7, cut and hide the tail.
Step 2
Start with a magic ring.R1: 8 sc in the round , 1 ss, 1 ch [8]R2: ( 2 sc in each st ) * 8 times, 1 ss, 1 ch [16]R3: (1 sc, 2 sc in each st)* 8 times, 1 ss, 1 ch [24]R4: (2 sc, 2 sc in each st)* 8 times, 1 ss, 1 ch [32]R5: (3 sc, 2 sc in each st)* 8 times, 1 ss, 1 ch [40]R6: (4 sc, 2 sc in each st)* 8 times, 1 ss, 1 ch [48]Soil surface sew between R16 and R17 of the flowerpot.
Step 3
Start with a magic ring.R1: 6 sc in the round. 1 ss, 1 chR2: (2 sc in each st ) * 6 times, 1 ss, 1 ch [12]R3: (1 sc, 2 sc in each st)* 6 times, 1 ss, 1 ch [18]R4: (2 sc, 2 sc in each st)* 6 times, 1 ss, 1 ch [24]R5: (3 sc, 2 sc in each st)* 6 times, 1 ss, 1 ch [30]R6-13: 30 sc, 1 ss, 1 ch [30]R14: ( 3 sc, sc2tog/dec )* 6 times, 1 ss, 1 ch [24]R15: ( 2 sc, sc2tog/dex )* 6 times [18]
Step 4
Start with a magic ring.R1: 6 sc in the round. 1 ss, 1 ch [6]R2: (2 sc in each st) * 6 times, 1 ss, 1 ch [12]R3-6: 12 sc, 1 ss, 1 ch [12]R7: (sc2tog/dec)* 6 times[6]
Step 5
Start with a magic ringR1: 6 sc in the round. 1 ss, 1 ch [6]R2: (1 sc, 2 sc in each st )* 3 times, 1 ss, 1 ch [9 ]R3-4: 9 sc, 1 ss, 1 ch [9]R5: ( 1 sc, sc2tog/dec )* 3 times [6]
Step 6
Start with a magic ring.( 2 ch, 2 dc, 2 ch, 1 ss ) * 5 times, 1 ssclose the loop tightly, hide the tail with the darning needle.
Step 7
Create a loop with white yarn, tie the knot three times around the loop, and sew in the middle of the flower
Step 8
Step 1: Sew the soil surface between R16 and R17 of the pot. Fill it with stuffing/fiberfillStep 2: Flatten the big cactus and sew it in the soil surface. You’ll sew it across the left R5 to right R5Step 3: Sew the middle cactus to bigger one. It’s up to you whether you will put it on the left or right side of the big cactus.Step 4: Follow it with sewing the last cactus piece (small) and attach it to the middle. It’s up to you whether you will put it on the left or right side of the middle cactus.Step 5: After it, you can now attach your flower. You can put it between big and middle cactus, or between middle and small cactus. You can also put more flowers on it if you want.
Step 9
R1: 16 ch, from 2nd st of hook, 15 sc [15]R2-35: turn your work, 1 ch, 15 sc [15] Sew end to end, then sew a circle along the edge, and finally pull the loop tight.
Step 10
Use a piece of yellow yarn to wind and cut to make a little fur ball.
Step 11
Step 1: Sew the soil surface between R16 and R17 of the pot. Fill it with stuffing/fiberfillStep 2: Sew Cactus B between R6 and R7 of the soil surface. In the hole of the top of it, insert a right amount of fiber fill on it.Step 3: Sew the open hole on the top of the cactusStep 4: Using your hot melt adhesive, attach the yellow furry flower on the top of your cactus.
Top similar recipes
Curated for youYour folders
 222 views
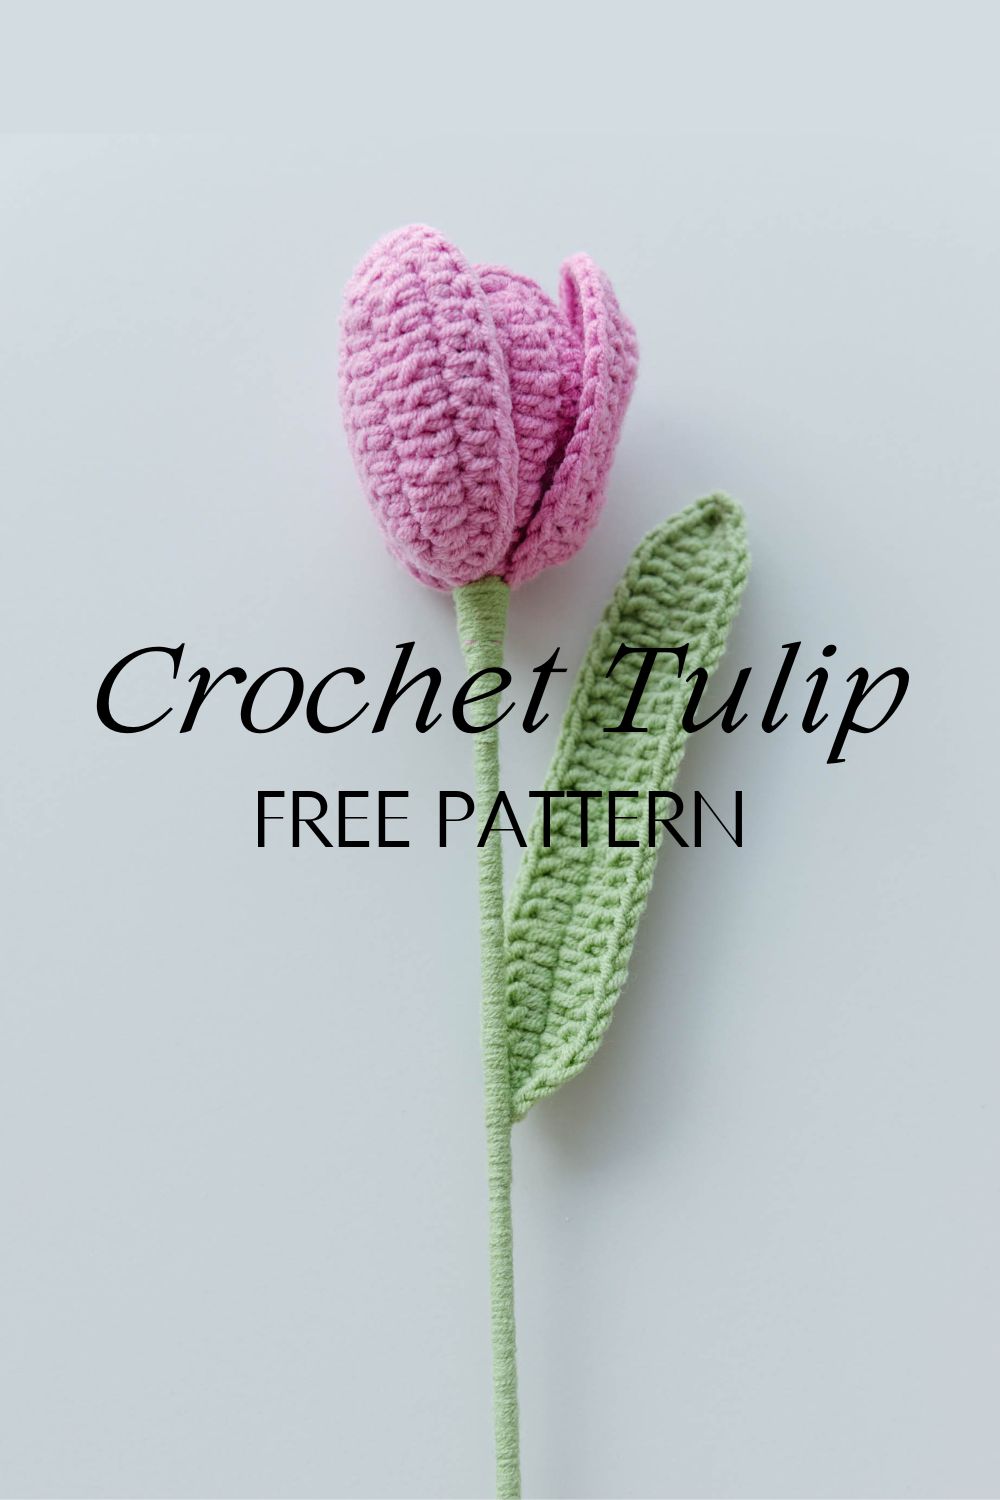
Crochet Tulip Pattern
hookok.com
Your folders
 63 views
Crochet Crow Pattern
thecaffeinatedsnail.com
Your folders
 248 views
Crochet Crow Pattern
thecaffeinatedsnail.com
Your folders
 169 views
Crochet Granny Rectangle Pattern
blog.treasurie.com
Your folders
 236 views
Crochet Dish Cloth Pattern
crochetncrafts.com
Your folders
 269 views
Crochet Fern Leaf Pattern
hookok.com
Your folders
 197 views
Crochet Fidget Toy Pattern
thecaffeinatedsnail.com
Your folders
 194 views
Crochet Large Leaf Pattern
hookok.com
Your folders
 181 views
Crochet Androsace flower Pattern
hookok.com
Your folders
 188 views
Single Crochet Beanie Pattern
crochetncrafts.com
Your folders
 76 views
Crochet Easy Rose Pattern
hookok.com
Your folders
 155 views
Crochet Floyd Rose – Free Pattern
hookok.com
Your folders
 89 views
Beginner Hooded Scarf Crochet Patte...
crochetncrafts.com
Your folders
 206 views
Crochet Lily Flower- Free Pattern
hookok.com
Your folders
 197 views
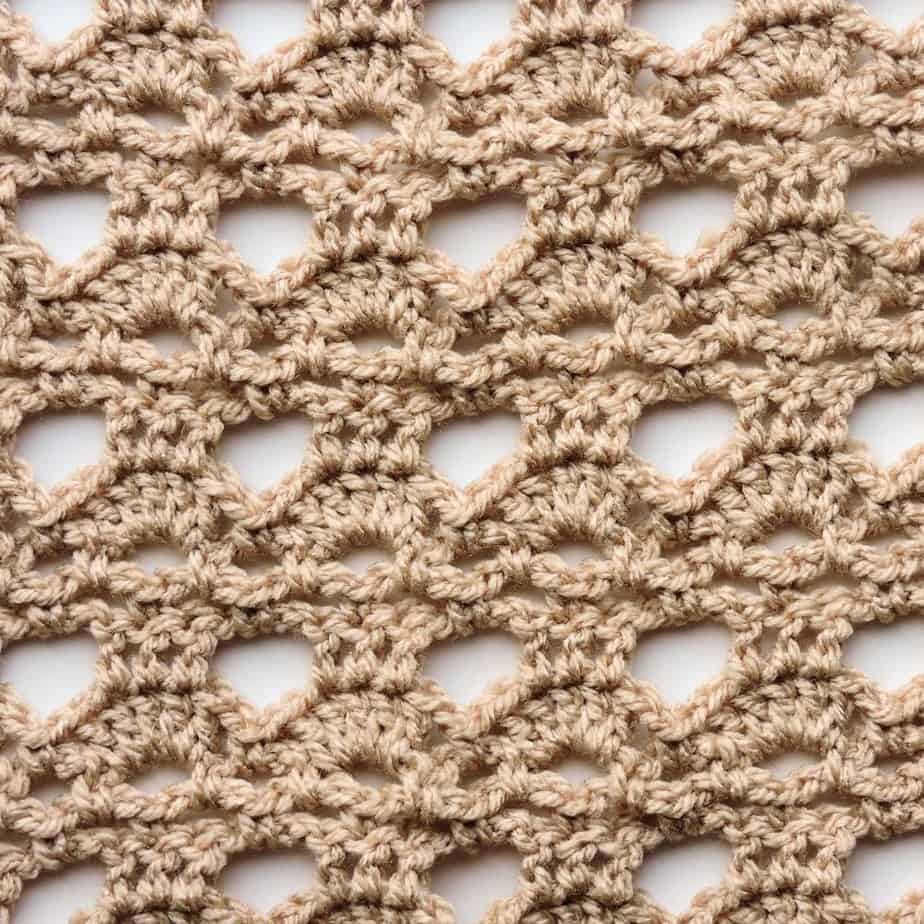
Lovely Arches Crochet Stitch Patter...
crochetkim.com
Your folders
 232 views
Granny Stitch Crochet Kerchief Patt...
crochetncrafts.com
Your folders
 208 views
Crochet Plaid Dishcloth- Free Patte...
hookok.com
Your folders
 251 views
Simple & Quick Bunny Crochet Patter...
sparklesofsunshine.com
Your folders
 108 views
Crochet Big Thai Rose Pattern
hookok.com