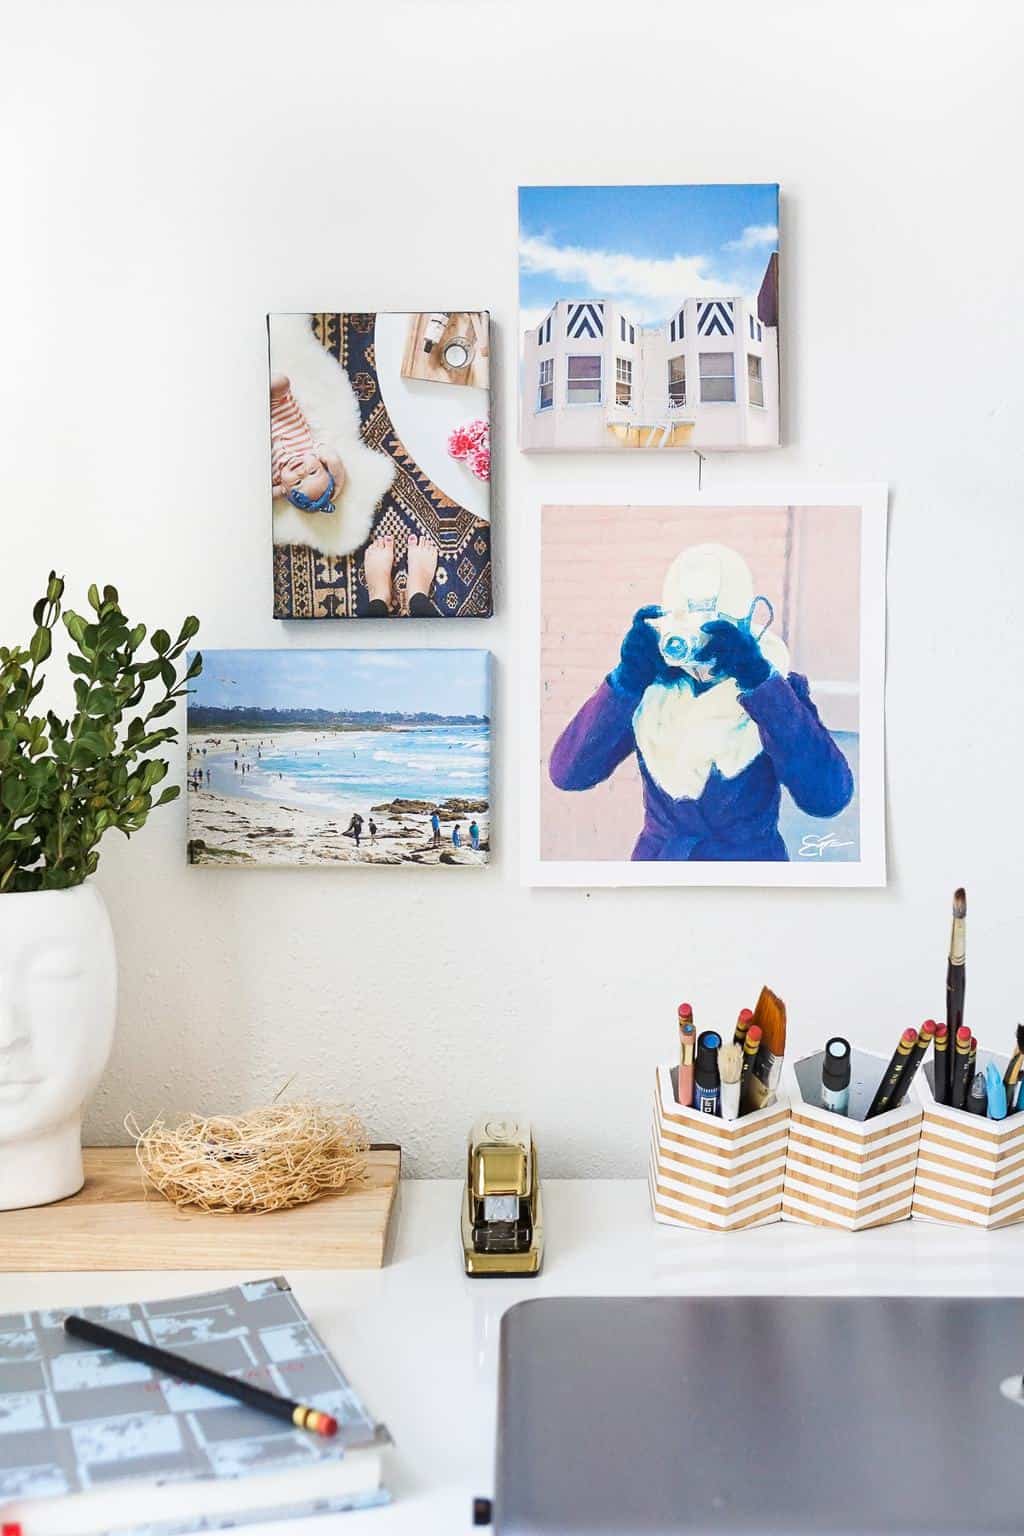
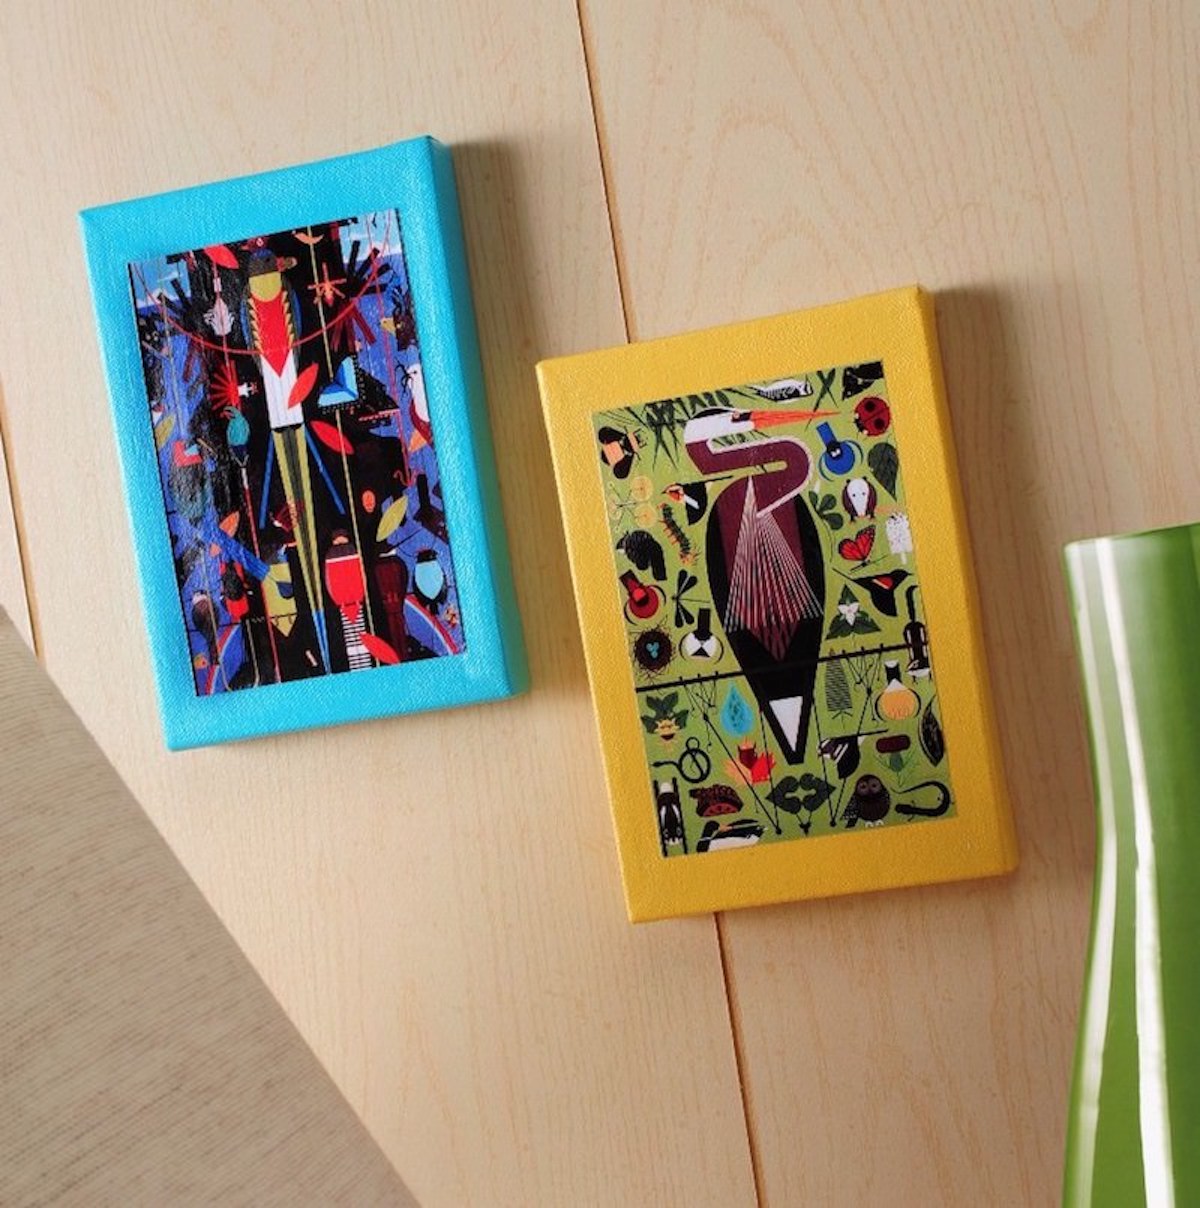
Diy Canvas Art Print
Your folders
Your folders
Total: 180
Servings: 1
Ingredients
Export 4 ingredients for grocery delivery
Instructions
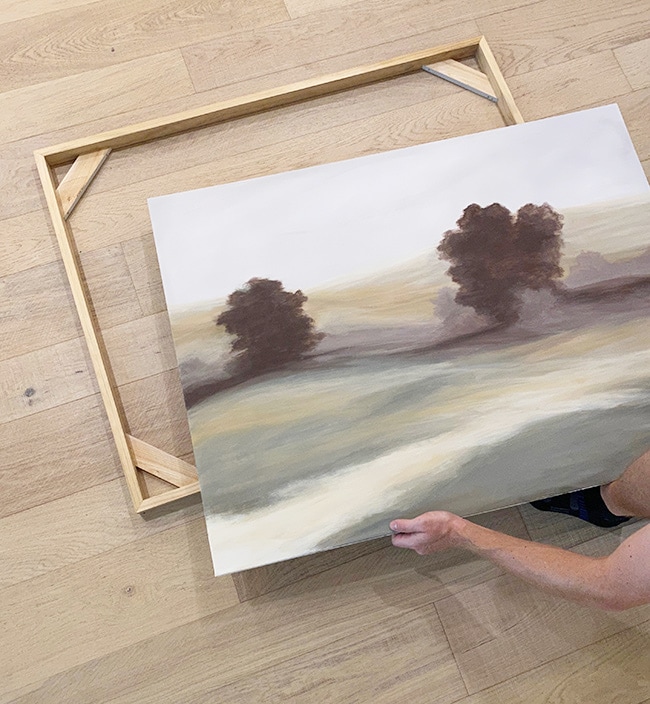
Open up a blank document in Powerpoint and insert your picture or artwork. Center the photo on the slide.Select the "rectangle shape" from the top tool bar and draw a rectangle roughly 2-3 inches larger than your photo. You can just eyeball it.Right click on the rectangle shape and choose "Send to Back" in order to send it behind your photo. Right click on the rectangle shape again and choose a color fill similar to the general color of your photo. Note that the color you select will appear along the sides of your frame.Do a test print on standard paper to confirm color and sizing look good.Edit your print settings to optimize printing on the canvas by going to "File" –> "Print" –> "Printer Properties"’. Choose the following settings and hit ‘Print’:— Print Quality: ‘Best’— Paper Type: ‘Matte Photo Paper.Once your canvas is printed, seal it with a spray coat of UV protective varnish to protect the ink.Optional: Use a pliers to pull off the staples and blank canvas that came on the blank art canvases. This step is optional, but I found that I got a tighter wrap by removing the blank canvas.Lay your printed canvas face down, and center the wood frame on the canvas. Check the canvas edges to confirm correct placement. Beginning with one of the longer edges, fold the canvas around the wood frame and staple towards the middle of the frame.Fold the opposite edge around the other side of the frame pulling and stretching the canvas as tight as you can.Staple the canvas into place. Trim off excess canvas material at each corner at a 45-degree angle to help make the corners easier to wrap.Wrap the first corner by taking hold of the loose canvas corner and pushing the corner in toward the center of the frame. The goal is to make a small fold from the center of the canvas corner down to the corner of the wood frame.Fold the loose canvas flap onto the frame so that the folded edge is parallel with the corner. Secure flap with a staple.Repeat these steps to wrap the remaining 3 corners.
Top similar recipes
Curated for youYour folders

 242 views
DIY Floating Canvas Frame
blog.jennasuedesign.com
Your folders
 189 views
DIY Floating Canvas Frame
jennasuedesign.com
Your folders
 111 views
DIY Scratch Art
onelittleproject.com
Your folders
 179 views
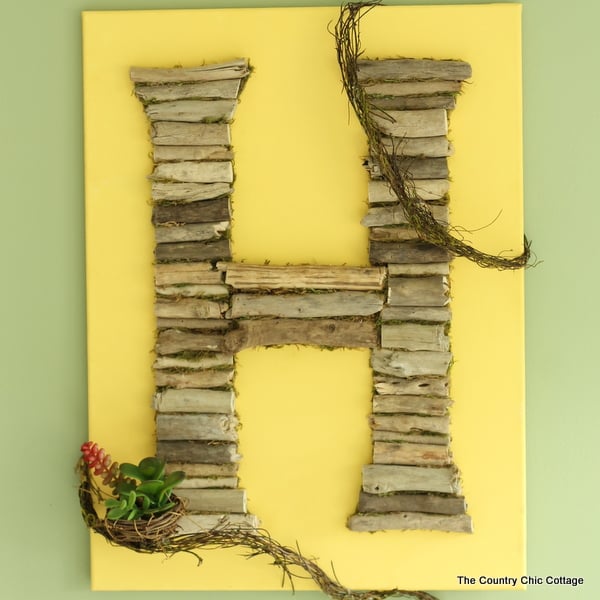
DIY Driftwood Monogram Art
thecountrychiccottage.net
Your folders
 110 views
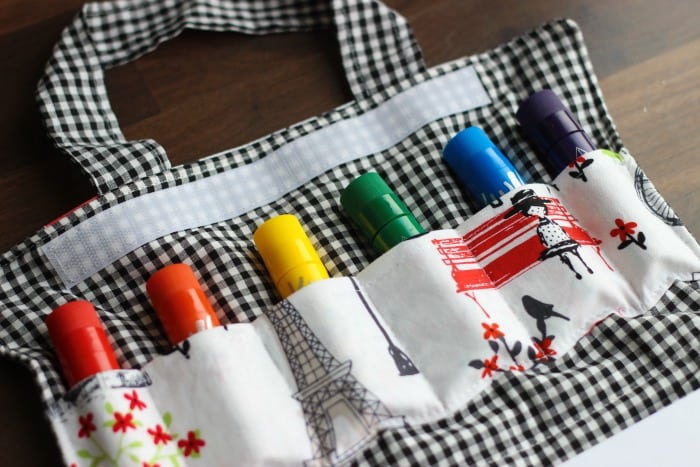
DIY ART CADDY SEWING TUTORIALDIY AR...
gluesticksblog.com
Your folders
 171 views
How to Set Up Bubble Wrap Art (PRIN...
dayswithgrey.com
Your folders
 235 views
How to Clean Canvas Shoes
onegoodthingbyjillee.com
Your folders
 13 views
Mod Podge Image to Canvas
modpodgerocksblog.com
Your folders
 193 views
Salatdressing Sylter Art
edeka.de
4.0
(13)
15 minutes
Your folders
 194 views
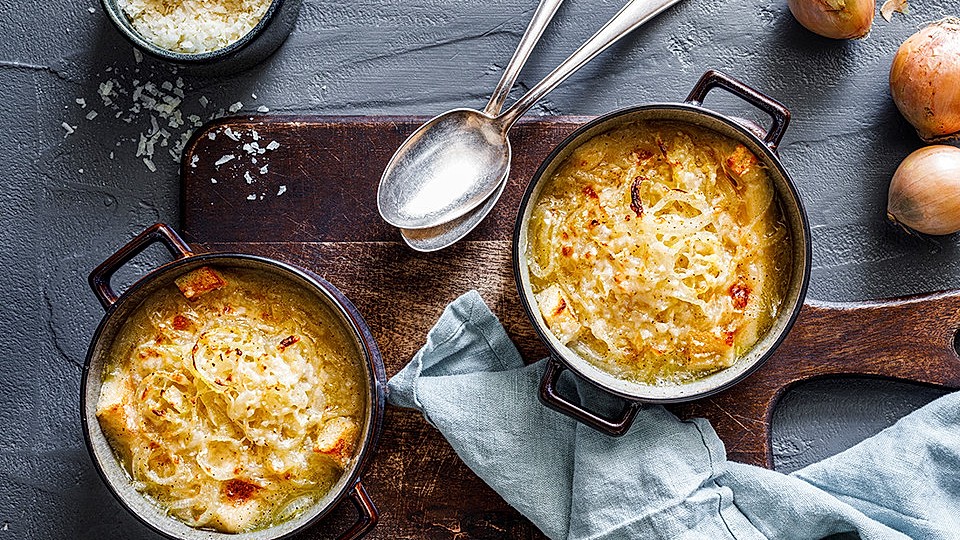
Zwiebelsuppe, französische Art
chefkoch.de
4.6
(286)
35 minutes
Your folders
 118 views
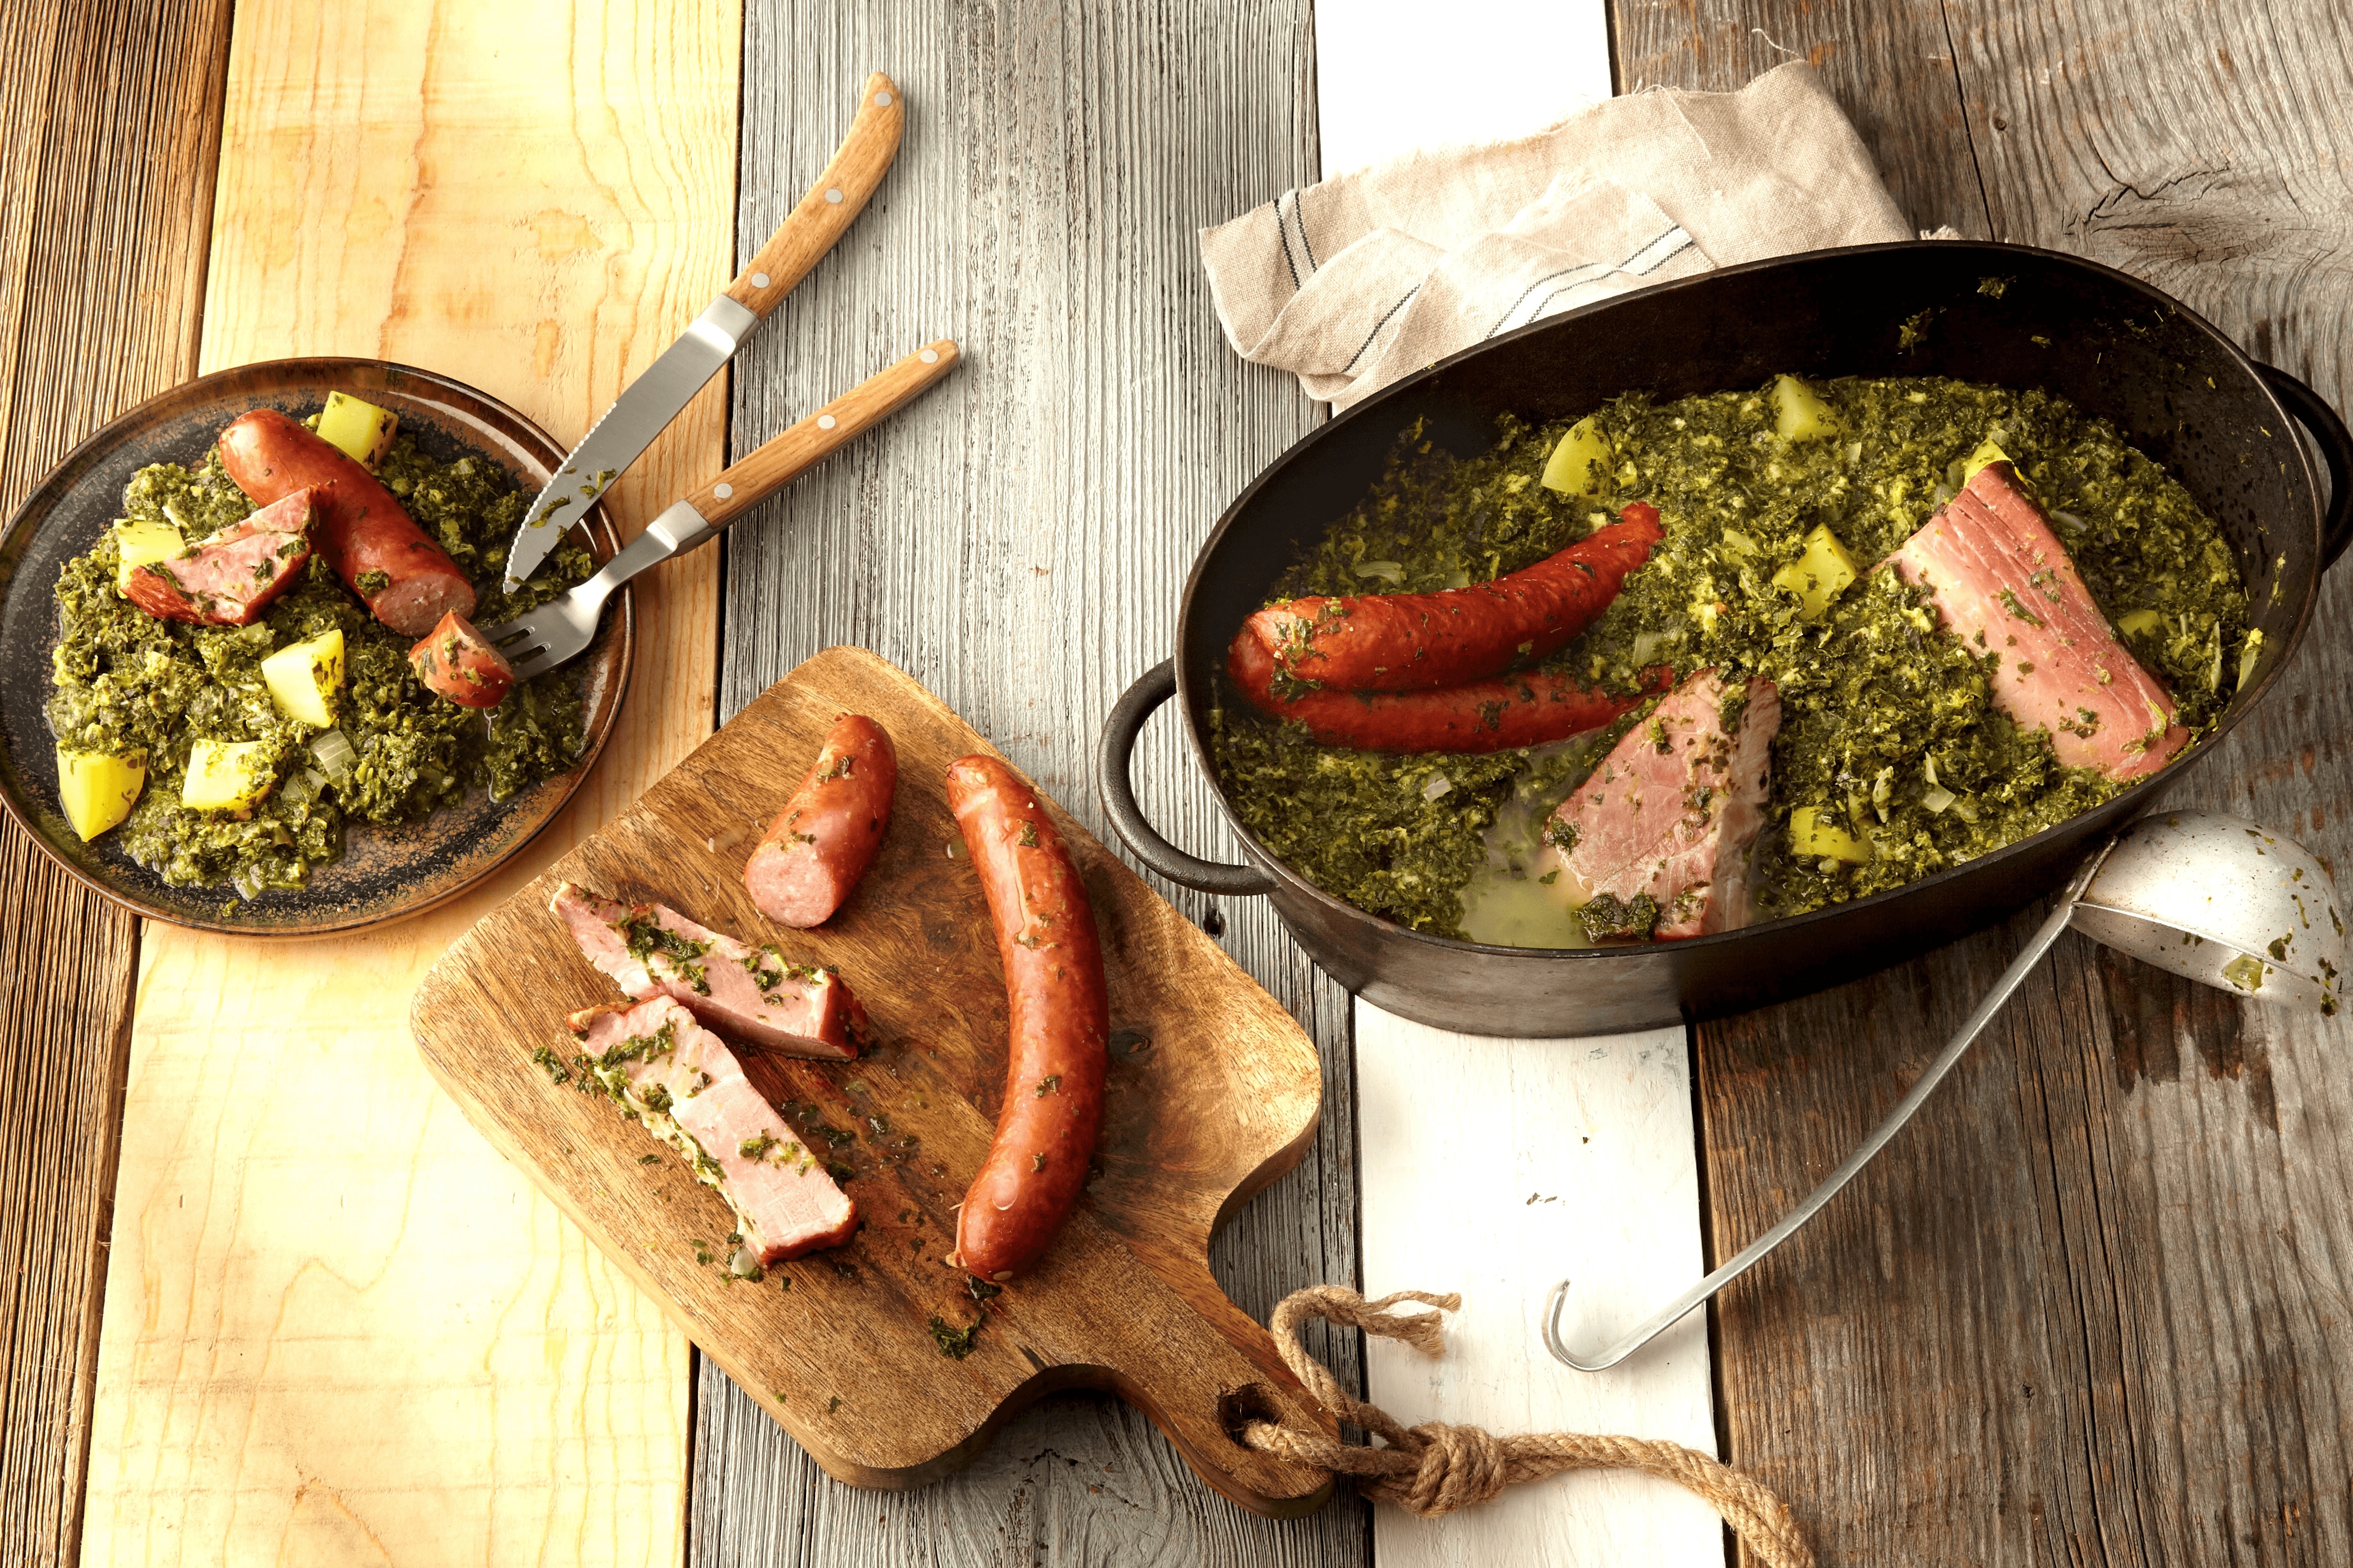
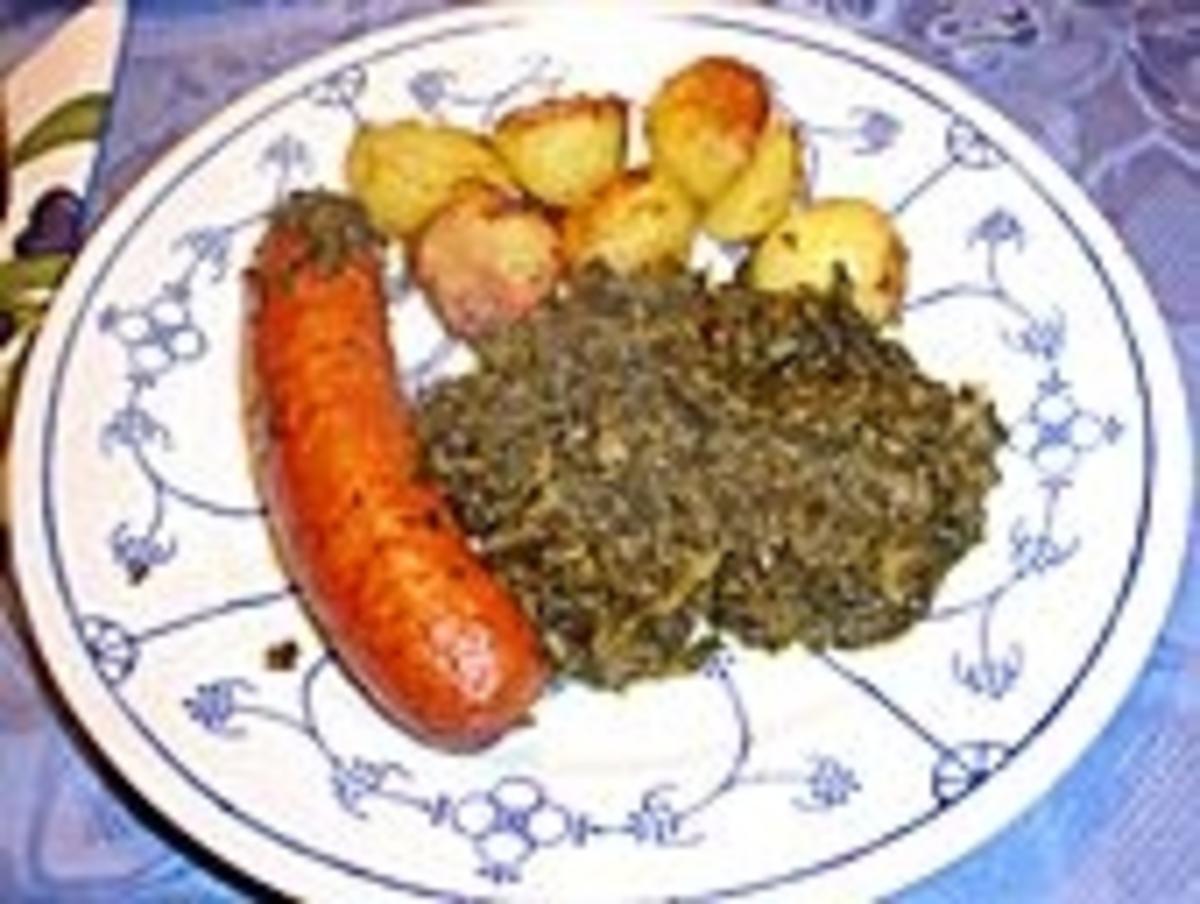
Grünkohl norddeutsche Art
rewe.de
90 minutes
Your folders
 372 views
Focaccia Bread Art
my100yearoldhome.com
4.2
(19)
Your folders
 342 views
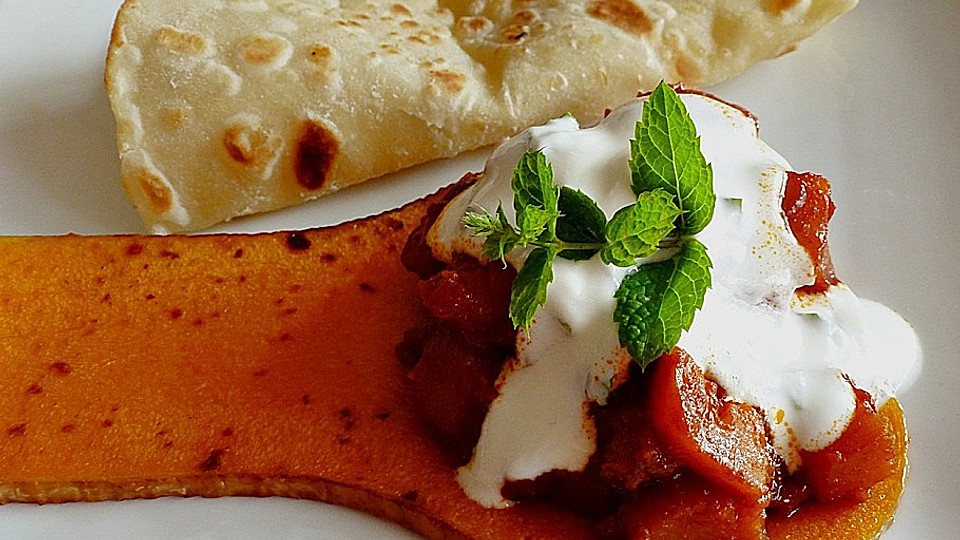
Kürbis afghanische Art
chefkoch.de
4.5
(218)
30 minutes
Your folders
 281 views
Art of Choke
diffordsguide.com
4.0
(5)
Your folders
 297 views
Abstract Art Cookies
cooking.nytimes.com
4.0
(495)
Your folders
 204 views
Schichtbraten Zigeuner Art
top-rezepte.de
5.0
(1)
Your folders
 308 views
Latte art - Wikipedia
en.wikipedia.org
Your folders
 206 views
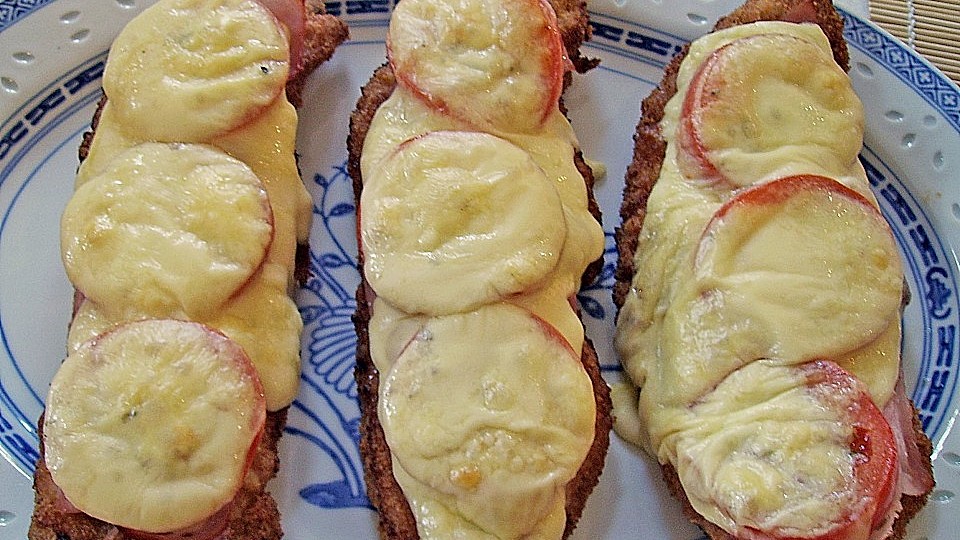
Schnitzel Schweizer Art
chefkoch.de
4.1
(28)
Your folders
 130 views
Grünkohl Holsteiner Art
kochbar.de
4.8
(4)