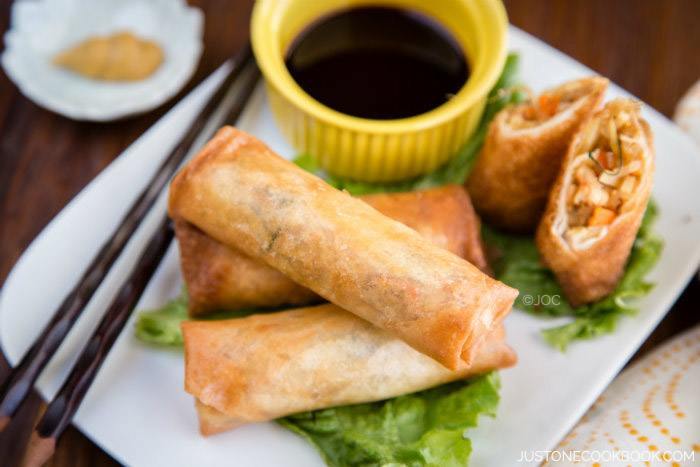
Harumaki (Japanese Spring Rolls)
4.8
(9)
Your folders
Your folders
Prep Time: 40 minutes
Cook Time: 20 minutes
Total: 60 minutes
Servings: 10
Cost: $6.25 /serving
Author : Namiko Chen

Ingredients
Export 22 ingredients for grocery delivery
Instructions
Step 1
Gather all the ingredients.
Step 2
Soak dried mushrooms in ¼ cup water to re-hydrate, about 15 minutes.
Step 3
Cut shrimp and chicken tender into small pieces. Mix the ingredients for marinade in a medium bowl. Add the shrimp, chicken, and pork in the bowl and mix well. Set aside to marinade.
Step 4
Cook the vermicelli in a boiling water for 2-3 minutes. Drain well and cut into 1 inch length.
Step 5
Cut the bamboo, ginger, dried mushrooms, Tokyo negi, Chinese chives, and carrots into long strips (2 inch julienned pieces). Wash the bean sprout and drain well.
Step 6
To make harumaki filling, heat sesame oil and ginger over medium high heat in a large frying pan. Once fragrant, add the shrimp/chicken/pork and stir fry until no longer pink.
Step 7
Add bamboo shoot and carrot and stir fry until coated with oil and slightly tender. Add the bean sprout, Tokyo negi, Chinese chives, and dried mushrooms and stir fry, then add vermicelli.
Step 8
Add the ingredients for Seasonings and mix well.
Step 9
Combine potato/corn starch with water in a small bowl.
Step 10
After a quick stir, pour the potato starch mixture into the harumaki filling and mix well. Transfer the filling from the pan to a baking sheet or plate. Let it cool completely and evaporate the moisture. Make sure there is no moisture in the filling. Otherwise, the wrappers will break easily before and during deep frying (and might explode in the oil).
Step 11
Slowly peel each harumaki wrapper one at a time and keep them plastic wrap or a damp kitchen towel to prevent from drying up while you work.
Step 12
To make harumaki, lay the harumaki wrapper with a corner pointed towards you (diamond shape). Place the filling neatly just below the center of the wrapper. I use an ice cream scooper to transfer the filling so the amount of filling for each wrapper is somewhat standardized. Start folding the bottom corner over the filling towards the top and tuck under the filling nice and tight.
Step 13
Roll the wrapper once to cover the filling, and fold the right and left corners of the wrapper in. They should overlap each other a little bit. Then roll toward the remaining corner. When you start rolling upward, the wrapper may flair out. Make sure both sides of the wrapper to taper inwards.
Step 14
Using your finger, put good amount of flour + water paste on the top corner. Then roll and press firmly to seal. Continue with remaining wrappers.
Step 15
Once you finish wrapping, start deep frying immediately before the wrapper gets soggy. Deep fry the harumaki in a deep fryer/wok/pot with 170°C (338°F) vegetable oil until light golden brown and crisp, about 5 minutes. Drain the excess oil over a wire rack or paper towel.
Step 16
If you prefer to bake, preheat the oven to 400ºF (200°C). For a convection oven, reduce cooking temperature by 25ºF (15ºC). Arrange the harumaki in a single layer on a baking sheet lined with parchment paper. Brush the tops of the rolls with vegetable oil then bake them for 10 to 12 minutes, rotating after 6 minutes, until they're golden brown and crispy.
Step 17
Make a dipping sauce with soy sauce, rice vinegar, and Japanese karashi mustard as you like and serve with harumaki.
Step 18
You can keep the leftovers in an airtight container and store in the refrigerator for up to 3 days and in the freezer for a month.