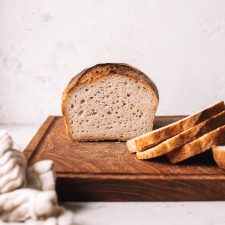
How to Make Gluten-Free Sourdough Bread
4.9
(124)
Your folders
Your folders
Prep Time: 20 minutes
Cook Time: 1 hours, 20 minutes
Total: 1 hours, 40 minutes
Servings: 1
Author : Bakerita | Rachel Conners

Ingredients
Export 9 ingredients for grocery delivery
Instructions
Step 1
In a bowl, mix together 150g active starter, water, and brown rice flour. Mix until smooth, and then cover and let rest for anywhere between 4 and 18 hours. The longer it ferments, the more sour your loaf will be. I’ve had success all across the time spectrum!
Step 2
Whisk together the psyllium husk, sweetener, and water. Whisk until combined and let gel while preparing the flour mixture.
Step 3
In a large bowl or stand mixer, combine all of the flours + starches, plus salt. This is also where you’d adding any herbs and other dry seasonings if you want to flavor your dough.
Step 4
Whisk the psyllium gel mixture into the preferment, along with the olive oil if using, and any other wet seasonings (like garlic, soaked nuts or seeds, etc.).
Step 5
Add the wet ingredients to the flour mixture. Use a spoon and then your hands to bring the dough together, or use your dough hook to mix all of the ingredients until a smooth dough forms. It will take a few minutes in a stand mixer. If you’re using your hands, you will likely want to knead the dough together for a few minutes to make sure all the flour is hydrated and the dough is smooth.
Step 6
Once your dough is soft and smooth, turn it out onto a clean, smooth work surface. Lightly flour it if your dough seems sticky – mine usually doesn’t need any flour. Knead into a smooth ball, and use your hands to shape the dough into a round (or whatever shape you’re making).
Step 7
Dust your banneton or tea towel-lined bowl generously with brown rice flour. You can place the dough directly into the banneton if you want the horizontal lines you see on my round loaves, or you can use the liner for a smoother look.
Step 8
Use a dough scraper or your hands to transfer the dough into your banneton, or a bowl lined with a clean tea towel. Put the smooth side facing down, so the “seams” of the loaf are facing up. Since we’ll flip the loaf before baking, the seams will be on the bottom after baking.
Step 9
Cover, and let the dough proof for about three to four hours at room temperature, or overnight in the refrigerator. (While this timing works pretty consistently for me here in San Diego, other bakers have mentioned that sometimes their bread can take up to 6 to 8 hours to rise well. Remember to look for the soft, puffy texture instead of relying strongly on the exact timing. Conditions of weather, your starter, ingredients, etc. can vary this timing pretty widely!)
Step 10
An hour before your dough is fully proofed, turn on the oven to 425°F. Make sure your Dutch oven is preheating inside of the oven if you’re using one. If you did an overnight proof in the refrigerator, I recommend taking the bread out to finish rising at room temperature for an hour to two while the oven preheats. You want the loaf to feel puffy when it’s going into the oven.
Step 11
When your oven is preheated and your dough is well proofed, carefully flip the dough onto a sheet of parchment paper. Score the bread as desired, making sure your cut is deep enough, otherwise, you’ll still have cracking where you didn’t cut through.
Step 12
Remove your hot Dutch oven, carefully, from the oven. Carefully lower your loaf into the Dutch oven, being careful not to drop it in, which will cause gumminess and reduce the loaf’s rise. Replace the lid, and put your bread into the oven for 45 minutes.
Step 13
After 45 minutes of baking, remove the lid and let it finish baking for 25 to 40 minutes. The exact timing will depend on your oven and how golden brown you want your bread.
Step 14
Once the bread is golden brown to your liking, remove it from the oven. Very carefully remove the bread from the Dutch oven and let cool completely at room temperature before slicing into it. This is the hardest part, but worth the wait!
Step 15
It will keep well at room temperature for two or three days. You can store it in a linen bread bag to extend its life. If your loaf gets a bit stale, put it in a 300°F for 10 minutes to refresh the crust. You can also slice and freeze the bread. It toasts from frozen perfectly!