How to Make Mochi with a Stand Mixer
Your folders
Your folders
Total: 240
Servings: 16
Ingredients
Export 3 ingredients for grocery delivery
Instructions
Step 1
This recipe was created using a KitchenAid stand mixer (professional series). Please do not use a hand mixer to make this recipe as the motor is not powerful enough to handle mochi. I cannot guarantee that other equipment will work as I have not tested it. You can always pound the cooked glutinous rice with a wooden mallet.
Step 2
Measure the glutinous rice. One rice cooker cup (180 ml) of glutinous rice is 150 grams. You will need 3 rice cooker cups (540 ml, 450 grams).
Step 3
To rinse the glutinous rice, put the rice in a large bowl and add some water. Stir with your hands and quickly drain the water.
Step 4
Then gently stir the rice with your fingertips. Glutinous rice breaks easily, so you should not apply any extra pressure. Just lightly stir a few times.
Step 5
Add water to the bowl, and carefully rinse 4-5 times. Drain the rice in a fine-mesh sieve/colander.
Step 6
Shake the sieve/colander to remove the excess water. Then transfer the rice into the inner pot of the rice cooker.
Step 7
Even the level of the rice in the pot and add 400 ml of water. The water should be at the 3-cup line for Sweet Rice. Evenly distribute the rice with chopsticks or your fingers.
Step 8
Close the lid of the rice cooker. Select Regular on the menu and start cooking. Regular mode cooking is usually 5-10 minutes longer than the Sweet Rice setting. When the rice is finished cooking, we can take it out immediately.
Step 9
When the rice is almost done, prepare about 4-5 cups of boiling water. Once the hot water is ready, pour one-third of the boiled water into your stand mixer bowl to warm it up, one-third into a mixing bowl to warm a dough hook and a flat beater, and the rest into a 2-cup measuring cup to keep a silicone spatula wet. Make sure there is enough hot water to submerge all the tools.
Step 10
Discard the hot water in the stand mixer. Transfer all the cooked glutinous rice into the stand mixer.
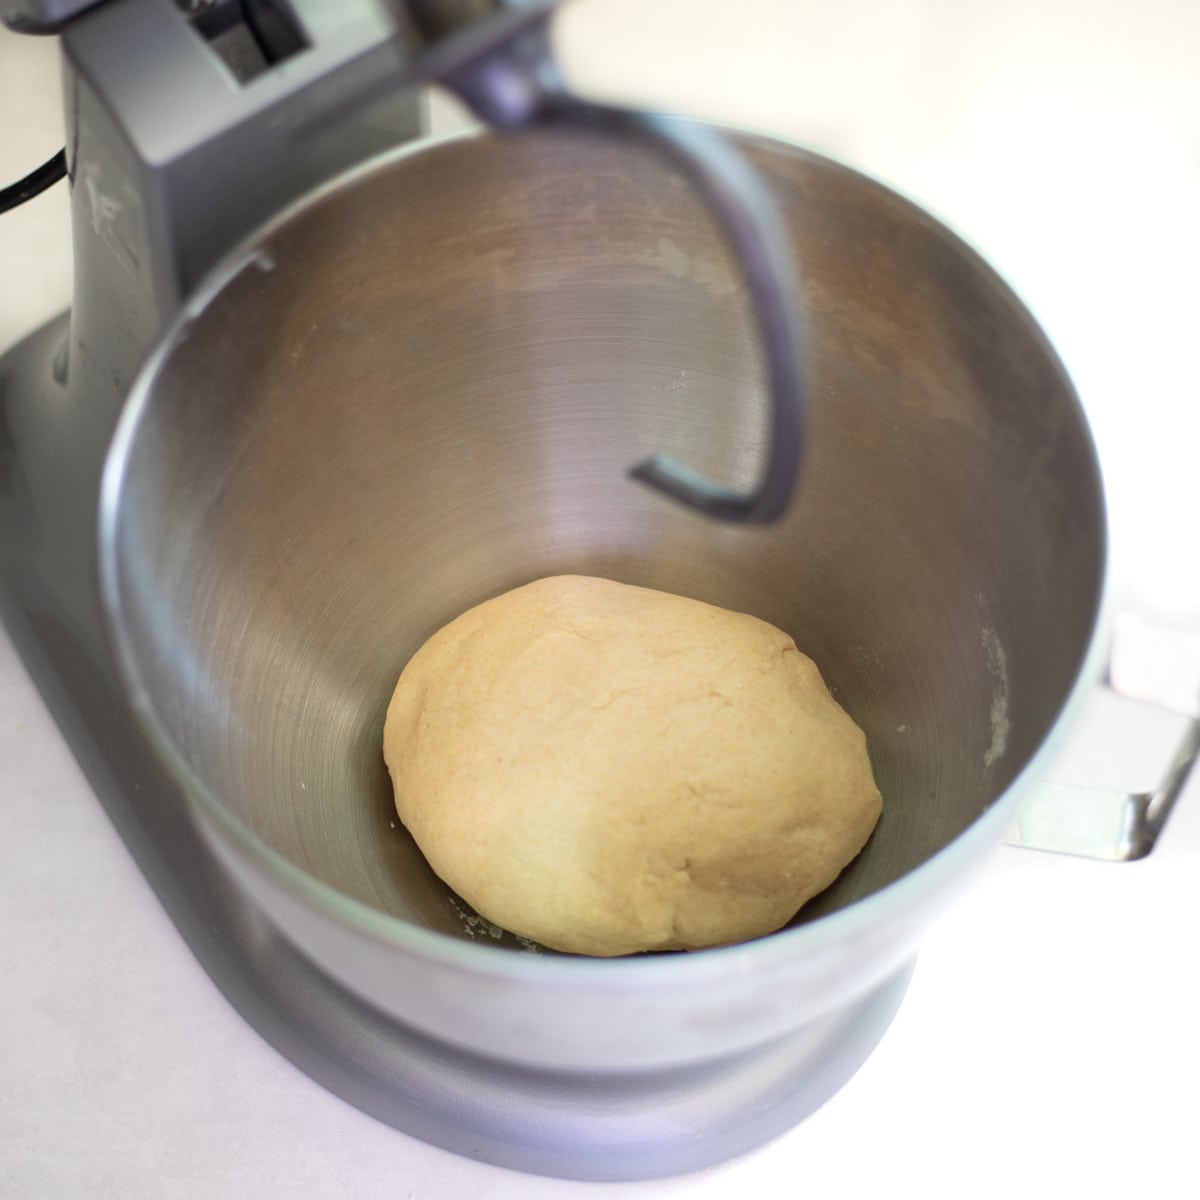
Step 11
Set the dough hook attachment in your stand mixer. Start kneading the glutinous rice on Speed 2. Set timer for 3 minutes (first round).
Step 12
The dough hook will start pulling in the rice.
Step 13
(Optional) While kneading, you can use your wet silicone spatula to detach the glutinous rice from the wall of the stand mixer bowl.
Step 14
When the 3-minute timer beeps [03:00], remove the bowl from the stand mixer, keeping the dough hook attached. Using the wet silicone spatula, flip the glutinous rice. Dip the spatula in the water a few times so it doesn’t stick to the rice.
Step 15
Put the bowl back onto the stand mixer and start kneading again on Speed 2. Reset the timer for 3 minutes (second round).
Step 16
When the 3-minute timer beeps [06:00], remove the bowl from the stand mixer and flip the glutinous rice again, using the wet silicone spatula. Now the rice grains are less visible and are starting to look like mochi.
Step 17
Put the bowl back onto the stand mixer and start kneading again on Speed 2. Reset the timer for 3 minutes (third round).
Step 18
When the 3-minute timer beeps [09:00], remove the bowl from the stand mixer and flip the glutinous rice again, using the wet silicone spatula. Now it’s getting stickier and elastic.
Step 19
Put the bowl back onto the stand mixer and start kneading again on Speed 2. Reset the timer for 3 minutes (fourth round).
Step 20
When the 3-minute timer beeps [12:00], remove the bowl from the stand mixer and flip the glutinous rice again, using the wet silicone spatula. Now the kneading is complete.
Step 21
Remove the dough hook attachment from the stand mixer and change to a flat beater attachment.
Step 22
Beat the mochi on Speed 3. Set the timer for 30 seconds (first round).
Step 23
When the 30-second timer beeps [00:30], do not remove the bowl from the stand mixer. Scrape the mochi as much as you can from the sides of the bowl, using the wet silicone spatula.
Step 24
Reset the timer for 30 seconds (second round). Start beating again on Speed 3. When the 30-second timer beeps [01:00], scrape the mochi again from the sides of the bowl, using the wet silicone spatula.
Step 25
Reset the timer for 30 seconds (third round). Start beating again on Speed 3. When the 30-second timer beeps [01:30], scrape the mochi again from the sides of the bowl, using the wet silicone spatula.
Step 26
Reset the timer for 30 seconds (fourth round). Start beating again on Speed 3. When the 30-second timer beeps [02:00], scrape the mochi again from the sides of the bowl, using the wet silicone spatula. Now the pounding is done.
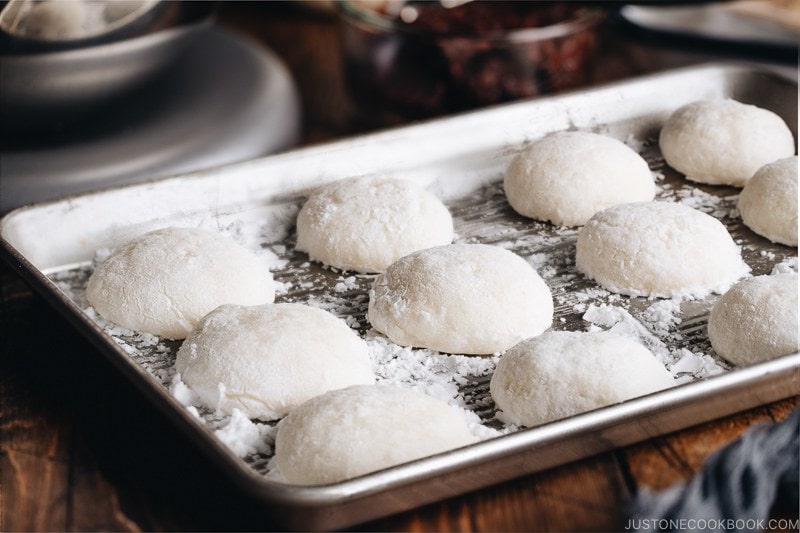
Step 27
Prepare two rimmed baking sheets by covering them with potato starch. Put all the pounded mochi on one of the baking sheets. The other one is for keeping the mochi cakes.
Step 28
Sprinkle some potato starch on top of the freshly pounded mochi. Make sure your hands are completely dry and dust them with potato starch. Keep extra starch handy so you can always dust your hands when needed.
Step 29
Spread the potato starch on top of the mochi, making sure there is no sticky part exposed. Pick up a corner of the mochi and start tucking in the edges underneath.
Step 30
Once you’ve mounded up a thick layer of mochi, make a C shape with your left index finger and thumb against the edge of the mochi.
Step 31
Use your right hand to tuck in and push up the mochi underneath to create a ball shape above your left C shaped fingers.
Step 32
Pinch and twist: Using your C-shaped fingers, pinch underneath the ball to cut off the mochi. Use your right hand to twist off the mochi. Do not pull the mochi as it creates a sticky surface.
Step 33
This photo is a bad example. You don’t want to pull the mochi. The sticky mochi surface appears and now your hands get sticky when you touch it. REMEMBER: Pinch and twist. Pinch and twist.
Step 34
As you form the mochi cakes, place them on the other rimmed baking sheet. When you're ready to eat them, dust off the starch with a pastry brush or with your dry hands. Enjoy your mochi in Japanese New Year Soup (Ozoni) and Red Bean Soup, or make Anko Mochi or Kinako Mochi (see below).
Step 35
If you do not use the mochi cakes immediately, cover each one individually in plastic wrap and put in a freezer bag. Store in the freezer for 3 months.
Step 36
Flatten the mochi cake by pressing down with the palm of your hand.
Step 37
Brush off the excess starch with your hands or a pastry brush. It’s important to remove the starch, so don’t skip this step.
Step 38
Put the anko (sweet red bean paste) in the center of each mochi. Pull two opposite sides of the mochi out and away from the center.
Step 39
Pull up the sides and pinch the ends over the anko. Repeat for the other sides and pinch the ends together on top.
Step 40
Lightly dust your hands with potato starch (do not overcoat). Use light pressure to pinch and seal the top of the mochi.
Step 41
In a bowl, combine kinako (roasted soybean flour) and sugar (ratio: 2 parts kinako to 1 part sugar) and mix well
Step 42
Pour hot water in a separate bowl. Dip a mochi cake in the hot water.
Step 43
Coat well with the kinako mixture and repeat with the rest. Serve immediately.
Top similar recipes
Curated for youYour folders
 1330 views
How To Make Mochi With A Stand Mixe...
justonecookbook.com
4.5
(33)
45 minutes
Your folders
 336 views
How To Make Fresh Pasta With A Stan...
fussfreeflavours.com
5.0
(6)
2 minutes
Your folders
 279 views
How to make Roti Dough using Stand ...
pipingpotcurry.com
5.0
(13)
Your folders
 250 views
How to Make Butter in a KitchenAid ...
alittleinsanity.com
5.0
(10)
Your folders
 342 views
How To: Make Mochi
asianfoodnetwork.com
5.0
(1)
Your folders
 381 views
How to Make Mochi in a Microwave
pickledplum.com
5.0
(1)
5 minutes
Your folders
 475 views
How to Make Homemade Bread Without ...
mywindowsill.com
5.0
30
Your folders
 495 views
Stand Mixer Peasant Bread
101cookingfortwo.com
4.5
(9)
30 minutes
Your folders
 104 views
Stand Mixer Sourdough Bread
heartscontentfarmhouse.com
4.8
(6)
45 minutes
Your folders
 124 views
Stand Mixer Sourdough Bread
epicuricloud.com
5.0
(2)
40 minutes
Your folders
 116 views
Stand Mixer Sourdough Bread
grantbakes.com
4.3
(52)
1 hours
Your folders
 306 views
How To Make A Fall-Themed DIY Desse...
thecountrychiccottage.net
Your folders
 503 views
Stand Mixer Lunch Lady Rolls
101cookingfortwo.com
4.5
(36)
15 minutes
Your folders
 186 views
Perfectly Fudgy Stand Mixer Brownie...
epicuricloud.com
5.0
(1)
30 minutes
Your folders
 83 views
Homemade Butter (Stand Mixer Method...
thepracticalkitchen.com
5.0
(20)
Your folders
 263 views
How to Make Homemade Pasta with Kit...
soberjulie.com
4.7
Your folders
 619 views
How To Make White Bread With Kitche...
cookingwithemily.co.uk
5.0
(3)
30 minutes
Your folders
/Beauty_-45a1c9aec9a44da3b790694cf3dbf2be.jpg) 347 views
347 viewsHow to Make Fried Potato Mochi
seriouseats.com
Your folders
 289 views
How to Make Hawaiian Butter Mochi
thekitchn.com
1 hours