Maple Oat Sourdough Sandwich Bread
4.9
(25)
Your folders
Your folders
Cook Time: 50 minutes
Servings: 1
Cost: $45.03 /serving
Author : Traci York | Vanilla And Bean
Ingredients
Export 7 ingredients for grocery delivery
Instructions
Step 1
Add the oats to a small bowl and pour the water over them. The water wont fully cover the oats - that's okay. Set aside.
Step 2
Mix the Dough: In the evening, whisk the starter, milk, maple syrup and oil together in a large bowl with a fork. Add the flours and salt. First, mix with a fork, the dough will be shaggy. Then mix by hand, mixing, folding and pushing the dough until the flour is fully incorporated and no dry bits are present. It will seem dry at first, but the more you work the dough, the more hydrated it will become. The dough will feel stiff and it will stick to your fingers as you go. Do this for about 3-4 minutes. Use the fork to scrape off the dough on your fingers as much as you can. Cover bowl with a damp tea towel. Set a timer for for 30 minutes and allow the dough to rest for 30 minutes. Now is a good time to feed/refresh your starter.
Step 3
Incorporate the Soaker: After the dough has rested, mix in the soaker. To do this, dump the soaker on top of the dough and begin kneading and folding the dough over and on top of itself, incorporating the ingredients of the soaker. Do this for about 2-3 minutes or until the soaker is evenly distributed in the dough. It will seem like a lot of added bits, but as you work the dough and as the dough develops through fermentation, the soaker will incorporate. The dough will be stiff, wet and sticky. Cover bowl with a damp tea towel, set a timer for 30 minutes and allow the dough to rest for 30 minutes.
Step 4
Fold the Dough: After the dough has rested, fold the dough. To do this, grab a portion of the dough while it remains in the bowl, stretch it up and fold it over, pressing your fingertips into the center of the dough. You'll notice the dough is a little less stiff and more workable at this point. Repeat, until you've worked your way around the dough. If the dough feels *too* stiff, you can always let it rest another 15 minutes. This is the first fold, and you can stop here and begin bulk fermentation, but If time permits, and optimally, you'll want to repeat this fold two more times as it improves the final dough's structure and crumb. Allow for about 30 minutes between the second and third fold.
Step 5
Bulk Fermentation (first rise): After the last fold, cover the bowl with a damp towel and allow to rise overnight at room temperature (see note* on optionally retarding the dough). This will take about 8-10 hours at 70F (21C), but in a cooler kitchen the dough can take up to 12-14 hours to rise - this is the norm in my chilly kitchen 66F (18C). Use the time as a guide and not a determining factor. The dough is ready when it no longer looks dense, is jiggly when the bowl is shaken, and has about doubled in size.
Step 6
Shape the Dough: In the morning, and with damp fingertips, coax the dough into a floured work-surface. With moist fingers, take a portion of the dough, gently stretch it towards you and fold it over towards the center, pressing it down gently. Repeat this process until you work the dough all the way around the dough. Using a bench scraper flip the dough over, cover with a tea towel rest the dough for 15-20 minutes. While the dough rests, throughly coat the inside of a 9x5" (23cm X 12cm) loaf pan with olive or coconut oil. Set aside.Flour the work surface and using a bench scraper flip the dough back over. Use the photos in the blog post to help guide shaping. Gently shape the dough into a rough rectangle (sort of a football/oblong shape if you can) by dimpling the dough (think focaccia), to roughly 6" wide and 8-10" long. Fold the dough lengthwise 2/3 over onto itself and crease it firmly using the pinky side of your hand. Fold the 1/3 piece left towards the crease and pinch the seam closed. Fold in the ends, coming in about an 3/4" - 1" and pinch the seam closed. Flip the bread over and rock it back and fourth a bit and gently fluff the ends in. Cover with a tea towel and allow the dough to rest for about 5-10 minutes. Scrape your work surface area of any excess flour and very lightly spritz it with water. Place the dough on the spritz of water (seam side down) and using lightly floured hands, cup the back of the dough and gently pull the it towards you until the surface is taught. Gently "fluff" the ends in again if needed to fit into the loaf pan.Once the surface is taut and with one swift move, use the bench scraper to scoop the dough up and, place the dough into the prepared loaf pan. If there's any misshapen edges that need tucking in, use a moist rubber spatula to gently finesse and shape the edges of the dough down into the pan.
Step 7
Proof the Dough (second rise): Cover the pan with a damp tea towel and allow the dough to rise until the dough rises to about 3/4" - 1" (2cm - 2.54cm) above the lip of the pan at the center of the dough. The amount of time will vary depending on ambient temperature. At 70F (21C) proofing takes about an hour. In my chilly kitchen, about two hours.Set an oven rack in the center of the oven. Preheat your oven to 450F (232C).
Step 8
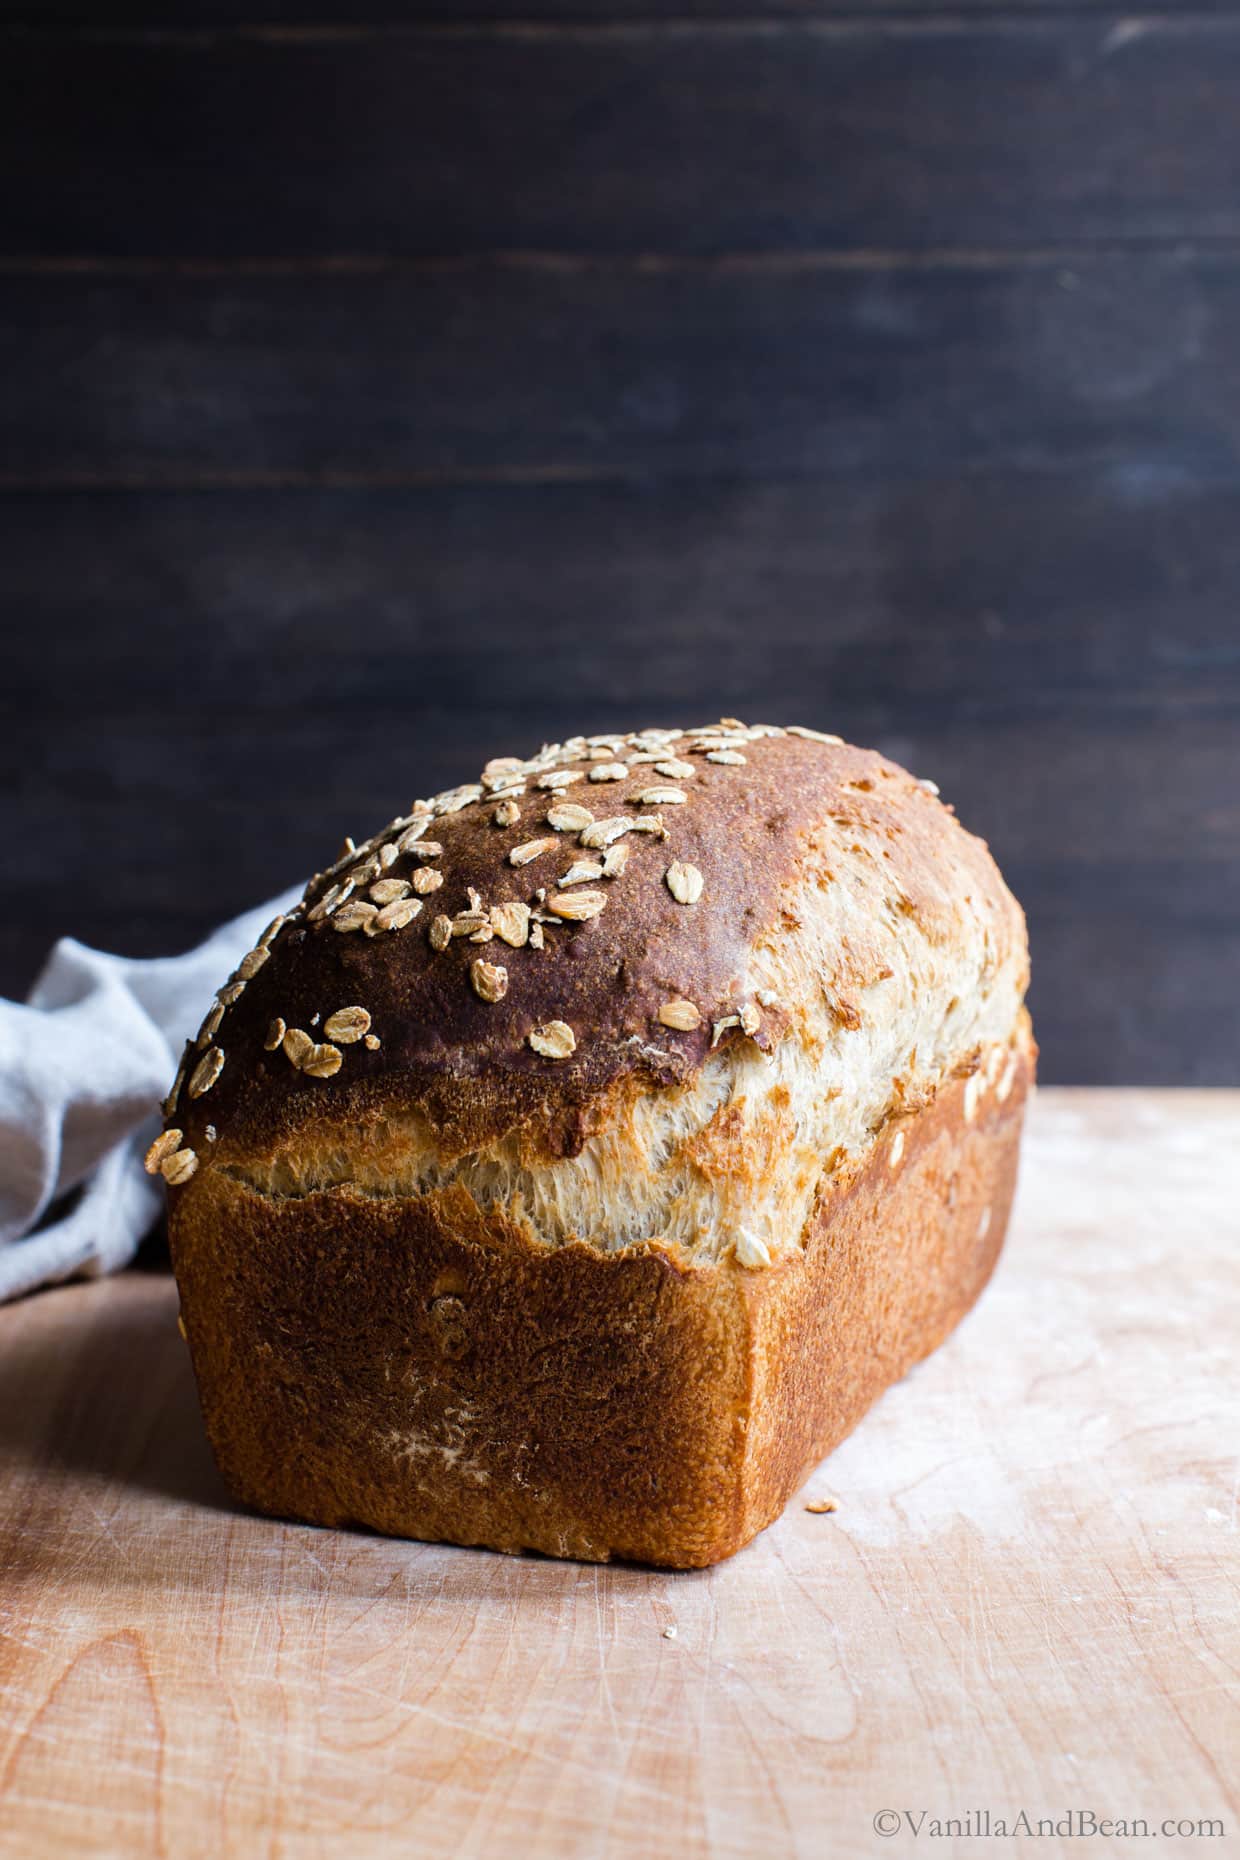
Bake the Dough: Lightly spritz the top of your loaf with water and sprinkle 1-2 Tbs of Rolled oats over the top. Place the loaf into the oven and then, reduce the oven temperature to 400F (204C). Bake for 45-55 minutes, rotating and tenting the loaf at about 25-30 minutes so it doesn't get too dark. The bread is ready when the internal temperature of the loaf is between 190F - 205F (87C - 96C). When done, transfer to a wire rack. Cool for 10 minutes in the pan, then transfer to a cooling rack. Cool 1 hour before slicing.
Step 9
Storage Notes: Sourdough is best consumed on the same day it's baked, but it lasts for 3-4 days stored at room temperature. Store at room temperature cut side down.This bread freezes beautifully. Store baked bread in a freezer bag either whole or sliced for up to two weeks. Thaw at room temperature. This bread can go straight from freezer to toaster to make the most delicious toast!