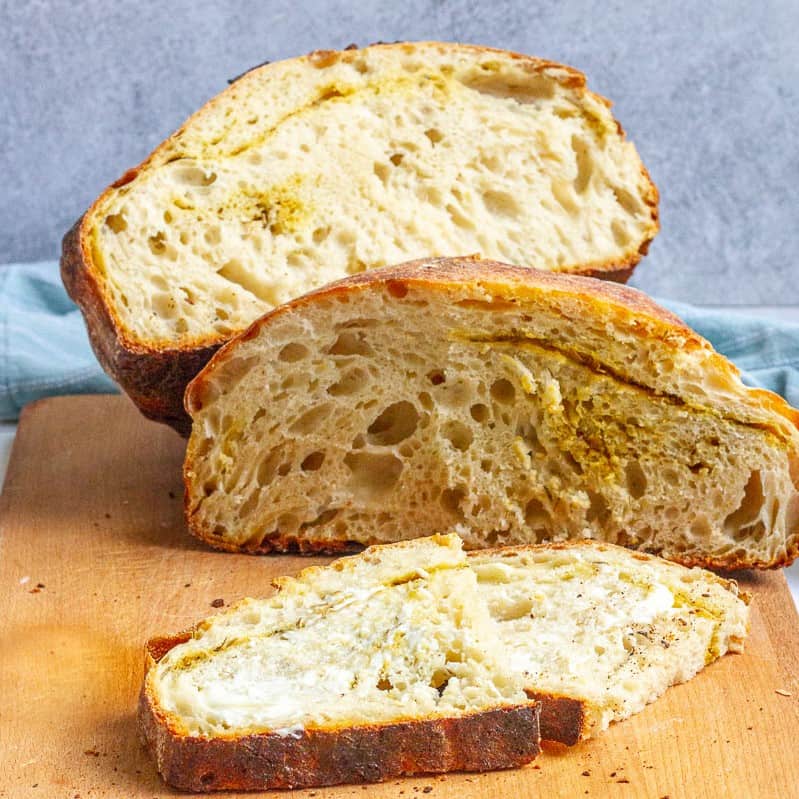
Rosemary Garlic Sourdough Bread
5.0
(5)
Your folders
Your folders
Prep Time: 180 minutes
Cook Time: 60 minutes
Total: 870 minutes
Servings: 8
Author : Sarah Trenalone

Ingredients
Export 5 ingredients for grocery delivery
Instructions
Step 1
Combine the starter, flour and water in a large bowl or in the basin of your stand mixer. Do not add the salt yet.Use a large spoon or dough whisk to stir the dough together, or use the paddle attachment on your stand mixer to mix on medium-speed for about 60 seconds. Mix until the dough no longer clings to the bowl, and instead forms a ball.Allow the dough to rest about 20 minutes, and then add the salt.
Step 2
Incorporate the salt by mixing again with the spoon, whisk, or stand mixer until just mixed. You may need to use your fingers to help work the salt into the dough until you don't feel the salt crystals anymore.Place the dough in a non-reactive bowl (such as glass or Pyrex), and cover the dough with a damp towel. Allow to rise for one hour.
Step 3
Spritz a work surface with water and dampen your hands and (optionally) a flexible dough scraper.Gently move the dough onto the work surface. Using your hands or the dough scraper, spread the dough slightly and then fold the dough like a letter. (I fold the upper third down towards the center and then the bottom third up towards the center.)
Step 4
Fold the sides of the dough in. (I fold the right third in towards the center and the left third in towards the center.)Flip the dough and repeat the stretching and folding process on the other side.
Step 5
Return the dough to the bowl, cover, and allow to rise for another hour.Repeat the rest and fold period two more times (for a total of 3 hours).On the third folding, add the herbs, garlic powder and nutritional yeast (if using) by folding it into the dough. Spread the dough slightly and then sprinkle half the herbs, garlic and nutritional yeast across the dough. Fold it like a letter, flip the dough, and spread it out again. Sprinkle the remaining herbs, garlic and yeast over the dough. Fold the dough one more time.
Step 6
Return the dough to the bowl and cover with a fitted lid, damp towel, or with plastic wrap.Do one of the following proofing methods (not both):Proof Refrigerated (Preferred Method): Place the dough in the fridge and proof for at least 8 hours, or up to 2 days (48 hours). If you used a towel (instead of plastic wrap) to cover the bowl, re-dampen the towel occasionally. Proof Unrefrigerated: (Only proof unrefrigerated if your kitchen is around 70°F or cooler). Place the dough out of direct sunlight on your counter and allow it to rise for about 8 hours, more or less, depending on the temperature. Check the bread to see if it's finished proofing by pressing the dough with a lightly floured or oiled knuckle. If the dough springs right back, allow it to keep proofing. If it's slow to spring back, it's ready.
Step 7
Dampen a work surface and your hands.Gently turn the dough out onto the work surface. Form the dough into a ball, place it seam-side up, and cover with a damp towel. Allow the dough to rest for about 15 minutes.Next, use dampened hands to roll the dough into a round ball. Place the dough on parchment paper.
Step 8
If you proofed your dough in the fridge: Leave the dough to rise at room temperature until it's no longer cold (about 2½ to 3 hours).If you proofed your dough at room temperature: Leave the dough to rest on the parchment paper while the oven pre-heats, and then you can go ahead and bake.
Step 9
About 30 minutes before you're ready to bake, pre-heat your oven to 480°F. If using a non-enameled pot, place the pot in the oven during the pre-heat.Just before baking, lightly dust the dough with flour, and then use a bread lame or a floured knife to score the bread. (Scoring will give steam an outlet and will prevent the bottom of the loaf from cracking.)Scoring can be as simple as one or two long lines across the top. If desired, you can create a pattern while scoring for a more decorative final loaf.
Step 10
If you pre-heated the Dutch oven, remove it carefully from the oven. Place the parchment paper and dough into the Dutch oven. Lightly spritz the dough with water, and then add the Dutch oven lid. Slide bread into the pre-heated oven.Lower the oven temperature to 450°F.Bake the bread for 45 minutes covered, and then remove the Dutch oven lid and bake uncovered another 10 to 15 minutes, until the center of the loaf is 210°F. If you don't have a digital thermometer, you can try gently knocking on the bottom of the loaf to see if it sounds hollow.
Step 11
Use a spatula, tongs or the edges of the parchment paper to move the bread onto a cooling rack.Wait at least 2 hours before cutting into the loaf. It will be tempting to cut it earlier, but the bread is still baking internally. Cutting early will result in an under-cooked loaf.Store the bread lightly wrapped on the countertop for up to 4 days, or wrap tightly and freeze up to 3 months. I recommend slicing the bread before freezing, so that you can thaw individual slices if desired. Thaw frozen slices by toasting or heating over low heat on a stovetop griddle or pan.