Rustic Red Fife Whole Grain Bread - Wheat Recipes | Anson Mills - Artisan Mill Goods
Your folders
Your folders
Total: 430
Servings: 1
Cost: $16.34 /serving
Ingredients
Export 6 ingredients for grocery delivery
Instructions
Step 1
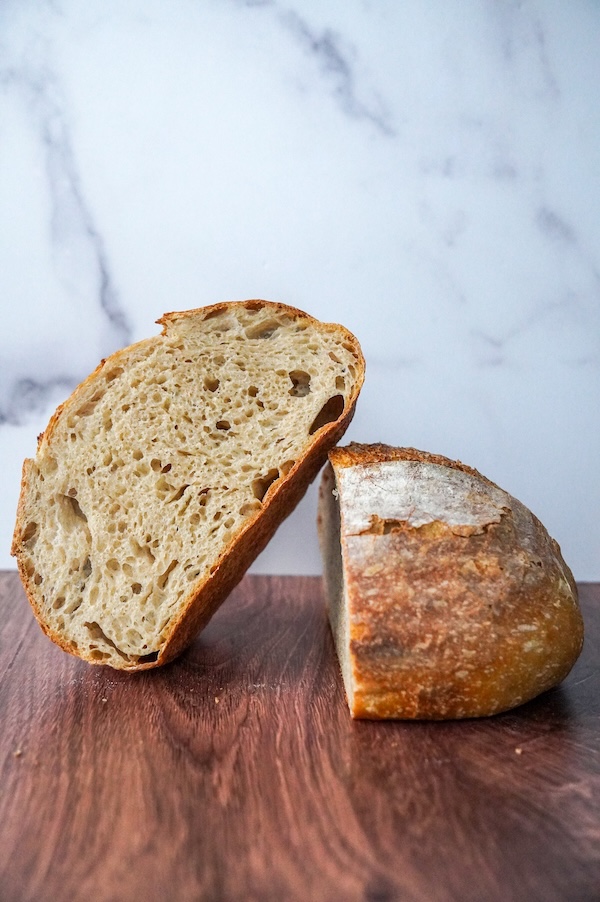
Make the unleavened preferment: Mix the flour and salt in a small bowl. Pour in the water and stir the ingredients with your fingertips or a wooden spoon until they form a shaggy dough. Knead the dough by hand in the bowl, wiping the sides of the bowl with the dough ball to clean them, and then turn the ball out onto the countertop. Knead the dough about 2 minute more; it will be smooth and tacky. Return the dough to the bowl, cover it loosely with plastic wrap, and let it stand at room temperature for 24 hours. Make the leavened preferment: Mix the flour and yeast in a small bowl. Pour in the water and stir the ingredients with your fingertips or a wooden spoon until they form a shaggy dough. Knead the dough by hand in the bowl, wiping the sides of the bowl with the dough ball to clean them, then turn the ball out onto the countertop. Knead the dough until smooth and strong, about 5 minutes. Return the dough to the bowl, cover it loosely with plastic wrap, and refrigerate for 24 hours. Note: The two preferments look like identical twins (fig. 2.1). Make the dough: After 24 hours, the unleavened preferment will smell sweet and look slightly sweaty from sitting up all night, but will not differ much visually from the day before. The leavened preferment, on the other hand, will look about 6 months pregnant. Remove the leavened preferment from the refrigerator and let it stand at room temperature for 2 hours before mixing the final dough. After 2 hours, combine both preferments in the bowl of a stand mixer fitted with the dough hook attachment. Add the yeast, honey or agave, olive oil, and salt and mix on low speed until no yeast granules are visible and the dough is smooth and sinewy, about 5 minutes. Add the flour and continue to knead the dough on medium speed until it is strong and a small piece of it can be gently stretched with the fingers into a see-through gluten window (see Baking Notes), 15 to 20 minutes. Remove the bowl from the mixer. Wet your hands, pull the dough from the bowl and off the dough hook, and throw it on the counter. If the dough feels stubbornly taut, wet your hands and knead it 2 or 3 times to hydrate the dough. Return the dough to the bowl. Cover the bowl with plastic wrap and let the dough rise at room temperature until it doubles in size and looks spongy and pocked, about 2 hours and 45 minutes. Adjust an oven rack to the lowest position; remove any additional racks. Place a pizza stone on the rack and set a large, clean terra cotta pot on the stone (don’t forget to first plug the hole in the pot with a small ball of aluminum foil). Heat the oven to 500 degrees. Shape the dough: Using a plastic dough scraper or large rubber spatula, gently ease the risen dough from the bowl onto the countertop, leaving as much air in the dough as possible. Shape the dough into a rough ball. Cup both hands around the sides of the ball and drag its bottom against the counter, using friction to stretch and tighten the dough into a smooth, round ball (fig. 6.1). Turn the dough ball smooth-side down into a floured 8-inch brotform or home-fabricated 1½-quart proofing basket. Wet your fingers and pinch the seams of the dough to seal them (fig. 6.2). Brush the top of the dough with oil, then drape plastic wrap lightly over the basket and let the dough rise at room temperature until it appears light and airy and has risen close to the top of the brotform or bowl, about 1 hour and 15 minutes. Bake the bread: Gently invert the brotform with the risen dough over a parchment paper–lined pizza peel or inverted baking sheet. Lift the basket off the dough. Using a baker’s lame or single-edged razor blade, slash an X into the top of the dough. Wearing long oven mitts, quickly pull the oven rack halfway out and transfer the pot from the stone to the open oven door. Slide the dough and its parchment from the pizza peel onto the stone and invert the pot immediately over the dough. Slide the rack back in, close the oven door, and reduce the heat to 450 degrees. Bake for 20 minutes. Remove the pot and continue to bake the bread until an instant-read thermometer inserted into the center of the loaf registers 190 to 200 degrees, about 5 minutes longer. The bread should be nicely risen and a dark russet brown. Using potholders, transfer the bread from the oven to a wire rack and let cool to room temperature.
Step 2
2.1 6.1 6.2
Step 4
6.1 6.2
Top similar recipes
Curated for youYour folders

 71 views
Christmas Trifle - Wheat Recipes | ...
ansonmills.com
Your folders
110 viewsChantilly Meringue - Recipes | Ans...
ansonmills.com
Your folders
73 viewsMujadara - Rice Recipes | Anson Mil...
ansonmills.com
Your folders
128 viewsBaba Ghanoush - Recipes | Anson Mi...
ansonmills.com
Your folders
93 viewsChicken Bog - Rice Recipes | Anson ...
ansonmills.com
Your folders
79 viewsAsparagus Gomae - Benne Recipes | ...
ansonmills.com
Your folders
72 viewsCarolina Gold Risotto - Rice Recipe...
ansonmills.com
Your folders
91 viewsClassic Separate-Grain Carolina Gol...
ansonmills.com
Your folders
76 viewsCarolina Gold Rice Grits Cakes - Ri...
ansonmills.com
Your folders
87 viewsPosole Rojo (Pork and Hominy Stew) ...
ansonmills.com
Your folders
 131 views
Whole Wheat Sourdough Artisan Bread
amybakesbread.com
5.0
(1)
45 minutes
Your folders
75 viewsWhole Wheat Sourdough Artisan Bread
amybakesbread.com
Your folders
 77 views
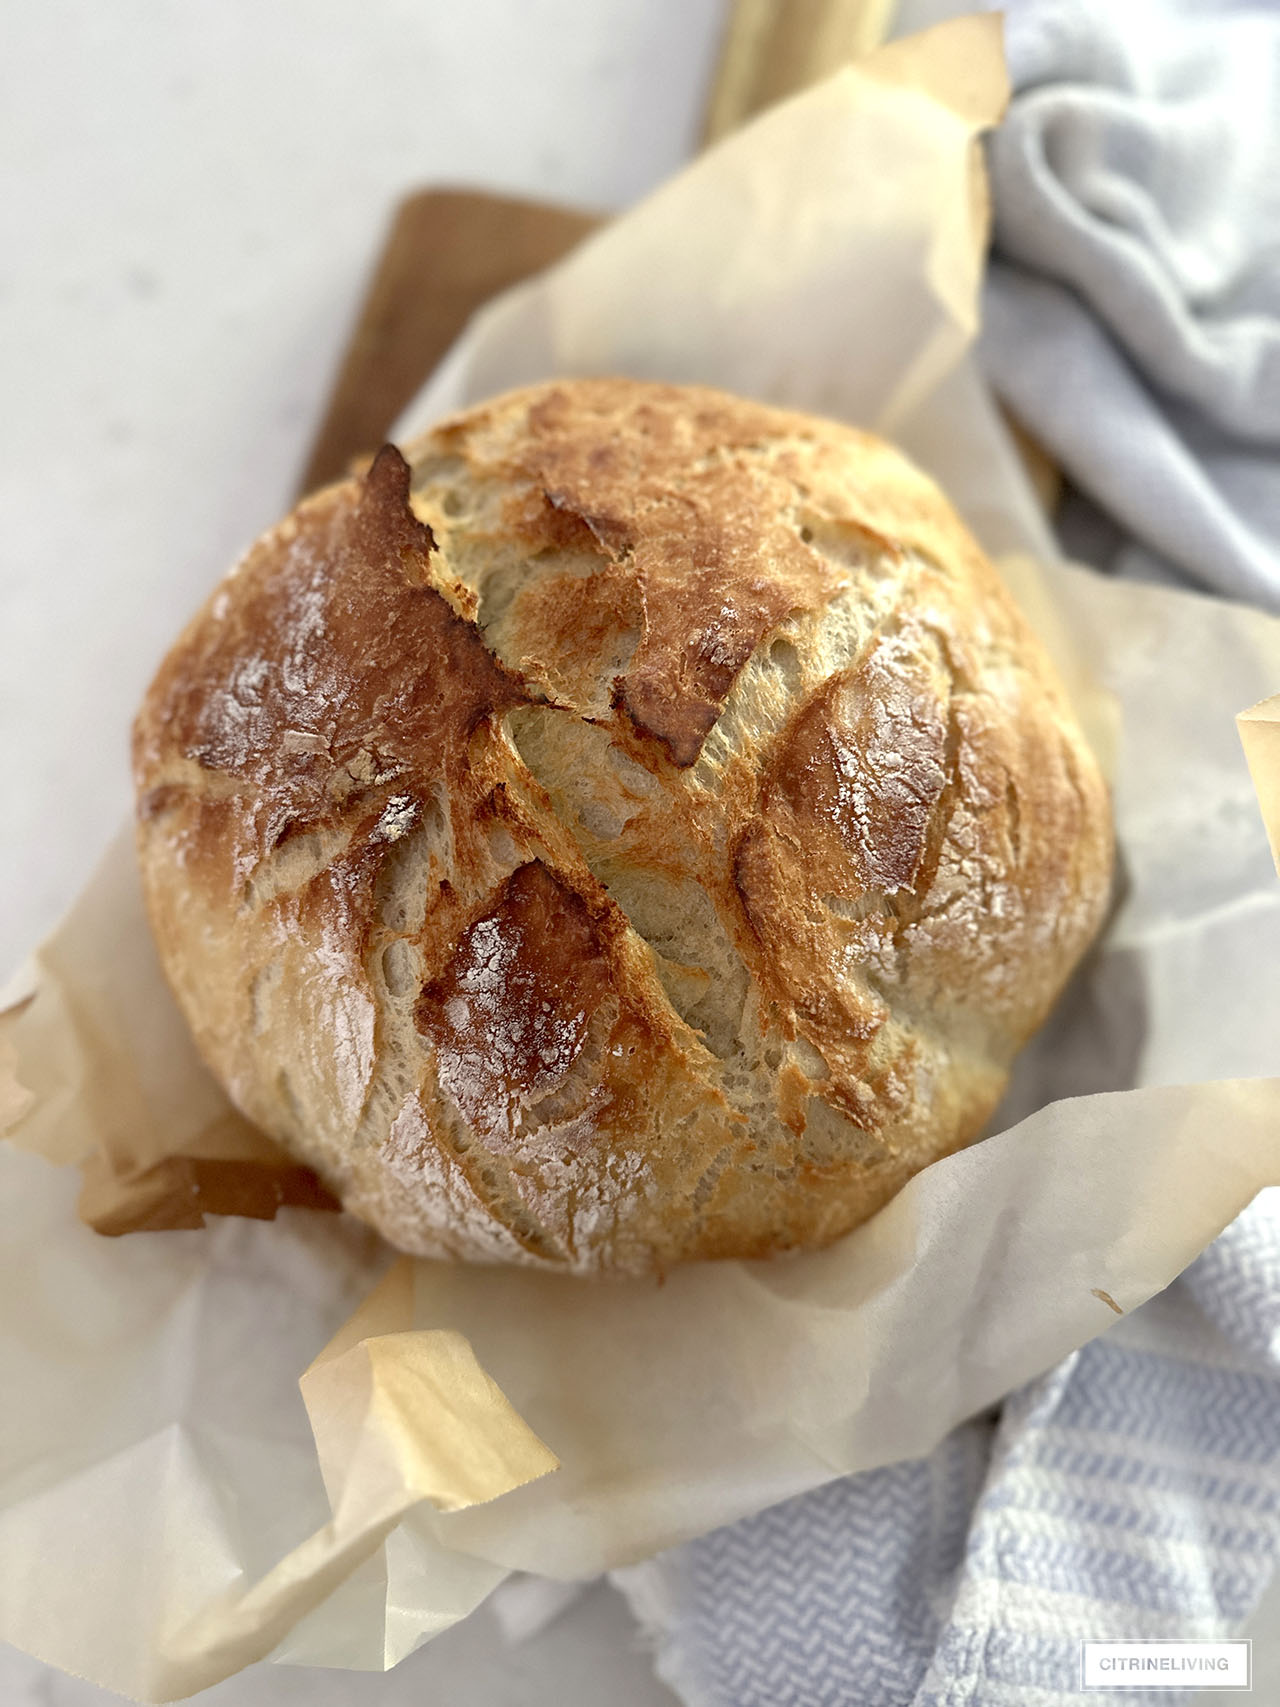
Rustic Artisan Bread
citrineliving.com
5.0
(14)
35 minutes
Your folders
 96 views
Honey Whole Wheat Sourdough Artisan...
amybakesbread.com
5.0
(9)
45 minutes
Your folders
90 viewsHoney Whole Wheat Sourdough Artisan...
amybakesbread.com
Your folders
 267 views
Rustic Whole Wheat and Buckwheat Br...
grainmillwagon.com
Your folders
 417 views
No-Knead Rustic Whole Wheat Bread
kingarthurbaking.com
3.9
(16)
25 minutes
Your folders
 179 views
4 Ingredient Whole Wheat Artisan Br...
theconscientiouseater.com
4.5
(104)
45 minutes
Your folders
 76 views
20% Whole Wheat Artisan Sourdough B...
thatsourdoughgal.com
5.0
(1)
35 minutes