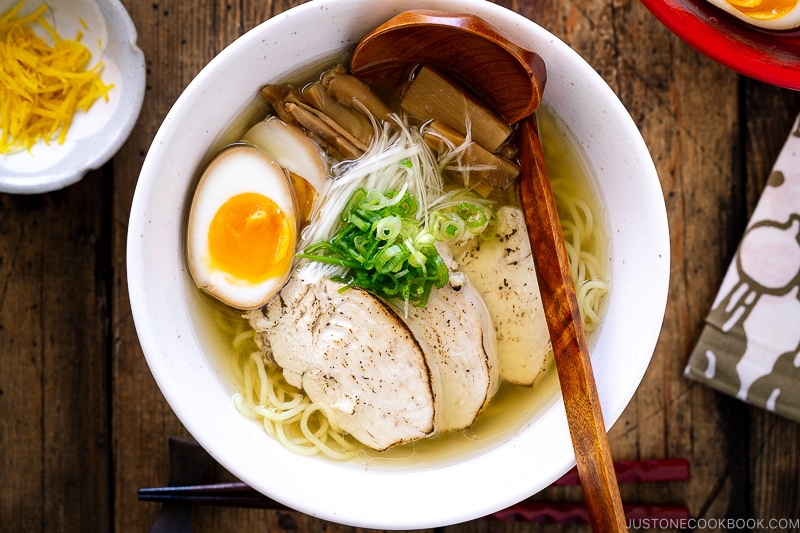
Shio Ramen with Chicken Chashu
Your folders
Your folders
Prep Time: 30 minutes
Cook Time: 60 minutes
Total: 330 minutes
Servings: 4
Cost: $21.56 /serving
Author : Namiko Chen
Ingredients
Export 32 ingredients for grocery delivery
Instructions
Step 1
I measure my ingredients using a kitchen scale (click the "metric" button above). For the best results, I highly recommend making the Cold Brew Dashi overnight, or at least 4 hours in advance. You simply need to add the dried ingredients to the water, then leave it to steep.
Step 2
Gather all the ingredients for making the Cold Brew Dashi and Ramen Soup. You can keep the ground chicken in the refrigerator for now.
Step 3
In a large pot, combine the water, kombu, dried shiitake mushrooms, and dried anchovies. If you use several pieces of kombu, count them so you know how many pieces to remove later.
Step 4
Let it steep overnight (preferably) or at least 4 hours. Do not steep longer than 12 hours or the kombu will turn slimy and the dashi will be bitter. During summertime or hot weather, keep your pot in the refrigerator for food safety.
Step 5
After steeping, reserve the specified amount of this dashi (½ cup or 120 ml for 4 servings) for making the Shio Tare later. Set it aside.
Step 6
Thinly slice the ginger (about 3 slices for 4 servings). Cut and separate the Tokyo negi into four sections: the white stalk; the Y-shaped piece where the white stalk and light green leaves meet; the light green leaves; and the dark green tops. Reserve the outer layers of the white stalk for the shiraga negi (white scallion topping) and the stalk's light green core for the Aroma Oil (See Step 2 of "To Prepare the Toppings" for how to remove the core). For making the soup, we'll use half of the dark green tops plus the Y-shaped piece (see center top of the photo, below right).
Step 7
To the pot of Cold Brew Dashi add the ground chicken, ginger slices, half of the negi's dark green tops, and the Y-shaped negi piece.
Step 8
Set the pot on the stove over medium heat. Using a wooden spatula, gently break apart the ground chicken while you heat up the stock. Do not leave any big chunks of chicken. Slowly bring the stock to a gentle boil to extract the flavor from the kombu. Right before the liquid boils, remove all the kombu pieces that you counted earlier and discard them.
Step 9
Lower the heat and simmer the stock for 30 minutes. Remember to keep the stock gently simmering but not boiling. As we're using ground chicken, we do not need to skim the scum from the stock. During this time, you can start making the Chicken Chashu.
Step 10
After 30 minutes of simmering, add the thick shavings (atsukezuri) of the katsuobushi and gently simmer for another 10-15 minutes. If you are substituting with thin shavings (hanakatsuo), add them to the simmering stock and cook for just 30 seconds, turn off the heat, and let the katsuobushi steep for an additional 10 minutes.
Step 11
Drain the stock in a fine-mesh strainer (especially if you're using thin shavings) over a large pot. Here, I'm using an 8-cup measuring cup to measure the total amount of soup. I had 8½ cups of ramen soup after cooking (for 4 servings). I then transferred the soup to the large pot. You can repurpose the spent ground chicken to make All-Purpose Miso Sauce, Soboro Don, Soboro Ankake, Keema Curry, Kimchi Soup, Kabocha Pork Stir-Fry, Mapo Tofu, and Mapo Eggplant.
Step 12
Keep the pot of soup uncovered while prepping the other ingredients. The moisture will continue to evaporate, allowing the soup to develop more concentrated flavors.
Step 13
Gather the ingredients for the Vegetarian Ramen Soup. Set a large pot over medium heat. When it's hot, add the sesame oil and stir-fry the minced ginger and minced garlic until fragrant.
Step 14
Add the vegetable broth, water, dried kombu, and dried shiitake mushrooms. Slowly bring it to a simmer. When it almost reaches a simmer, remove the kombu from the liquid and discard it. Continue to simmer uncovered for 5 minutes. Remove from the heat and set it aside. Keep the pot of soup uncovered while prepping the other ingredients. The moisture will continue to evaporate, allowing the soup to develop more concentrated flavors.
Step 15
Gather all the ingredients for the Chicken Chashu. The amount of salt is based on Diamond Crystal kosher salt.
Step 16
Remove the chicken breast skin with a knife and your hands. It should come off easily by pulling and tearing. Next, cut the chicken skin into 1-inch pieces.
Step 17
In a small pot, combine the water, salt, and freshly ground black pepper. I recommend using a small pot instead of a large one so you don't need much liquid. If you have to use a large pot, double the amount of water, salt, and pepper. Bring the liquid to a boil.
Step 18
Once boiling, add the chicken breast, making sure it is covered by the liquid, and lower the heat to medium. Put an otoshibuta (drop lid) on top of the chicken so it is completely submerged in the liquid. Make sure to keep it gently simmering (not boiling) for 25-30 minutes.
Step 19
Around the 25-minute mark, check the internal temperature of the thickest part of the chicken using an instant-read thermometer. If it reads 165ºF (74ºC), transfer the chicken and some cooking liquid to a plate and cover with plastic so it will not dry out. Let it cool on the kitchen counter. You can discard the cooking liquid or repurpose it as a seasoning (it's a very salty chicken stock). If you don't have a thermometer, cook the chicken for 25-30 minutes. If you have a very thick chicken breast, you may need to cook it a few minutes longer. Guessing the chicken's doneness is difficult and it is possible to overcook it, resulting in dry meat. Having a thermometer takes the guesswork out of testing the doneness of the chicken.
Step 20
Cut the light green leaves of Tokyo negi into julienned strips and finely mince them into small pieces. You can also mince the light green inner core leftover from preparing the shiraga negi (See Step 2 of the "To Prepare the Toppings" section below). Simply score the white stalk of the Tokyo negi and peel off the outer white layers to reveal the core.
Step 21
Cut the remaining half of the negi's dark green tops into pieces 2 inches (5 cm) long. Mince the garlic (or use a garlic press). Note: The garlic clove is missing from the photo, below right.
Step 22
In a small frying pan, add the oil, chicken skin, light and dark green parts of the negi, and minced garlic. Turn on the stove to medium low.
Step 23
Cook for 10-15 minutes, slowly extracting the flavor from the chicken skin, garlic, and negi.
Step 24
Drain the oil using a fine-mesh strainer set over a small bowl. Press and squeeze the oil out of the cooked ingredients using a wooden spatula. Set the Aroma Oil aside and discard the cooked mixture.
Step 25
Gather all the ingredients. A note about salt: Many American chefs and recipes use Diamond Crystal (DC) brand kosher salt as their standard salt, and so do I. Different types of salt have different-sized granules, so the weight of salt in one tablespoon can vary. In general, DC kosher salt requires about twice the amount by volume as table salt (DC kosher salt is 10 g/tablespoon and table salt is 20 g/tablespoon). For accuracy, it's best to measure by weight. You may experience some trial and error until you figure out the right adjustment based on what brand you use.
Step 26
In a small pot, add all the ingredients except for the katsuobushi.
Step 27
Whisk the liquid and bring it to a gentle boil on medium heat. Then, reduce the heat to medium low and let it simmer for 5 minutes.
Step 28
Add the katsuobushi.
Step 29
If you are using thick shavings, let them cook for 5 minutes and drain the Shio Tare in a fine-mesh sieve over a small bowl. If you are using thin shavings, let them cook for 30 seconds, turn off the heat, and steep for 10 minutes; then, drain into a fine-mesh sieve over a small bowl. Set the Shio Tare aside.
Step 30
Gather the rest of the ingredients.
Step 31
To make the shiraga negi (white scallion topping), score the white stalk of the Tokyo negi and peel off the outer white layers. The light green inner core can be used for the Aroma Oil. Cut the outer white layers into pieces about 2 inches (5 cm) long.
Step 32
Next, finely julienne these outer white layers. Soak in cold water for 5 minutes to remove the bitterness. Drain and set aside.
Step 33
Thinly slice the green onion and set it aside.
Step 34
Slice the Ramen Eggs in half using a fishing wire or cheese cutter (that's what I use). A knife doesn't give a clean cut, but you can use it. I top each bowl with 2 halves of ramen egg.
Step 35
Cut the Chicken Chashu into thin slices, about ¼ inch (6 mm) thick.
Step 36
Optionally, if you have a kitchen butane torch, you can sear the surface of the Chicken Chashu for a nice charred flavor and to warm it up a little bit.
Step 37
To cook the ramen noodles, bring a large pot of water to a boil. Meanwhile, bring the ramen soup back up to a simmer over the stove. Lastly, set up all the ramen toppings on the kitchen counter so you're ready to serve when the noodles are finished cooking.
Step 38
In each ramen bowl (the typical size is 850-1000 ml), add 2 Tbsp of Shio Tare and 1 Tbsp of Aroma Oil. As I explained in "To Make the Shio Tare" section, the saltiness in the Shio Tare may vary. You will need to test the perfect ratio of your soup, tare, and oil a few times. My formula is 2 Tbsp shio tare, 1 Tbsp aroma oil, and 350 ml soup (using the ramen bowl I have).
Step 39
Loosen up the fresh ramen noodles with your hands before adding them to the boiling water. Cook the noodles, stirring once in a while, according to the package instructions. Tip: I usually undercook my ramen noodles a bit so they are firm and toothsome, to my liking.
Step 40
When it's almost time to drain the noodles, pour the hot soup into each of the ramen bowls. I place a kitchen scale underneath the bowl so I can measure the exact amount of soup (350 g) for each bowl.
Step 41
Drain the noodles, shake off the excess water, and transfer to the individual bowls filled with hot soup.
Step 42
Next, arrange the noodles in the bowl for an attractive presentation. First, lift the soup-soaked noodles high and straighten them. Then, when the noodles are neatly aligned, fold the noodles from the edge of the bowl and place them over the noodles in the soup. This is an optional step, but ramen shops typically do this so the ramen looks pretty.
Step 43
Quickly and neatly arrange the ramen toppings. Serve immediately.
Step 44
You can keep the leftovers in separate containers and store them in the refrigerator for up to 3 days and a month in the freezer. Boil the noodles right before serving.