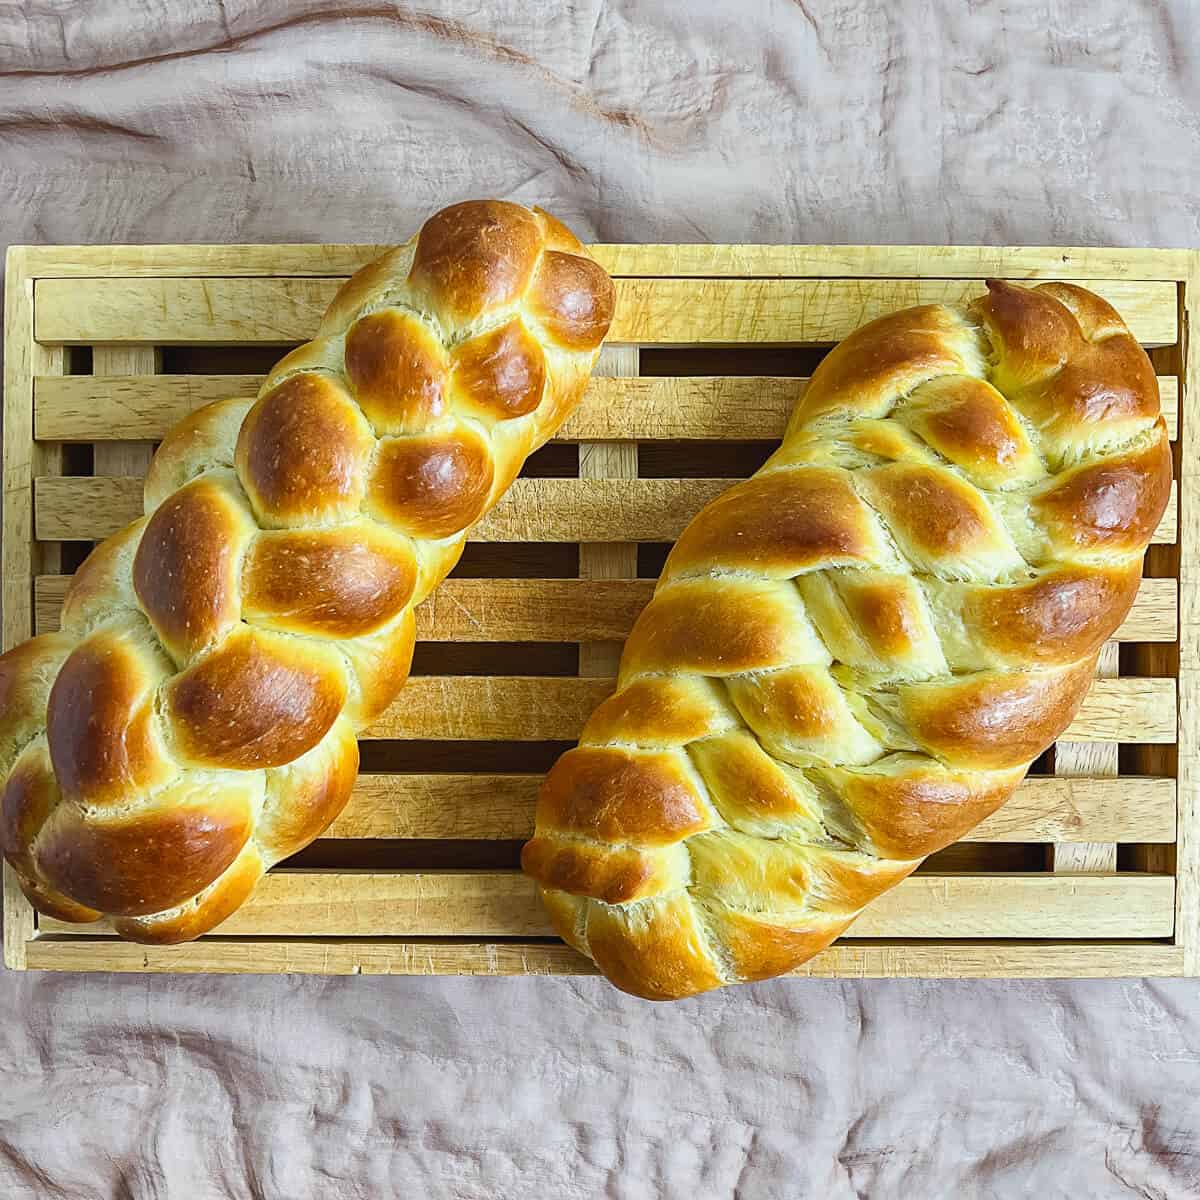
Six Strand Braided Challah Two Ways
5.0
(1)
Your folders
Your folders
Prep Time: 10 minutes
Cook Time: 35 minutes
Total: 90 minutes
Servings: 16
Ingredients
Export 2 ingredients for grocery delivery
Instructions
Step 1
Portion out 6 equal pieces of dough, cutting it with a bench scraper or knife (for the best accuracy, weigh the dough with a kitchen scale). Shape each piece into a long rope. Lay all the ropes side by side on a lightly floured surface and pinch them together at the top.
Step 2
Take the topmost right strand and place it on the opposite side. You're only going to do this step once.
Step 3
Take the second from the top left strand and place it on the opposite side. Take the topmost left strand and place it in the middle of the four remaining strands. This is the first step of the repeating pattern.
Step 4
Take the second from the top right strand and place it on the opposite side. Take the topmost right strand and place it in the middle of the four remaining strands. This is the second step of the repeating pattern.
Step 5
Repeat steps 2 and 3 until all the dough is braided.
Step 6
Tuck the ends of the loaf underneath on both ends to give a neat finish. Adjust the braid ends and sides with your hands to make everything even.
Step 7
Take the rightmost strand and jump it over the next 2 strands, under the 3rd strand, and over the next 2 strands.
Step 8
Repeat with the new rightmost strand, and continue the pattern until all the dough is braided. Pinch the leftover ends together and tuck under the loaf.
Step 9
Line a half sheet baking pan with a Silpat silicone mat or parchment paper. Transfer the shaped dough to the baking pan, then cover with greased plastic wrap.
Step 10
Let the shaped dough rise for 45 minutes in a warm place. Preheat the oven to 350 °F.
Step 11
For the egg wash, whisk together the beaten egg with the water. Brush the dough with the egg wash, then sprinkle on any desired toppings.
Step 12
Bake the dough for 25 to 35 minutes, rotating the pan front to back halfway through the baking time. When the loaf is golden brown and it sounds hollow when tapped on the bottom (or reads 190 °F on a digital thermometer), remove it from the oven and cool on a wire rack.
Step 13
Slice (or tear), serve, and enjoy!
Step 14
Challah will last for several days on the counter in an airtight container, and freezes beautifully.
Step 15
For more braiding inspiration, check out the instructions for braiding challahs with 3-strands, 4-strands (2 ways, straight and round), or 8-strands. Have a go!