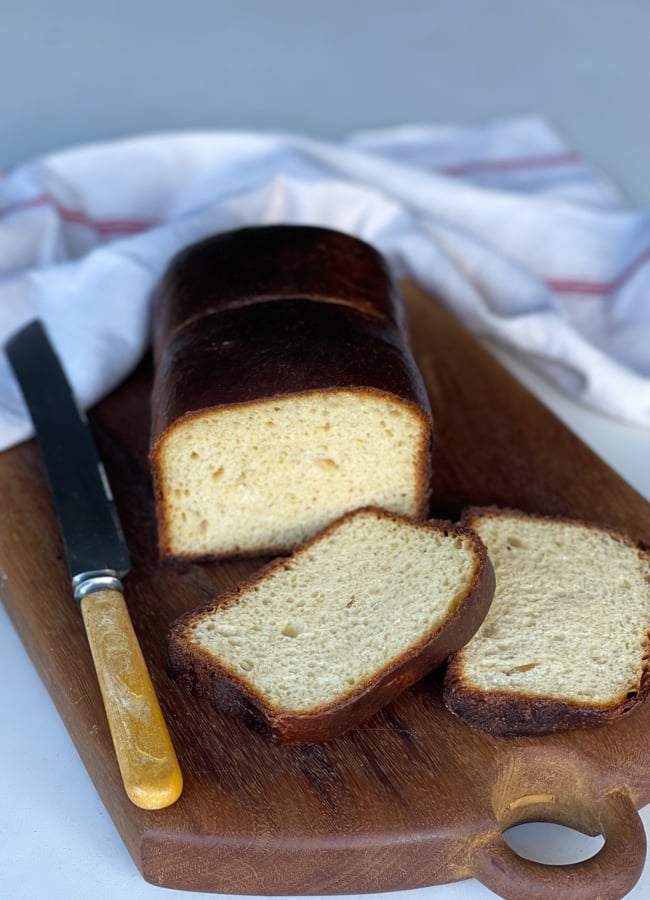
Sourdough Brioche
Your folders
Your folders
Prep Time: 2160 minutes
Cook Time: 60 minutes
Servings: 2
Cost: $14.39 /serving
Author : Well Nourished Team

Ingredients
Export 7 ingredients for grocery delivery
Instructions
Step 1
I have created a timeline for preparing the brioche, however, feel free to adapt the timing to best suit your schedule.
Step 2
Make sure the culture is fed the night before you want to start the loaf (so it is active in the morning).
Step 3
Prepare the leaven by mixing the flour, water and sourdough starter in a medium sized jar or glass bowl. Place in a warm spot in the kitchen and allow to rise.
Step 4
Once the leaven has risen to approximately twice its original size, it is ready to use. This could be between 1pm and 3pm, depending on how warm your kitchen is.
Step 5
It is important that the eggs are at room temperature, the milk is lukewarm and the butter is soft before you mix the dough so remember to take them out of the fridge in advance.
Step 6
It’s time to mix the dough. Put the flour, salt and sugar in the mixing bowl and whisk briefly with a fork to distribute evenly. If using a Thermomix, 30 seconds, speed 3.
Step 7
Next, add the leaven, eggs and warm milk.
Step 8
Mix (using the dough hook attachment or by hand) until the ingredients come together to form a rough dough. If using a Thermomix, 30 seconds, flour symbol.
Step 9
Allow the dough to rest for 30 minutes.
Step 10
If you are using an electric mixer, continue to mix the dough, using the hook attachment, for five minutes on speed 1 and for a further five minutes on speed 2.
Step 11
If you are kneading by hand, continue kneading for at least ten minutes until the dough is smooth and elastic. It could be quite sticky to start with.
Step 12
If using a Thermomix, mix 10 minutes, flour symbol. (Make sure it is far from the edge of the bench, and stay nearby in the kitchen.)
Step 13
Once the dough is well mixed, add the butter in small amounts while the mixer is on low. Continue until all the butter is incorporated and the dough looks shiny and smooth.
Step 14
If kneading by hand, this may feel like it may never come together so be patient, it will.
Step 15
If using a Thermomix, add 50 g of the butter then mix 30 seconds, flour symbol. Repeat until the butter is incorporated bit by bit until it comes together.
Step 16
Cover the bowl with a damp tea towel and set aside to prove at room temperature for 4 hours.
Step 17
After around 4 hours, ensure the bowl is well covered and place it in the fridge for a long, cool prove overnight. This will improve the flavour of the brioche.
Step 18
Generously grease your two loaf tins with butter.
Step 19
Remove the dough from the fridge and tip it out onto a lightly floured surface. Divide the dough into four even pieces and shape each piece into a ball (sprinkle lightly with flour if the dough is very sticky). Place two balls, side by side in each tin.
Step 20
Place the tins inside a large plastic bag (I have a few shopping bags I reuse for this purpose. Bin bags also work well and can be kept and reused) and then put them in the warmest part of the house to prove. Warmth is essential here so if your house is cool, find a spot close to the heater or pop them in the oven with just the light on.
Step 21
Allow the brioche to prove for approximately 4 hours. You are looking for a noticeable rise on the dough, the dough in the tins should be touching.
Step 22
Preheat the own to 240°C / 475°F (fan-forced).
Step 23
Whisk the extra egg with a dash of water to make an egg wash. Gently brush the loaves with the egg wash using a pastry brush or similar.
Step 24
Put the tins in the oven and immediately turn the temperature down to 200°C / 390°F (fan-forced). Bake for 30 minutes, then decrease the temperature again to 180°C / 390°F (fan-forced) and bake for a further 10 minutes. You want the brioche to get quite dark, but not to burn so keep an eye on it towards the end of cooking time.
Step 25
Allow the brioche to cool in the tins for an hour, then remove them from the tins and allow to cool completely on a rack before slicing.
Step 26
Brioche can be enjoyed with your favourite spreads, either fresh or toasted. Great for French toast or a bread and butter pudding, too!
Step 27
Snap freeze and store in an airtight container in the fridge or freezer.