Sourdough Starter
Your folders
Your folders
Author : Julia Estrada
Ingredients
Export 3 ingredients for grocery delivery
Instructions
Step 1
Day 1: Place a clean container on your scale and make a note of how much your container weighs. Then, tare so the scale reads “0”. Add 100 grams (g) whole wheat or rye flour (or all purpose if that is all you have) and 100g water. Stir thoroughly until no dry spots remain. Cover the container loosely with a lid or clean kitchen towel/paper towel and rubber band and set in a warm (70°F - 80°F) place for 24 hours.
Step 2
Day 2: You may see some bubbles and activity in your starter, or you may not see anything happening yet. Either way, discard 100g (about 1/2 cup) so that you are left with 100g in the container (100g starter plus the weight of your specific container). Add 100g water and stir to break up the starter. Add 100g flour (whole wheat/rye preferred again) and stir thoroughly until no dry spots remain. Cover the container loosely again and set in your warm place for 24 hours.
Step 3
Day 3: Today you will start feeding your starter twice a day. If you saw an initial surge of activity in the first couple of days, this may die down, or may continue to ramp up slowly. Regardless, discard 200g (about 1 cup) so that you are left with 100g in the container*. Add 100g water, stir to break up the starter, then and 100g flour (whole wheat/rye preferred again) and stir thoroughly until no dry spots remain. Cover the container loosely again and set in your warm place for 12 hours. 12 hours later: Repeat the feeding process described above. *If your container is looking very crusty, feel free to add 100g of your starter to a clean container to feed it instead of using the same container. This is why having multiple containers is helpful. Just keep in mind that you don’t have to use a fresh container for every feed.
Step 4
Days 4-6: Repeat the Day 3 feeding process every 12 hours. You may see no activity for a few days, and then be surprised to find your starter showing lots of activity, or it may slowly ramp up day-to-day. At this point, if you have been using whole wheat or rye flour, you may switch to feeding your starter a blend of whole wheat/rye and all purpose, such as 50g of whole wheat/rye and 50g of all purpose flour instead of 100g whole wheat/rye if you wish. If you are only using all purpose, keep doing what you are already doing.
Step 5
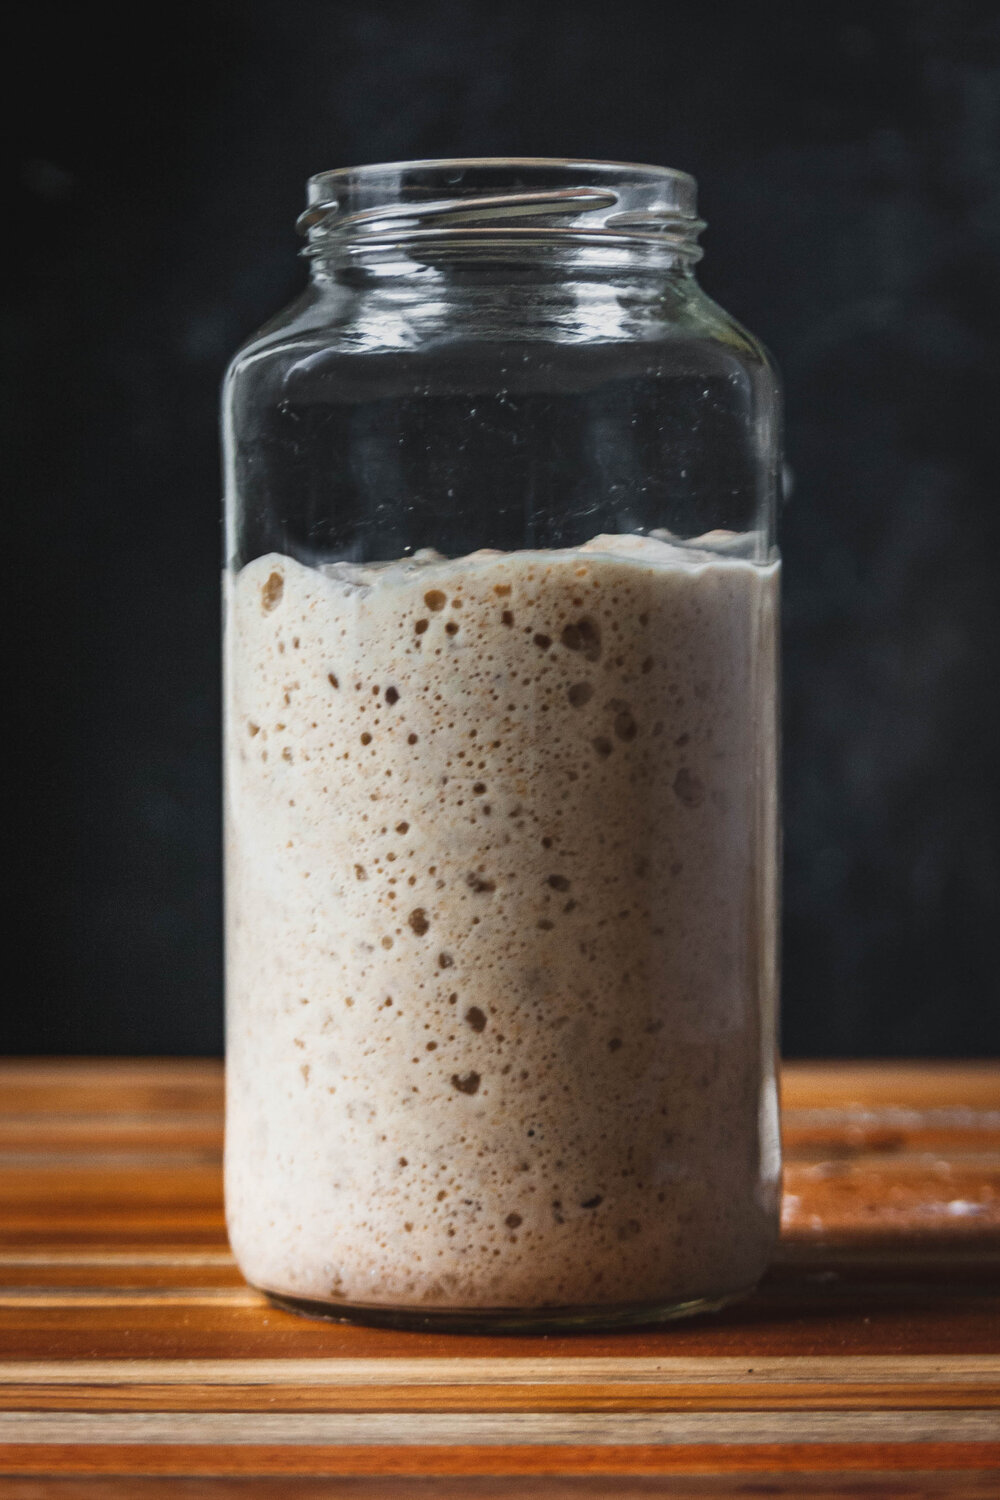
Day 7: By this point, you should hopefully see some reliable activity in your starter. If your starter consistently rises to double or triple its height within 4-8 hours of feeding it, it is ready to bake with. If not, continue to feed on the 12-hour schedule until it does. This could take up to 14 days in some cases, especially if you are using only all-purpose flour or your starter is in a colder environment. To tell if your starter is doubling/tripling, use a rubber band on the outside of the container to mark where the top of the starter is after feeding. Over the next 4-8 hours, check in periodically to monitor the growth. The starter will rise, creating a slight doming at the top, and you will see bubbles throughout, which will be different sizes/shapes depending on what flour you are feeding and your environment. After the starter reaches its peak, it will fall back down, leaving streaks on the side of the container. Once your starter behaves as described above, you can successfully bake with it!