The Easiest Crispy Roast Pork Belly (Siu Yuk / Sio Bak) - Salt Crust Method
5.0
(28)
Your folders
Your folders
Prep Time: 10 minutes
Cook Time: 105 minutes
Total: 115 minutes
Servings: 15
Author : Marvellina
Ingredients
Export 6 ingredients for grocery delivery
Instructions
Step 1
Try to get pork belly with smooth and even skin as much as possible. The one without much wrinkles and folds. Those areas tend to have not much crackle because they dip down and don't get much exposure to the heat, which is the key to get the good cracklings
Step 2
If you plan to use an air fryer, you may need to choose a smaller size pork belly so it fits into your air fryer
Step 3
Mix the wine, brown sugar, five-spice powder (if using) and salt in a small bowl. Place the pork belly in a container and gently pour in the marinade and use your hand to kinda rub the marinade into the meat and leave the skin out. Once you are done, pat the skin dry and put it in the refrigerator without cover for at least 8-12 hours. The drier the skin, the better the cracklings are going to be
Step 4
When ready to be roasted, preheat your oven to 350 F (180 C). Line your baking sheet with heavy-duty aluminum foil. Place another one to two layers of heavy-duty aluminum foil on top . Transfer the pork belly to the aluminum foil and fold all the sides up, leaving about 1/2-inch on top
Step 5
Brush a thin layer of apple cider vinegar on the skin. Very gently pour the salt on top of the skin to form about 1/4-inch of salt layer, if using fine salt. Use your hands to keep the aluminum foil as close to the pork as much as possible while pouring the salt to minimize any gap to prevent salt dripping through the gap too much (that will make the pork very salty especially if you use fine salt). I highly recommend using rock salt for this reason, especially if you are going to cook with an air-fryer, less messy
Step 6
If you use rock salt, cover the surface of the skin evenly, leaving no gap
Step 7
Pop it into the oven, 3rd rack from the top (middle of the oven) and let it roast for the next 1 hour and 30 minutes
Step 8
After 1 hour and 30 minutes, remove from the oven. If you used fine salt, the salt will form a crust. Gently remove the crust of salt off the skin. If you use rock salt, they crusted but won't form sheet of crust. Use a knife to gently scrape the rock salt off from the top and the sides if any
Step 9
Change to a new aluminum foil and brush off the salt from the side and underneath the meat with some vinegar or apple cider vinegar. Wrap it back up as you did before. Brush the skin with some cooking oil evenly. Carefully fold the aluminum foil down to expose the skin this time while covering the meat part to retain moisture
Step 10
The pork shrinks after cooking and the surface may become uneven. If this is the case, you can ball up some aluminum foil and tuck under the meat to prop any area that dip down so the surface is level and gets even heat distribution. If it doesn't get expose much to the heat, it won't crackle and you will just get area with no crackles and those areas are rubbery and tough
Step 11
Place the pork belly at the lowest rack or start with 2nd lowest rack of the oven and turn the broiler to a low setting (this is about 450 F or the highest heat your oven can get to if you don't have broiler function). This is the part when the cracklings start to form. Watch it carefully, as you don't want them to burn. Some spots may get burn quicker than the others, I use aluminum foil to cover the part that has crackled and started to get burn or you can move it down further from the fire. Let it broils until you are happy with the cracklings, may take 10-15 minutes or longer. Remove from the oven and let it sit for at least 10 minutes before slicing
Step 12
Remove the basket from the air fryer if you need to so the pork belly can fit into the air fryer. Preheat the air fryer at 375 F (190 C) for 5 minutes. If you don't need to, then just leave the basket in there. Put a metal trivet inside and put the pork belly on top. Close the air fryer and let the pork belly cook for the next 40 minutes or until it's cooked through
Step 13
WARNING: If you use fine salt, the salt will fly all over inside the air fryer at the beginning, but will settle down as the time goes and the salt forms crust. This is the part I don't like about cooking it in the air fryer, but the mess is not as bad as I thought
Step 14
After 40 minutes, carefully remove the pork belly from the air fryer and gently remove the salt crust. If too much salt has fallen through the cracks on the side during cooking, change to a new aluminum foil. Brush off any excess salt on the skin and at the bottom of the pork belly. Brush with some vinegar to minimize of the saltiness. Wrap it back up as you did with an aluminum foil
Step 15
Fold the aluminum foil down to expose the skin. Brush the skin with some oil. Put it back on top of the trivet inside the air fryer and let the skin crackles at 375 F (190C) for 15-20 minutes or until you are happy with the crackles
Step 16
Carefully unfold the aluminum foil down and remove the pork onto a chopping board. Discard the extra oil collected in the foil during baking. You can use apple cider vinegar to brush the sides of the pork belly to get rid of any excess salt that might get in the gap when you pour the salt earlier
Step 17
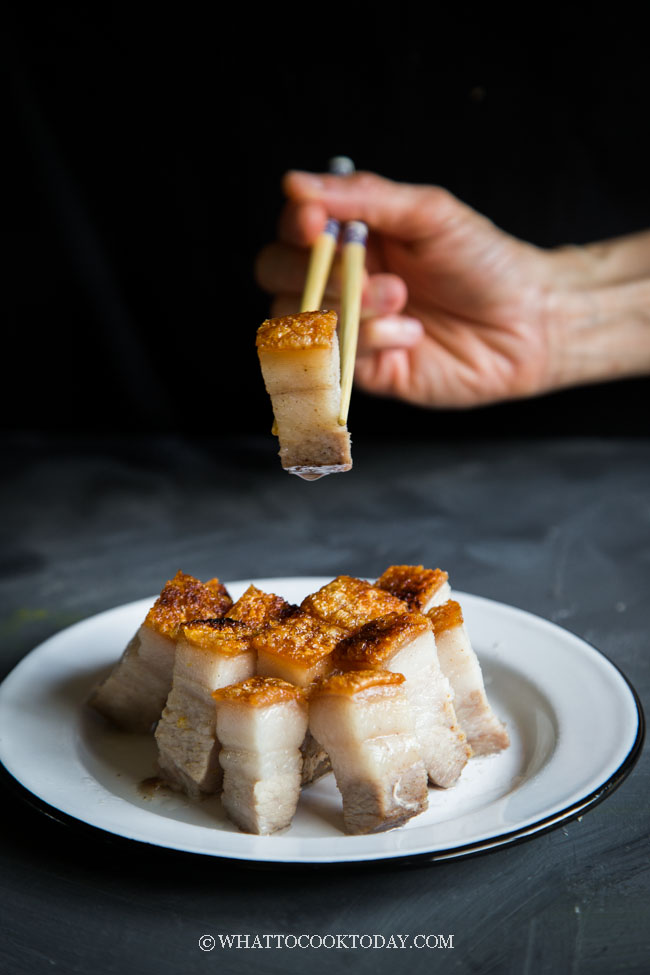
When ready to slice them, I found it easier to turn the skin side down on the chopping board and slice while applying gentle pressure on the knife to break off the pieces. Serve with your favorite chili sauce or on its own