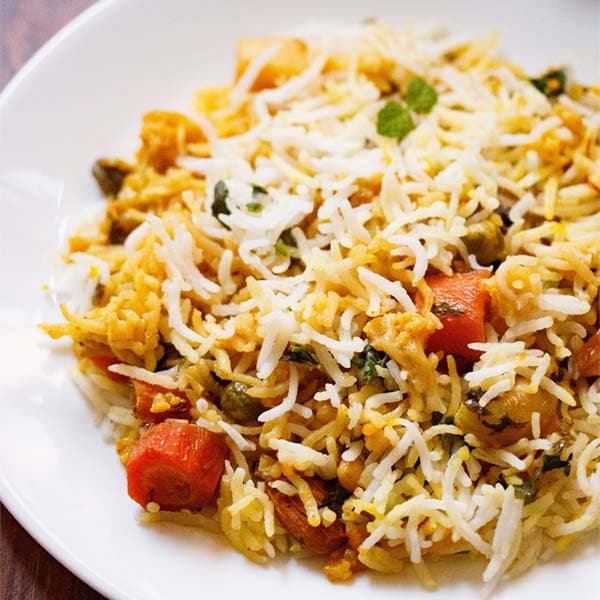
Veg Biryani | Veg Dum Biryani Recipe
4.9
(183)
Your folders
Your folders
Prep Time: 45 minutes
Cook Time: 45 minutes
Total: 90 minutes
Servings: 5
Cost: $21.51 /serving
Author : Dassana Amit
Ingredients
Export 31 ingredients for grocery delivery
Instructions
Step 1
Pick and rinse basmati rice in running water till the water runs clear of starch. Soak the rice in 1 cup of water for 30 minutes.
Step 2
After 30 minutes drain the rice and set aside.
Step 3
When the rice is soaking prep all the veggies and other ingredients. Set aside.
Step 4
Take a deep bottomed pan. Add water and heat the water on a high flame.
Step 5
When the water becomes hot, add the salt and following spices: tej patta, green cardamoms, cloves, black cardamom, cinnamon, strands of mace.
Step 6
Bring the water to a boil. Then add the soaked basmati rice.
Step 7
Just gently stir with a spoon or fork, after you add the soaked rice.
Step 8
Do not reduce the flame and continue to cook the rice grains.
Step 9
The rice has to be ¾ᵗʰ cooked. The grains should have a slight bite to them when cooked. The rice should not be fully cooked.
Step 10
Drain the rice in a colander. Gently fluff and keep aside.
Step 11
In a 2-litre pressure cooker or a pan, heat ghee. Add the following spices - shahjeera, tej patta, green cardamoms, cloves, black cardamom and cinnamon. Sauté the whole spices till they crackle.
Step 12
Now add the onions. Stir and sauté them on a low to medium flame.
Step 13
Add a pinch of salt to quicken the cooking process.
Step 14
When the onions are cooking, take 1 cup fresh curd (yogurt) in a bowl and whisk the curd with a spoon or wired whisk till it become smooth.
Step 15
Sauté the onions till they become golden brown or caramelize.
Step 16
Then add the ginger-garlic paste and sliced green chillies. You can also finely chop the ginger-garlic and add.
Step 17
Sauté till the raw aroma of ginger-garlic goes away.
Step 18
Add the turmeric and red chili powder. Stir and mix well.
Step 19
Next add the chopped veggies. Sauté for a minute or two.
Step 20
Lower the heat and add the whisked curd (yogurt). Stir and mix well as soon as you add the curd. Then add ½ cup water in the pressure cooker. For cooking in a pan, add ¾ cup water.
Step 21
Season with salt and mix again.
Step 22
Pressure cook for 1 whistle on 3 to 4 minutes on medium heat. If cooking in a pot, then cook until the vegetables are tender. Don’t over cook the vegetables.
Step 23
Warm 4 to 5 tablespoons milk in a microwave or in a small pan on the stove top. Add ¼ teaspoon of saffron strands. Stir and keep aside.
Step 24
When the pressure settles down on its own, remove the lid and check the gravy.
Step 25
If the vegetables are under cooked, then keep the cooker on the stove top and simmer the vegetable biryani gravy without the lid, till the vegetables are tender.
Step 26
If there is too much of water or stock in the gravy, then simmer until some of the water evaporates and dries up. Note that the vegetable gravy should have a medium or slightly thick consistency and should not be watery.
Step 27
Now add cashews, raisins and almonds (blanched or raw) to the vegetable gravy. Mix and stir. Set aside. Do a taste test and check the salt in the vegetable gravy. Add more if needed.
Step 28
Now in a thick bottomed pan, layer half portion of the vegetable gravy first.
Step 29
Then layer half portion of the semi-cooked rice.
Step 30
Sprinkle half of the chopped coriander leaves (cilantro), mint leaves and saffron milk.
Step 31
Layer the remaining vegetable gravy.
Step 32
Layer the last portion of the rice. Sprinkle the remaining coriander leaves, mint leaves, and saffron infused milk on the top. Sprinkle rose water or kewra water.
Step 33
You can make 2 layers or 4 layers like I have done. But do note that rice should be the top layer and the vegetable gravy should be the bottom layer.
Step 34
Now seal and secure the pot with an aluminium foil. Then cover with a lid. You can also seal the pan with a moist cotton cloth and then cover with a lid.
Step 35
Take a tava/griddle/skillet and heat it on medium flame.
Step 36
When the tawa become hot, then lower the flame. Keep the sealed veg biryani pan on the tawa.
Step 37
Keep the flame to the lowest and cook for 30 to 35 minutes. You can dum cook hyderabadi veg biryani for the first 15 minutes on a direct low flame and then for the last 10 minutes, place the pan on the hot tawa/skillet and cook on a low heat.
Step 38
Once done using a fork or spoon check the bottom layer of the biryani. There should be no liquids at the bottom. If there are liquids, then continue to dum cook for some more time.
Step 39
After dum cooking, give a resting time of 5 to 7 minutes and later serve the hyderabadi veg biryani.
Step 40
While serving, make sure you equally serve the vegetables as well as the rice.
Step 41
There are various sides that pair best with a veg biryani. Biryani is usually accompanied with a raita (yogurt dip). You can choose to pair it with Cucumber Raita, Onion Tomato Raita and Boondi Raita, or you could enjoy biryani with any savory raita of your liking.
Step 42
You can also pair it with Kachumber Salad (onion-tomato salad), plain Curd (Yogurt), Mango Pickle, some lemon wedges or roasted papad.
Step 43
The hyderabadi veg biryani is usually served with Mirchi ka Salan (Green Chilly Curry) and raita. If desired you can serve biryani with a simple soupy Shorba gravy.
Step 44
You can also enjoy biryani as it is without any sides or accompaniments.
Step 45
Store the biryani leftovers in your refrigerator for a day only. While reheating steam for 5 minutes in a pan or Instant pot. You could even lightly sauté the biryani stirring frequently in a frying pan or skillet until warm or hot.