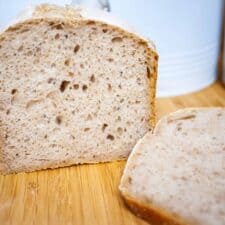
Bread machine sourdough bread recipe
4.8
(709)
Your folders
Your folders
Prep Time: 4 hours
Cook Time: 1 hours, 15 minutes
Total: 5 hours, 15 minutes
Servings: 1
Author : Eli K. Giannopoulos

Ingredients
Export 2 ingredients for grocery delivery
Instructions
Step 1
In your bread machine basket, pour in your sourdough starter then the flour
Step 2
Add in the sugar/honey, salt and the butter
Step 3
Pour in your water around the edges of the baking basket
Step 4
Set your bread machine to the kneading cycle for 30 minutes or if it has a sourdough dough cycle use that. For the Panasonic SD-ZX2522 use menu For the Panasonic SD-ZB2512 use menu 26.
Step 5
Once your sourdough bread has finished kneading, let your dough rest and proof for 3-4 hours or until it has risen by about 50% of its original size. For the Panasonic SD-ZX2522, use menu 30 for about 2 hours and 30 minutes to accelerate the proofing or let it rest with the machine switched off for about 4 hours for a more sour flavour. For the Panasonic SD-ZB2512KXE use menu 27 for the same amount of time (2h 30mins). Note that proofing time will depend on how active your sourdough starter is so adjust accordingly until your bread has risen the right amount.
Step 6
Once proofed, sprinkle some flour on top and score lengthwise with a sharp knife or a blade. Pop any large bubbles that may have appeared on the surface.
Step 7
Set your bread machine to the bake programme and set its timer for 1 hour and 15 minutes. For the Panasonic SD-ZX2522 and the Panasonic SD-ZB2512, use menu 18.
Step 8
Once done, remove the basket and tip the bread over to an airing rack. Let it cool down for about an hour before cutting it.
Step 9
If you want to prepare your bread overnight and own a Panasonic bread machine use menu 10 for the Panasonic SD-ZB2512 and menu 11 for the Panasonic SD-ZXThe loaf will be slightly denser so I recommend going with the 75% Hydration – Lighter dough recipe above.