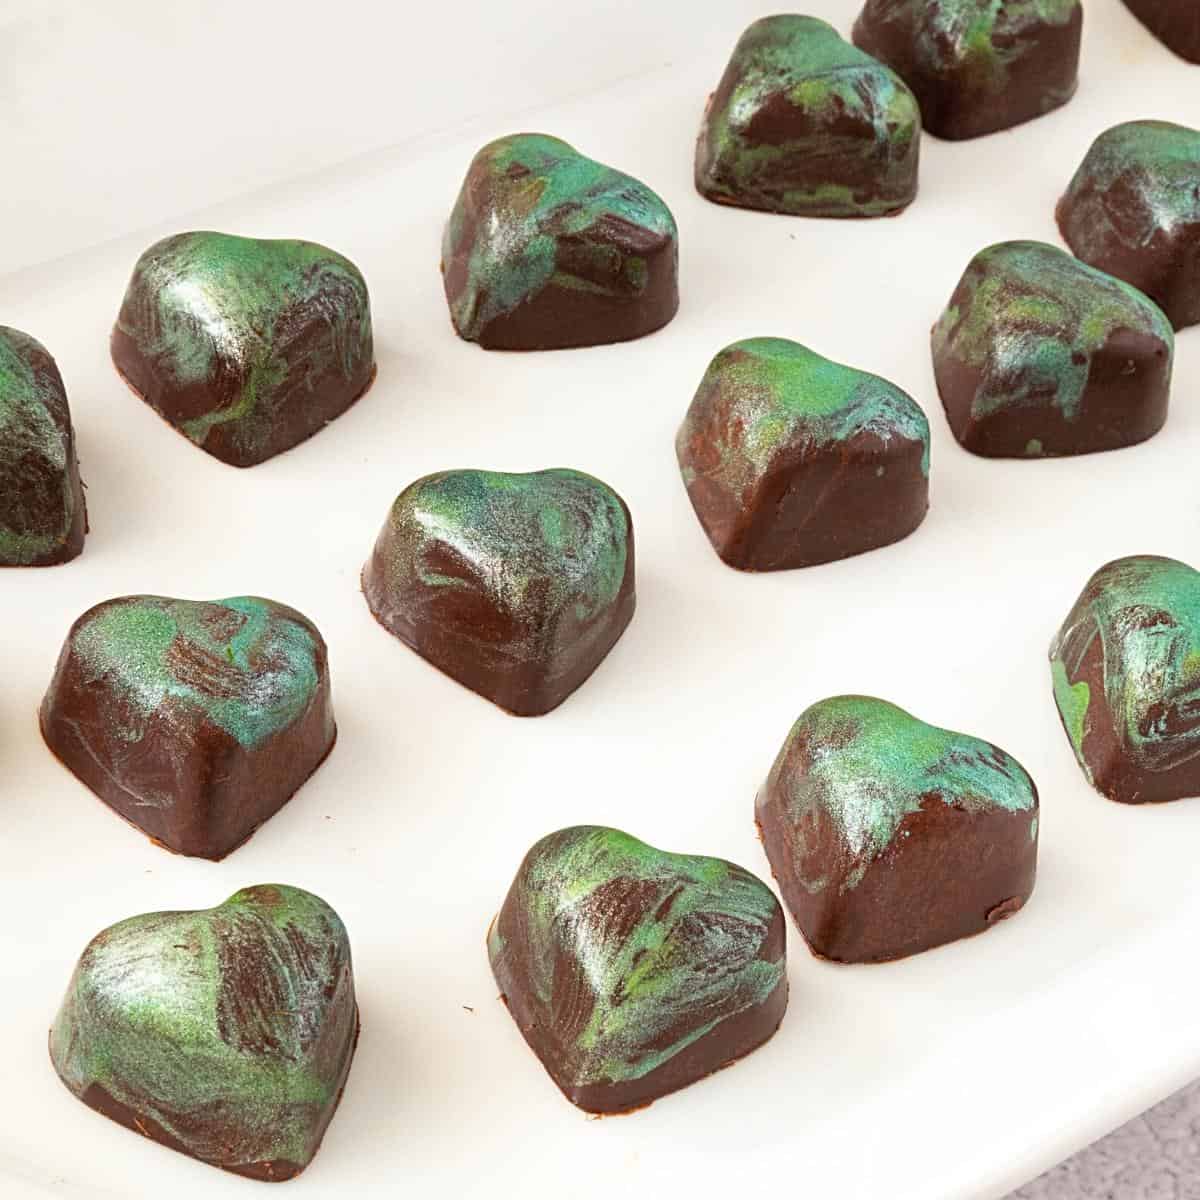
Chocolate Bonbons
5.0
(17)
Your folders
Your folders
Prep Time: 60 minutes
Cook Time: 10 minutes
Total: 310 minutes
Servings: 36
Ingredients
Export 5 ingredients for grocery delivery
Instructions
Step 1
Combine chocolate and whipping cream in a microwave-safe bowl. Melt in the microwave for a minute on high. Pro tip - Alternatively, heat the cream in a saucepan and pour hot cream over the chocolate. The heat in the cream should melt the chocolate.
Step 2
Let stand for 2 minutes then stir to combine. If you still have unmelted chocolate, heat in the microwave at 10 to 20-second intervals until completely melted.Pro tip - Letting the cream and chocolate rest for 2 minutes will help the heat from the cream melt the chocolate evenly and easily.
Step 3
Use a hand blender to whip the chocolate. Cover with a plastic wrap and let chill in the fridge until set. Usually, about 2 hours but you can leave it in the fridge for up to 2 days. Pro tip - Whipping the ganache will aerate the ganache and make it lighter in color. Also, the light-colored filling makes a nice contrast to the dark chocolate.
Step 4
When ready to use, transfer the ganache to a piping bag. Cut a small hole at the end when ready to pipe.
Step 5
Melt the cocoa butter in a microwave-safe bowl. It takes no more than 30 to 40 seconds. Set aside.
Step 6
On a small plate, add the edible powdered food colors. I used green and blue today, but you can use one or more colors. Pro tip - Make sure to use complimenting colors that will blend into a prettier color.
Step 7
Add a tablespoon of cocoa butter on the plate in between the colors. Using a soft-bristled paintbrush, combine one color with the cocoa butter. Make a thick paste and smear the color in each cavity of the bonbon mold. Then, do the same with the second color as shown in the video. Pro tip - The technique we used here blends the two colors together. But, you can also do the first color and chill the mold for 10 minutes. Then, do a second color. This will ensure the two colors do not blend.
Step 8
Place the bonbon mold in the fridge for 10 minutes for the cocoa butter to set.
Step 9
Use a microwave-safe bowl, heat-proof spatula or spoon, and thermometer.Pro tip - I like to use plastic or silicone bowls as they do not retain heat. This makes it easier to temper chocolate.
Step 10
Chop the chocolate into small, similar size pieces. Place 2/3 of the chocolate in one bowl. Chop the remaining chocolate into smaller pieces and set them aside. Pro tip -Today, I am using small choclate pallets so I melted the large batch without chopping. But I did chop the smaller batch to ensure easy tempering.
Step 11
Place the large batch of chocolate into the microwave and start at 30 seconds on high. Then, take it out of the microwave and stir it with a spatula or spoon.Pro tip - The chocolate will seem untouched as if it has not been melted but you still want to stir it.
Step 12
Next, put it back into the microwave and give it another 20 seconds. Remove and stir again. If necessary, put it back into the microwave for 10 seconds at a time until it is melted but does not go over 110°F/43°C (max 115°F/46°C). Pro tip - Make sure you stir well, the chocolate may look like it is not fully melted but the heat in the chocolate is often enough to melt the remaining chocolate.
Step 13
Now, add the remaining unmelted chocolate to the bowl stirring continuously. Pro tip - The chocolate will thicken and become shiny and smooth as it cools.
Step 14
Continue to stir until the temperature of the chocolate comes down to 90°F/32°C for dark chocolate, 86°F/30°C for milk chocolate, and 84°F/28°C for white chocolate. Pro tip - Reaching the temperature is important.
Step 15
Your chocolate should now be in temper. Pro tip - You can test your tempering by spreading a little chocolate on parchment paper. It should set within 3 minutes at room temperature. It should be shiny and without any streaks.
Step 16
Bonbon shells - Pour the tempered chocolate into the mold. Tap it a few times to remove any air bubbles. After about 30 seconds to a minute invert the mold over the bowl or table and let all the chocolate gently empty the mold. Pro tip - It will feel like the mold is empty when the chocolate drizzles out but that is exactly what we want - a nice think shell. Scrape the molds as you go to keep things less messy as shown in the video.
Step 17
Scrape the top of the mold to ensure a smooth top edge on the bonbons. Let the mold chill in the fridge for 10 minutes. Pro tip - It is important that you chill the shells for just 10 minutes or until the chocolate is just set but not completely dry. Otherwise, the shells will move when the filling is piped in.
Step 18
After 10 minutes, pipe the ganache filling in each mold cavity. Tap the mold to help the filling settle and remove any air pockets. Pro tip - If the filling is too liquid, place the mold in the fridge for 10 minutes or at least until the filling has a slight crust on the top. This ganache is set so it did not need any chilling.
Step 19
Pour the remaining tempered chocolate into a piping bag and cut a small hole at the tip. Then, pipe the chocolate over each filling in the mold. When done, scrape the excess chocolate back into the bowl until you have a clean smooth surface. Pro tip - Make sure you cut a small hole in the piping bag. Otherwise, it will be difficult to control the chocolate. Piping the chocolate keeps the filling in place and makes much less mess and leakage.
Step 20
Place the mold in the fridge and chill until the chocolate is set and pull away from the mold. Pro tip - You will know when the chocolate pulls away from the mold by looking at the back. But, make sure to hold them over the table so they don't fall and break.
Step 21
To remove the bonbons from the molds, simply invert them on a tabletop or flat surface. You may need to tap a few times to help some of them release from the mold. Pro tip - If necessary clean the edges of the bonbons with your fingers for a neater appearance.