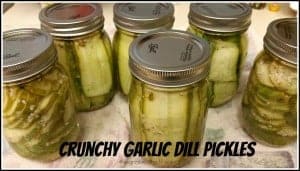
Crunchy Garlic Dill Pickles
Your folders
Your folders
Prep Time: 25 minutes
Cook Time: 15 minutes
Total: 40 minutes
Servings: 6
Author : JB @ The Grateful Girl Cooks!

Ingredients
Export 4 ingredients for grocery delivery
Instructions
Step 1
Preheat oven to 250 degrees. Wash canning jars in hot, soapy water. Place the clean jars upside down onto a tea towel lined cookie sheet (with edges) in the oven to keep them hot.
Step 2
Place flat lid seals and rings in a small bowl. Set aside.
Step 3
Wash the cucumbers, slice a piece off of each end (stem and bottom) of the cucumber, and discard, then slice your cucumbers into spears, chips, or lengthwise into sandwich slices. Pack the pickle slices into the hot jars (be careful when removing hot jars. I recommend canning tongs to hold the jars securely). I find it helpful to turn the jar sideways and slip the sandwich slices in... it helps them to stand up better in the jar.
Step 4
Add a teaspoon of minced garlic and 3/4 Tablespoon of dill seeds to each jar.
Step 5
When jar is filled (I remove one jar at a time from oven), place filled jar back in oven while filling another jar. You want the jars to stay really hot so that when you add boiling brine, the jars will seal properly.
Step 6
In a large saucepan, heat the vinegar, canning salt and water to boiling, stirring to dissolve salt.
Step 7
While the vinegar/water/salt brine is coming to a boil, in a separate bowl pour some **almost to boiling** water (plain "not quite boiling" water, NOT the brine) over the canning lids and rings. Let them sit in the very hot water for 5 minutes to soften the rubber seals.
Step 8
Once brine is boiling, remove jars from oven (be sure to place hot jars on a tea towel to avoid breakage). Pour boiling liquid into each jar, filling to within 1/2 inch from top (pickles must be covered with brine). Remove the air bubbles in each jar by inserting a plastic knife or canning tool down the sides of each jar. Add more brine, if needed to cover pickles. Leave about 1/2 inch head space in jar. Quickly wipe the rims of each jar with a clean towel to make sure the rim is dry and clean. Place flat lid on, then screw down canning ring to finger tight. Immediately invert the jars on the towel. Let them sit for 5 minutes, then turn them right side up again. Listen for the clicking sound to know the jars have sealed.
Step 9
**If you want to water bath can the jars, once filled and jar lids and rings are tightened, place them in a water bath canner and process for 15 minutes, following USDA canning guidelines and manufacturer instructions for your canner..
Step 10
Once the jars are all processed and sealed, leave them alone on the tea towel to cool. As they cool, you should hear the "clicking sound" of the jars sealing while cooling. Once completely cooled and sealed properly, store them in a cool, dark pantry for two weeks (to let the brine fully incorporate into the pickles, then refrigerate jar and enjoy. You might want to label each jar with the date they will be "ready", so you will know when you can enjoy them!