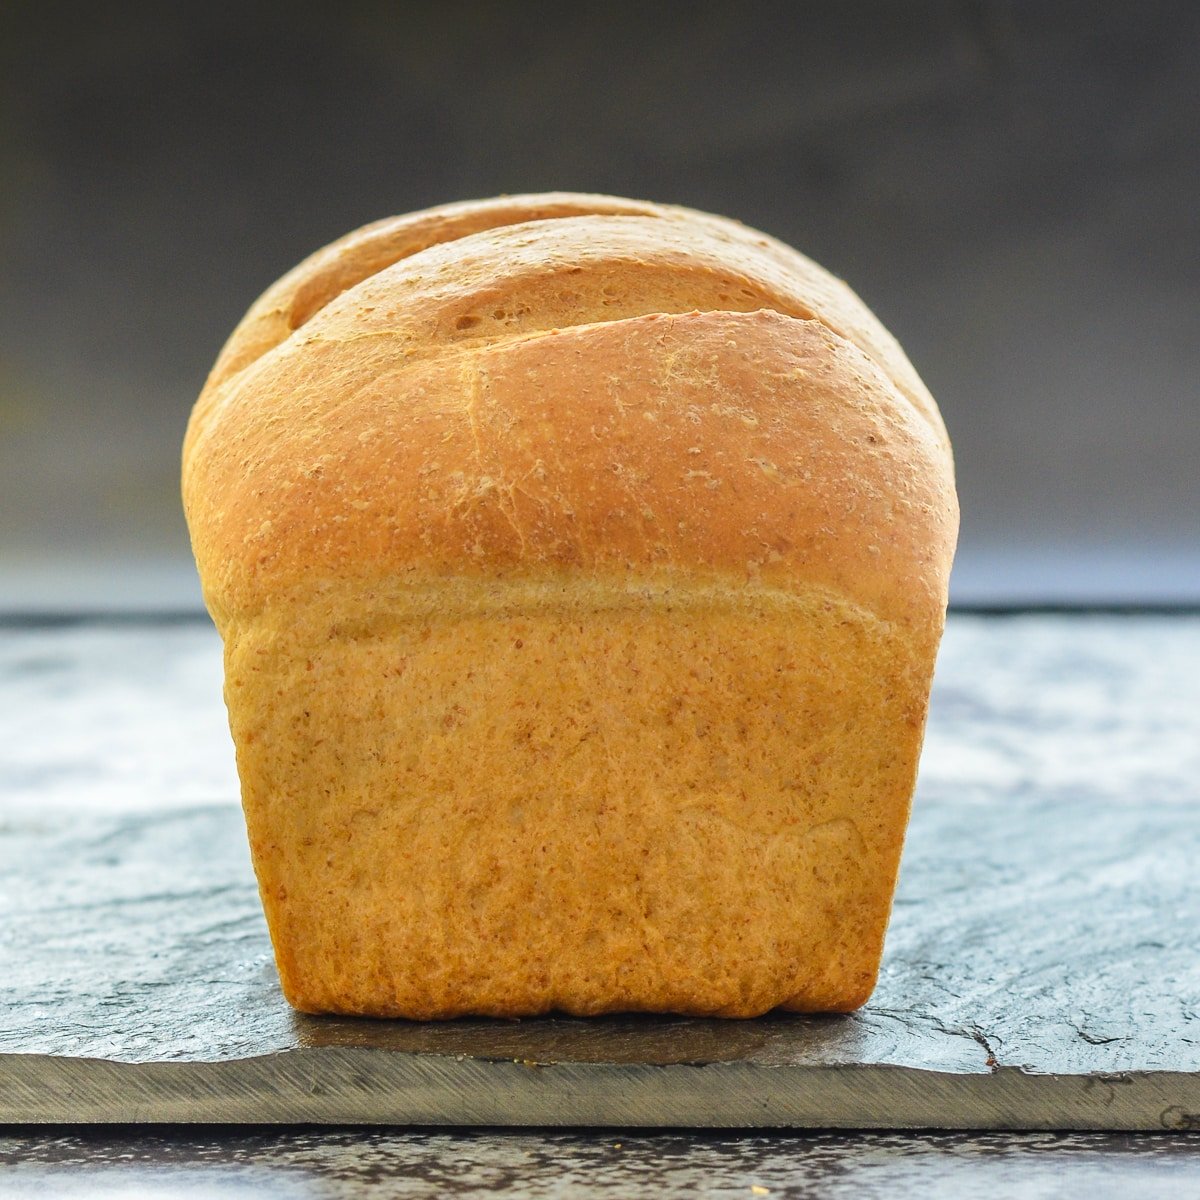
Easy Whole Wheat Bread
4.9
(53)
Your folders
Your folders
Prep Time: 20 minutes
Cook Time: 40 minutes
Total: 150 minutes
Servings: 12
Author : Melanie McDonald
Ingredients
Export 4 ingredients for grocery delivery
Instructions
Step 1
To see my video showing how to make this recipe, just scroll up a little to just above the recipe card. Add both flours, the yeast and the salt to the bowl of a stand mixer. If you are working by hand use a large mixing bowl.
Step 2
Add the olive oil and the water. Turn on the stand mixer and knead the dough for 10 minutes. My Kitchen Aid manual recommends speed 2 for bread dough. You might need to stop the machine after a couple of minutes and scrape down the sides if it isn't catching all of the flour as it kneads. If it feels a little dry add a few drops more water. Add it very gradnually though so you don't accidentally add too much. It should feel slightly tacky but not wet. If you are working by hand, stir the ingredients together with a spatula until a rough dough is made, then turn out onto a clean surface. I prefer to oil my surface and hands rather than use flour. It stops everything sticking and means there is no chance of you adding too much extra flour which will affect the texture of your bread, making it dry and heavy. Knead for 10 - 15 minutes, until the dough is smooth, elastic and when squeezed together between both of your hands, it should bounce back slowly. If you are unsure how to knead I recommend watching this video to help you perfect your technique.
Step 3
Once kneaded, grease a large bowl with a little oil, then put the kneaded dough in it and move around to coat all over in a light coating of oil. I tend to reuse the bowl I mixed the dough in.
Step 4
Cover with a damp, clean dish towel ( I just run mine under the tap for a minute then wring out), cling film or an unused shower cap and leave on the kitchen counter until doubled in size. The time this takes will vary depending on how warm your kitchen is but bear in mind that the longer it takes to rise, the more flavour there will be so unless you are in a hurry, don’t rush it by cranking up the heating or putting it somewhere very warm. Mine generally takes between 60 - 90 minutes to double.
Step 5
Once the dough has doubled scrape it gently onto a clean, lightly oiled work surface. Be sure you don't tear it as you do this. Use the heels of your hands to flatten it into a rectangle roughly the width of your bread pan.
Step 6
Fold the bottom third up and use the heel of your hand to push it down and seal it a bit. Then fold the top third down and push it down to seal it again. Then fold the dough in half again and pinch closed. Watch my video to see these steps. Gently turn under the ends if they look a little untidy then gently place in a lightly oiled bread pan. It will fit well into an 8.5 by 4.5 inch pan or a 9 x 5 inch pan.
Step 7
Rub a tiny bit of oil over the surface of the dough to stop sticking, then cover again with a damp dish towel, cling film or a shower cap and leave until the bread dough is nicely domes and about 1 inch above the sides of the pan. It won't take as long this time. In my kitchen about 30 - 40 minutes.
Step 8
While you are waiting for your loaf to rise preheat your oven to 400° F.
Step 9
Once the dough is ready you can bake right away, or you can slash the top if you have a bread lame, sharp enough knife or razor blade. It needs to be super sharp though or it will drag the dough and ruin your loaf. If you do not have anything suitable then don't worry and leave out this step. You can slash anyway you like, one slash straight down the middle, or two or three width ways. The slashing enables the dough to expand a bit more and you will get slightly better oven spring than you will if you do not slash. It isn't essential though and really doesn't make too much difference.
Step 10
Place in the preheated oven and bake for 40 minutes.
Step 11
After this time it will be baked through. You can check by knocking on the bottom. It should sound hollow. Remove from the pan and cool on a cooling rack .
Step 12
As hard as it is to resist eating it when fresh out of the oven it really is best to leave it to cool completely before cutting. Cutting while still warm affects the crumb and might make it slightly damp and doughy. I sometimes make two. One for eating while warm and one for later!