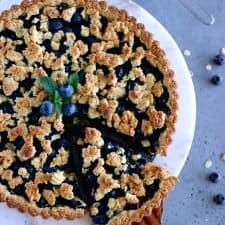
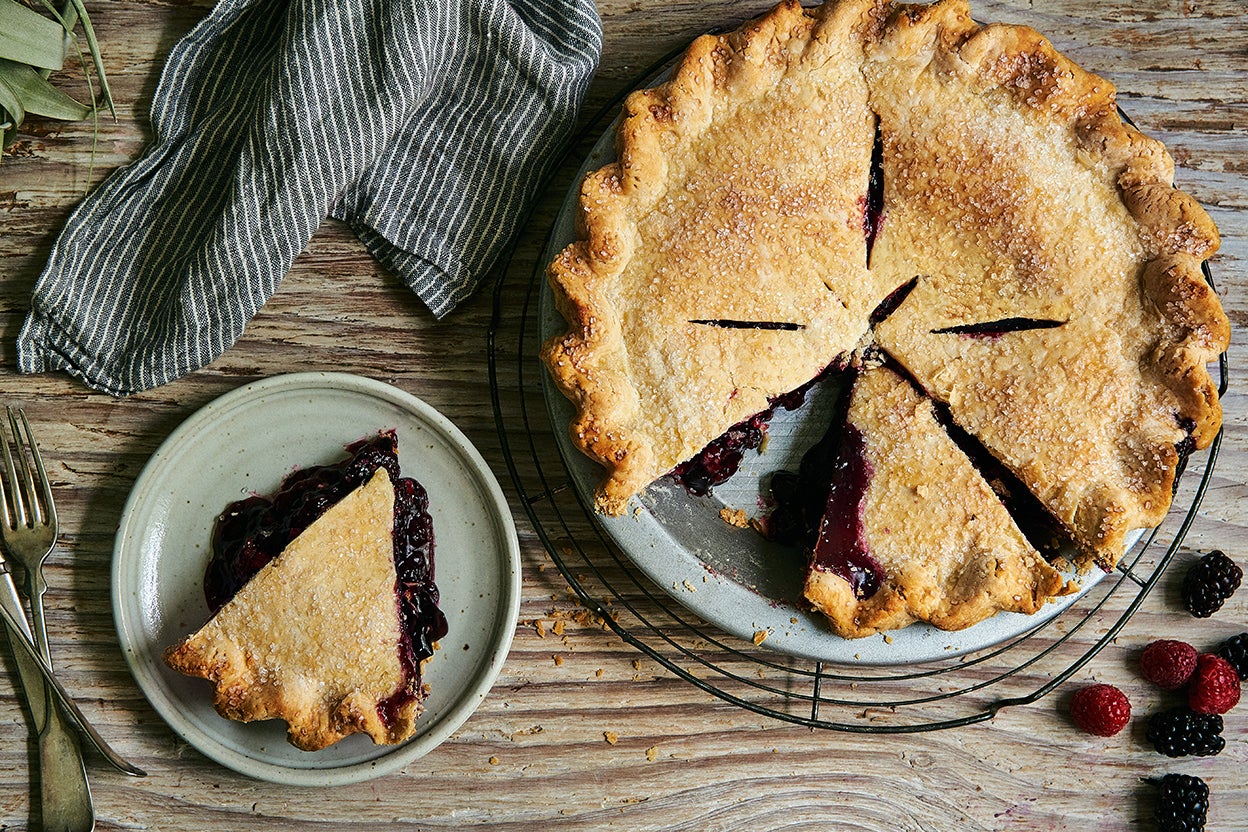
Gluten Free Blueberry Pie
5.0
(3)
Your folders
Your folders
Prep Time: 33 minutes
Cook Time: 22 minutes
Total: 55 minutes
Servings: 8

Ingredients
Export 9 ingredients for grocery delivery
Instructions
Step 1
In a cup, mix together cold water and apple cider vinegar, and place them into the freezer until needed.
Step 2
Sift together gluten free flour, coconut flour, xanthan gum, salt and caster sugar.
Step 3
Add the butter and toss it in the flour until all butter pieces are covered with it.
Step 4
Using your hands, pinch together the butter pieces and flour until you get a mix of fine pea-size pieces and larger, ~1/3 inch size pieces.
Step 5
Add the ice cold water-vinegar mixture, 2 tbsp at a time, and mix the pie dough with a fork until it comes together. You will need 14 – 16 tbsp of water. The dough at the end should be slightly more damp/wet than typical pie crust because gluten free flour tends to absorb more moisture during baking, so we want to counteract that.
Step 6
Shape the pie dough into a disc (if needed, knead it slightly – but don't overwork it!), wrap it into cling film and refrigerate for at least 1 hour.
Step 7
Mix all the blueberry filling ingredients together, until the sugar and cornflour are evenly distributed.
Step 8
If you are using frozen blueberries, place the filling mixture into the fridge until you start assembling the pie.
Step 9
Remove 1/2 of the pie crust dough from the fridge, shape it roughly into a disc, and place it in between two pieces of cling film. The cling film pieces should be at least 3 - 4 inches larger than the pie dish diameter. They will stop the pie crust from sticking to the rolling pin and the surface underneath. And the pie bottom will be much easier to transfer into the pie dish!
Step 10
Roll the pie dough out into a roughly circular shape, at least 2 1/2 - 3 inches larger than the pie dish. The dough should be about 3 mm thick.
Step 11
Peel back the top layer of cling film. Slide the pie crust with the bottom cling film layer onto a plate. Turn the pie dish upside-down onto the plate, and then turn it around (basically the same procedure as turning a bundt cake onto a plate). The bottom cling film layer should not be on top – do not remove it yet!
Step 12
Carefully shape the pasty so that it's snug against the pie dish sides. The cling film should keep it from tearing.
Step 13
With the cling film still in place and without cutting off the excess dough, place the pie dish into the fridge.
Step 14
Remove the remaining 1/2 of the pie crust dough from the fridge, shape it roughly into a disc, and place it in between two pieces of cling film. The cling film pieces should be at least 3 - 4 inches larger than the pie dish diameter.
Step 15
Roll the pie dough out into a roughly circular shape, at least 1 inch larger than the pie dish. The dough should be about 3 mm thick (but you can easily go a bit thicker – I rolled mine to about 3.5 mm, as I like how it puffs up!).
Step 16
Remove the top cling film layer. Cut the pie dough into strips, roughly 3/4 inch wide. If you use a 7 3/4 inch (20 cm) diameter pie dish, you will need 8 such strips.
Step 17
Pre-heat the oven to 200 ºC (390 ºF).
Step 18
Remove the pie dish from the fridge, and peel away the cling film layer on the pie crust bottom. Do not cut away the excess pie dough!
Step 19
Transfer the blueberry filling into the pie dish, flattening it out with a spoon or spatula.
Step 20
Place 4 parallel strips on top of the filling.
Step 21
Fold back the 1st and the 3rd strip, and place a strip perpendicular to them, slightly displaced away from the middle (i.e. it should be at the same perpendicular distance from the edge of the pie dish as the 2nd and 3rd strips). Straighten back the 1st and the 3rd strip.
Step 22
Fold back the 2nd and 4th strip, and place a strip perpendicular to them, this time closer to the edge (i.e. it should be at the same perpendicular distance from the edge of the pie dish as the 1st and 4th strips). Straighten back the 2nd and 4th strip.
Step 23
Repeat on the other half.
Step 24
The final pattern should be like that on the pictures above.
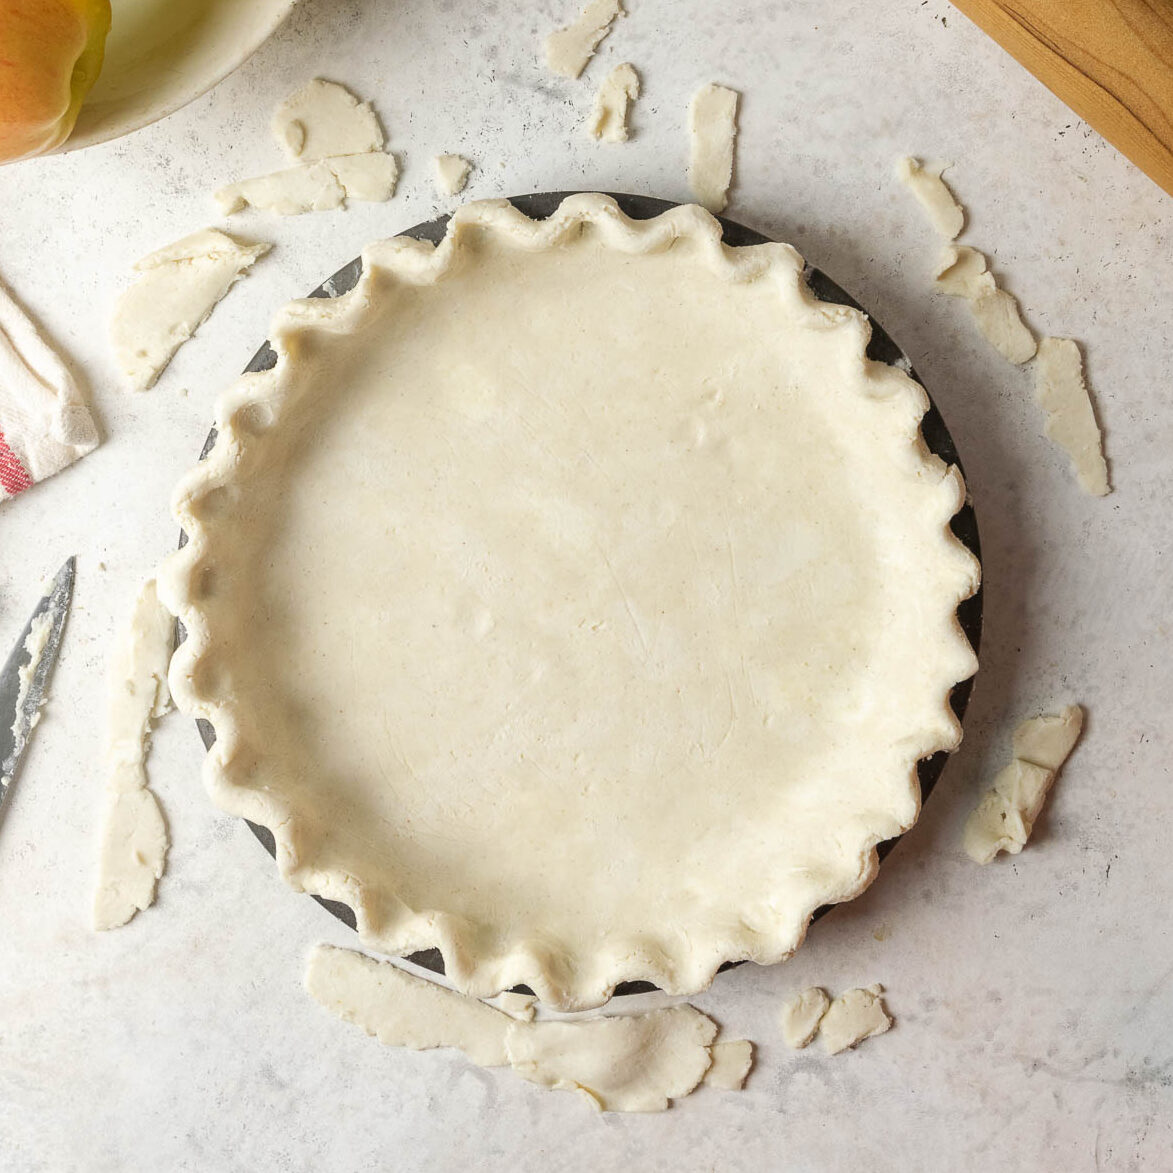
Step 25
Using either scissors or a knife, cut away the excess pie dough – both from the pie crust bottom and from the strips. You can crimp the pie edges, or decorate the border by pressing a fork along the edge, but I prefer the minimalistic style!
Step 26
Brush the pie crust strips with the egg wash (or milk for an egg-free version) and sprinkle lightly with caster sugar.
Step 27
Bake the pie in the pre-heated oven at 200 ºC (390 ºF) for 22 - 24 minutes or until golden on top. The edges will start browning quicker – when they are a dark golden brown colour, cover them with aluminium foil. (Take a square of aluminium foil that is slightly larger than the pie dish diameter and cut a circle with a diameter that is ~3/4 that of the pie dish).
Step 28
Allow to cool and enjoy!
Step 29
The gluten free blueberry pie keeps well covered in cling film in a cool, dry place for about 3 days (but that's only wishful thinking).
Top similar recipes
Curated for youYour folders

 206 views
Vegan Blueberry Pie (Gluten + Grain...
frommybowl.com
4.7
(3)
35 minutes
Your folders
 102 views
Blueberry Pie with Oat Crust (Glute...
delscookingtwist.com
5.0
(1)
40 minutes
Your folders
 378 views
Gluten Free Blueberry Crisp
bakedbree.com
4.6
(9)
35 minutes
Your folders
 349 views
Gluten-Free Blueberry Cake
itsnotcomplicatedrecipes.com
5.0
(79)
45 minutes
Your folders
 384 views
Gluten-Free Blueberry Buckle
kingarthurbaking.com
5.0
(4)
55 minutes
Your folders
 193 views
Gluten-Free Blueberry Cobbler
bakerita.com
4.8
(13)
30 minutes
Your folders
 181 views
Gluten-free Blueberry Muffins
makingthymeforhealth.com
5.0
(5)
20 minutes
Your folders
 170 views
Gluten Free Blueberry Cake
theglutenfreeaustrian.com
5.0
(27)
55 minutes
Your folders
 263 views
Sugar Free Blueberry Pie
thesugarfreediva.com
4.2
(97)
50 minutes
Your folders
 388 views
Gluten-Free Pumpkin Pie
bettycrocker.com
4.5
(8)
Your folders
 345 views
Gluten-free pumpkin pie
jamieoliver.com
Your folders
 617 views
Gluten-Free Pie Crust
kingarthurbaking.com
4.6
(130)
40 minutes
Your folders
 215 views
Gluten-Free Pie Dough
marthastewart.com
3.1
(675)
Your folders
 452 views
Gluten Free Pie Crust
thereislifeafterwheat.com
4.4
(70)
20 minutes
Your folders
 275 views
Gluten Free Apple Pie
letthemeatgfcake.com
4.8
(14)
80 minutes
Your folders
 132 views
Gluten-Free S'mores Pie
lexiscleankitchen.com
3.7
(3)
45 minutes
Your folders
 98 views
Gluten Free Pie Crust
wellfedbaker.com
5.0
(5)
Your folders
 149 views
Gluten-Free Apple Pie
kingarthurbaking.com
4.3
(23)
1 hours, 5 minutes
Your folders
 402 views
Gluten Free Lemon Blueberry Cake
livingfoodwise.com.au
5.0
(1)