Horenso Tamagoyaki (Japanese Spinach & Egg Roulade) | Bebe Love Okazu
5.0
Your folders
Your folders
Prep Time: 10
Cook Time: 15
Total: 25
Servings: 2
Author : Bebe Love Okazu

Ingredients
Export 4 ingredients for grocery delivery
Instructions
Step 1
Mix luke warm water and ¼ teaspoon dried dashi powder in a medium bowl. I use either katsuo dashi (bonito extract) or konbu dashi (seaweed extract). Add shoyu, mirin, and sugar. Add 4 eggs and gently mix using chopsticks. Try not to create too many bubbles.
Step 2
In a small bowl, add baby spinach, enough water to cover spinach and microwave on high for 30 seconds to 1 minute. Drain and run spinach under cold water until cool. Squeeze excess water from spinach, then chop. Combine spinach and egg mixture.
Step 3
Heat medium frying pan over medium heat and spray with cooking spray. I used a rectangular tamagoyaki pan for this, but I recommend using the simple "rolling over" method which is what I use for making Bebe E's hourensou tamagoyaki (see below).
Step 4
Pour a thin layer of the egg mixture into the pan and lower the heat to medium low. Allow the bottom to cook and become firm enough to fold over, about 3 minutes. If any large bubbles begin to form, use your chopsticks to gently pop the bubble.
Step 5
Gently fold over the egg from one end and keep going until you reach the end of the pan. With each fold, allow the egg to cook a little bit before creating the next fold.
Step 6
At this point, pour yet another thin layer of the egg mixture into the pan, gently lift your folded over layer to allow the wet mixture to seep under the cooked egg, and allow this to cook and become firm enough to fold over again. Now you'll fold your omelette back towards the opposite end of the pan from which you came.
Step 7
Repeat the previous step. I repeated this step twice more before I allowed the omelette to cook just a few more minutes in it's rolled state. You'll probably have some egg mixture leftover in order to make a second omelette, but this will depend on the size and type of pan you use.
Step 8
Remove tamagoyaki from pan and rest the tamagoyaki on a bamboo sushi rolling mat. You can skip this part, but if you're looking to impress, I recommend trying this because the sushi mat creates an interesting (and fancy) pattern on your tamagoyaki.
Step 9
While the tamagoyaki is warm (not hot off the stove), gently roll the tamagoyaki in the sushi mat and apply pressure to create a subtle pattern.
Step 10
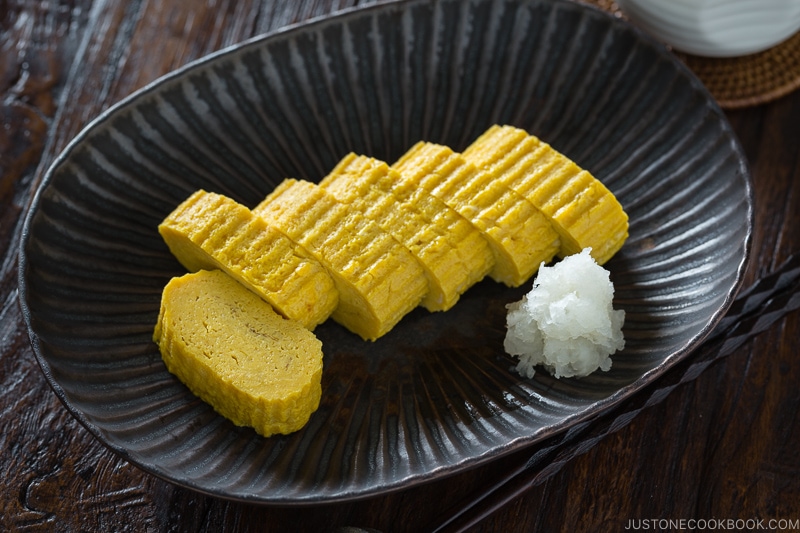
Once the tamagoyaki is cool, slice to desired thickness and serve.
Top similar recipes
Curated for youYour folders

 183 views
Japanese Egg Sandwich (Tamagoyaki S...
norecipes.com
5.0
(3)
5 minutes
Your folders
 273 views
Tamagoyaki Japanese omelette
japancentre.com
4.0
(1.0k)
10 minutes
Your folders
 503 views
Tamagoyaki - Japanese Omelette
tiffycooks.com
15 minutes
Your folders
 638 views
Tamagoyaki (Japanese Egg Omelet) Re...
tasty.co
97.0
(287)
Your folders
 679 views
Tamagoyaki (Japanese Rolled Omelett...
allrecipes.com
10 minutes
Your folders
 851 views
Tamagoyaki (Japanese Rolled Omelett...
justonecookbook.com
4.7
(60)
5 minutes
Your folders
 1003 views
Tamagoyaki (Japanese Rolled Omelett...
norecipes.com
5.0
(2)
4 minutes
Your folders
 98 views
Tamagoyaki (Japanese Rolled Omelett...
justonecookbook.com
Your folders
 282 views
Tamagoyaki (Japanese Rolled Omelet)
drivemehungry.com
5.0
(225)
5 minutes
Your folders
228 viewsTamagoyaki (Japanese Rolled Omelet)
thekitchn.com
Your folders
 272 views
I Love Rock ‘n Roulade
thedevilwearsparsley.com
100
Your folders
80 viewsJapanese Sweet Rolled Omelet (Tamag...
justonecookbook.com
Your folders
81 viewsJapanese Sweet Rolled Omelet (Tamag...
justonecookbook.com
Your folders
 412 views
Japanese Sweet Rolled Omelet (Tamag...
justonecookbook.com
4.1
(116)
15 minutes
Your folders
 287 views
Tamagoyaki
chopstickchronicles.com
4.8
(25)
10 minutes
Your folders
 555 views
Japanese Omelette (Tamagoyaki) Reci...
tasty.co
91.0
(166)
Your folders
 567 views
Tamagoyaki Japanese Omelette Recipe...
japancentre.com
3.8
(908)
Your folders
 150 views
Japanese Spinach
funkyasiankitchen.com
5.0
(1)
5 minutes
Your folders
 659 views
Home-Style Tamagoyaki (Japanese Rol...
seriouseats.com
5.0
(4)